


Friday, December 02 2016
Metal detectors are electromagnetic devices and can detect items that are conductive or magnetic, or both. Gold is an example of a non-magnetic conductive item. Iron is both conductive and magnetic. Almost all major advances in prospecting metal detectors over the last 40 years revolve around improving ways to ignore and see through ground mineralization while still finding gold nuggets. If you’re using any brand of VLF (very low frequency) metal detector to prospect for gold, choosing the correct operating mode (also called search mode) can make or break your success. Experts recommend that any metal detector you are considering for gold prospecting should have a true all metal mode. This mode is important because of its lack of filtering applied to the signal. It will normally offer the best depth and the best sensitivity to small gold. Unfortunately, two common problems occur when using All Metal Mode: interference from ferrous iron and steel junk, and from hot rocks. A hot rock is nothing more than a rock that has a different magnetic content than the ground. Some rocks are that way because they contain conductive minerals besides gold. The Discrimination knob on your detector will help with these two problems. Discrimination is a type of electronic filtering. The signal is analyzed, and depending on the discrimination setting, identified as either a target to be dug or a target to be ignored. Applying more discrimination eliminates more trash, but be careful—you don’t want to completely eliminate all ferrous trash because an aggressive level of discrimination easily tunes out gold. So be prepared to still dig ferrous junk which usually turns out to be larger chunks of steel and iron. Also know that discrimination circuits can be fooled, especially in ground with lots of iron mineralization. This ground condition can override the small gold signal and cause a faint gold signal to be identified as ferrous. Even with this limitation, the discrimination mode can be invaluable for finding gold in extremely trashy areas. Trashy areas are where a VLF detector can really outshine a PI (pulse induction) machine, especially when dealing with nails, bits of rusted cans, and other small trash. If you’re in the market for a metal detector, some manufacturers offer special holiday packages such as the 3 listed below. You can also shop for Fisher, Garrett, Bounty Hunter, Minelab, Tesoro and Teknetics metal detectors here. Through Christmas only... FREE Recharge Kit and FREE 15” Coil and FREE Shipping with purchase of either Fisher F75 ($599) or Teknetics T2 ($499) detectors! Both machines are recommended for Coin Shooting, Relic Hunting, and Gold Prospecting.
Garrett AT Pro holiday package ($594.96) includes detector, headphones, instructional DVD, Sunday, November 20 2016
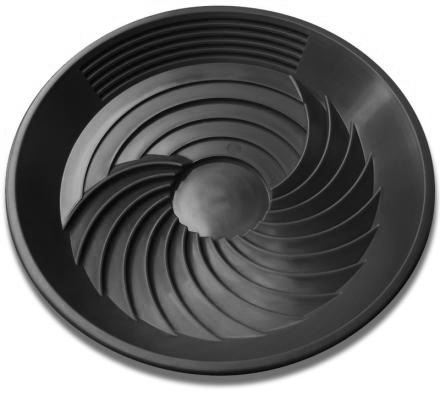
Recently, Gold Prospectors magazine published an article in the November/December 2016 issue about the Turbopan. Read an excerpt of that article below: Turbopan was designed by Kim Hillier, an Australian geologist and prospector with over 20 years experience in "A river is a natural sluice, and because a sluice is an excellent way of recovering gold, I designed the Turbopan to act like a sluice in a pan," explains Mr. Hillier. The pan's riffles act like a circular sluice and were designed to use gravity to accelerate the gold to the bottom of the pan. The bottom well of the Turbo pan is in the center of the pan-- as far away from the lip of the pan as possible, so you don't accidentally lose any of your precious metal. The design of the Turbopan combines the best features of the traditional batea, a deep conical shaped wooden bowl used as far back as the Mayans, and the basic copper pan used in the Klondike Gold Rush. The unique design allows the whole circumference of the pan to eject waste material and many more riffles trap much more gold. This is a huge advantage over traditional pans which tend to concentrate all material on one side of the pan. "The Turbopan is really fast!" says Hillier. "You've got maximum riffles if you're panning out over the front and also you can get the waste out before you start the clean up. It's sort of a bit of a hydrocyclone as well if used to its maximum ability, and its also good for wet sifting through gravels for gems." How to Use the Turbopan: 1. Place your material in the Turbopan. Be careful not to overload it. The pan is meant to hold up to about pounds. With the clean-up riffles facing away from you, submerge the pan into water, and then spin the pan counter-clockwise and then clockwise 180 degrees to allow the water to saturate the materials. TIP: Use a catch tub so you don't lose any gold in a fast-flowing stream! 2. Before panning, use your finger to feel the texture of the material in the bottom of the central trap. Does it feel too tightly compacted? If so, simply shake up the material for better stratification. 3. With your Turbo pan partially submerged, begin moving it in a counter-clockwise circular motion so that the material moves over the circular riffle bed. This action will break up clumps of dirt and prevent compaction. 4. Because gold-bearing black sands are much heavier than dirt and gravel, it will sink and become trapped in the spiral riffle grooves and gravity will move gold into the central trap. The circular motion creates centrifugal force, pushing light sands and clays to the outside of the pan, leaving the heavier black sands and gold in the center of the pan. Alternate between a "centering swirl" to get the gold-bearing heavies to the middle of the pan and the "lights" to the surface, and an "ejection swirl" to get rid of the waste materials. 5. Because the pan is shallow, you'll notice how easily you can clear the small rocks, pebbles and debris from the pan with a single sweep of your hand. 6. When the amount of material remianing in the pan barely covers the central trap, do two or three more clockwise swirls, then about five seconds of vigorous back-to-front and side-to-side motions. 7. Tilt the pan away from you and gently shake it side to side while tilting the pan up at about a 30 degree angle. 8. Pan off any waste until you have only a small amount of concentrates containing gold (about the diameter of a 50 cent piece). 9. Tilt the pan towards you and look for your gold in the bottom of the central trap. 10. If you see gold in the cleanup riffles, don't worry. With a little more practice you'll master your own technique. To watch how-to videos or shop for the Turbopan, click here. Tuesday, November 15 2016
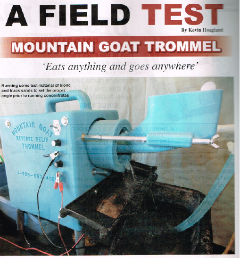
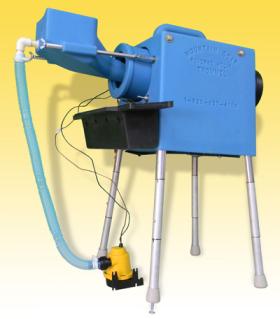
The Mountain Goat Trommel is not new to the prospecting industry by any means, but it has just recently been field tested by Kevin Hoagland, host of the GPAA-produced TV series Gold Trails. Kevin's complete Field Test was published in the November/December 2016 issue of Gold Prospectors magazine. Below is an excerpt or you can Download the complete Mountain Goat Field Test here (6-page .pdf). Invented by the late great Angus Niccolls who started Camel Mining, the Mountain Goat Trommel has a long history of excellent gold recovery and easy of use. It will handle .5 inch minus material with the optimal recovery The Mountain Goat is a variant of the Archimedean Screw, which is a tube surrounding a rotating screw used to pull a column of water up a grade. This makes it possible to easily lift water. In the Mountain Goat, the outer tube is lined with the screw, and as gold-bearing material is stratified by a stream of water and run through the tube, the heavier gold-bearing material is deposited into the reverse screw and brought to the top of the unit. The lighter waste material is continually washed and pushed through the unit into the tailings. In other words, when material enters the hopper, the gold goes one direction and the water goes the other. It’s really no different than huge trommels, except that the Mountain Goat does all of this in a unit that weighs less than 20 pounds, and recirculates about 10 gallons of water all day long. And if set up properly, the manufacturer says it can handle about two yards of material in a long day of running. The Mountain Goat Trommel is cleverly designed. It’s compact and almost completely assembled when you receive it. The carry handle is molded into the unit, making it easy to transport (especially if you are riding a quad or other vehicle). The trommel tube is pre-mounted to the unit with the nugget trap installed, needing no further assembly. The legs are collapsible and can be set to two different heights. Plus, the front legs are further adjustable to allow you to fine tune the unit to the material you’re working. The pump is 12-volt, and the flow rate was chosen to offer the best recovery possible. It is recommended that But before you use it for the first time, or if it has sat unused for a while, be sure to clean the unit with hot water and a little unscented dishwashing soap. Hook up the unit and allow the soapy water to do its job of removing the release agent that comes on just about any product that has been molded. Sponge down all surfaces exposed to water and the outside of the unit, too. This simple cleaning step can prevent gold loss. You might want to clean the machine outdoors as the soap bubbles can go everywhere! As you use the Mountain Goat, continually test the tailings. You should not see any gold. If you do, you may need to increase the angle of the unit by turning the screws on the front legs. It’s a bit of trial and error, just as it is when setting up a sluice in a stream. The Mountain Goat can be paired with the Desert Fox Spiral Wheel for a complete two stage concentrator and final recovery unit. Nugget of News Blog Tuesday, November 01 2016
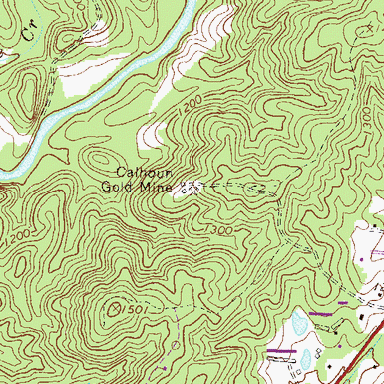
Researching and exploring new areas in which to prospect for gold, gems, or whatever you are seeking can be a lot of work, but the process can go much quicker and easier when you know where to start. If the weather where you live is keeping you indoors much of the time this winter, use your downtime wisely by researching and planning for next spring and summer. But don’t rely on just one source of information. Confirm it through several sources. It’s not that you don’t trust Uncle Joe or a “friend of a friend” tip, but facts can be distorted or forgotten over time and that “secret” nugget patch found 30 years ago just might not t The best kind of research brings together different forms of info from a multitude of sources. It is the info gleaned from COMBINED sources that can help you to determine the best possible place to locate precious metal or gems. The more info you can lay your hands on, the better. Consider these resources: Old mining district reports and mining history books. Most western states have some form of mining and geology agency, although they all have different names depending on the state. Find out what information is publicly available at the agencies located in the area you will want to prospect. Old history books can be more help than any state agency because they were written by folks with ties to the area they wrote about. That means they often include valuable information on old mining discoveries or operations that didn’t make it into a government report. Topographic maps. Many old mining areas are shown on topo maps, but usually not on the newer versions, so try and find older topo maps. Many of the newer versions may have old mines removed as a way for the government to “keep the general public safe” by not advertising the whereabouts of the old and “dangerous” mine shafts. Aerial photos. Google Earth is amazing in its quality and detail of photos. Many times you can see individual trees, hiking trails, rock outcrops and even hand-stacked piles of rocks left behind by old-timers. Sometimes larger features and patterns (areas where miners removed a lot of brush, for example) cannot be seen from ground level, but are obvious from far up in the sky. This is also a good way to get an idea of the condition of the roads in the area so you’ll know in advance which look to be commonly traveled. Google Earth ties in with GPS, too. You can review the photos, check them against maps, and get the GPS coordinates of the precise location you want to visit. No more guessing if you have arrived! You will know for sure with GPS that you are in the right spot. Reference libraries. The librarians at state mining divisions and university libraries are generally very friendly and helpful. These libraries are open to the public, so don’t feel shy about requesting help. Any university with a good-sized geology or mining program should have quite a few geologic reference resources including old reports, magazines on the mining industry, thesis reports by graduate students, and even reports by engineers and geologists who were on site at the big operating gold mines in the late 1800s. Many of the old books and reports found in the university libraries will be out of print and cannot be purchased anywhere, so be sure to make photocopies of any documents you need while you are onsite. Many prospectors are discouraged by the amount of work and time that can be involved in researching new areas, but when you find a new spot with good gold, it will be well worth your time and effort! Saturday, October 01 2016
Gold Prospectors Association of America (GPAA) has announced its Fall 2016 schedule of Gold & Treasure Shows for Nashville, Dayton, and Concord! Whether you’re a newbie prospector or detectorist, or have been mining Children 12 and under are FREE, so be sure to bring the kids and the whole family can pan for gold together—and keep all the gold you find! Adult pre-sale admission purchased online is $5 until the Friday before each show, or $10 at the door. Active military members and veterans with ID are FREE. Saturday shows run 10 am - 5 pm and Sunday 10 am - 4 pm. Thousands of dollars in door prizes are given away each day—detectors, pans, sluice boxes, you name it! All you have to do is show up and you could be leaving with a brand new piece of top of the line prospecting equipment. Mark your calendars for:
Visit the GPAA website for more details and online registration. Tuesday, August 30 2016
If you are getting tired of area closures, fight back by getting your traditional Mining District organized! Why is this important? Because Mining Districts will be the arbiters when it comes to deciding whether or not a road or trail should remain open or be reopened. They are federally recognized entities with the power and authority to create their own regulations and to seek coordination status with local, state, and federal regulatory agencies. This power was written into the 1872 Mining Law. The purpose of organizing the traditional Mining D There are thousands of Mining Districts (MD) across the USA, and all have the power to make their own regulations. If you want to take back control of what’s happening in your area, here are the basic steps to follow: • Locate the original bylaws for your MD. Since many of them were established in the 1850 or 1860s, the county boundaries and names may have changed over the years. Try your local county recorder, museum, or historical society. Websites that can help with your research include: http://www.icmj.com/resources_page.php?id=12&keywords=Bylaws_for_Traditional_Mining_Districts http://www.mineralsandminingadvisorycouncil.org/mmac-mining-districts-usa.html http://www.westernmininghistory.com • Attempt to contact other claim-holders in your traditional MD. You may find their contact info. through the Bureau of Land Management (BLM) office. • Set up and hold a meeting near the MD for claimholders (5 clahimholders make a quorum). Announce the date about two months in advance to give everyone a chance to hear about it and make arrangements to attend. Publish a public notice of the date, time and location. • Conduct the meeting, elect officers, and take detailed notes. • Securely post signage at all the major entry points to your district. • Encourage claim holders in neighboring MDs to get their district organized if not already done. In the meantime while your MD is getting organized, attend oversight meetings for the BLM, Forest Service, State Water Resources Control Board, etc. that oversee public lands in your area. Politely inform them that you represent a [name here] Mining District and asked to be placed on the board. A MD representative should be able to get a voting position on the board. Just imagine going to an oversight meeting where several MD reps have obtained voting positions on the board. This is huge! Mining Districts have power that has gone untapped for too long! The goal is to remove local, county, and state agencies from oversight of mining-related activities and put that authority back where it belongs— with the people! Monday, July 25 2016
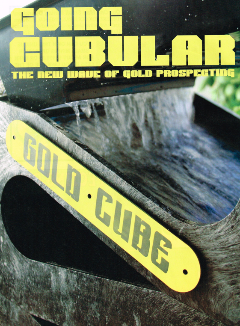
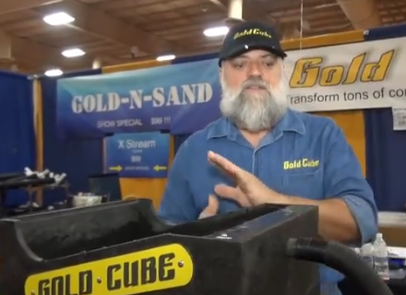
The following is an excerpt from the extensive and informative "Going Cubular" article that appears in the Whether you're prospecting in a stream or desert, mine alone or run a large operation, chances are you've seen or personally operated a Gold Cube. This super concentrator is everywhere! Mike Pung, the co-inventor, demonstrates this workhorse at all the GPAA Gold & Treasure Shows, and it's been made famous on the GPAA-produced Gold Trails and on the Discovery Channel's Gold Rush and Bering Sea Gold reality TV shows. The celebrities all use it, including Dakota Fred, Parker Schnabel, Todd Hoffman, Vernon Adkison, and Emily Riedel. Save Time with the Gold Cube Why do so many famous gold miners, as well as average guys and gals, use the Gold Cube? Because it saves time. Lots and lots of time! "What would normally take about 8 hours of cleanup with a gold pan is reduced down to about an hour with the Gold Cube," explains Mike Pung. "Anybody with a lot of concentrates or who has a dredge or if you're running a big operation views the Gold Cube as more of a clean up tool. But to many recreational prospectors and small-scale miners, the Gold Cube is their primary piece of equipment in the field. The Gold Cube can process the black sands and hold the fine gold like no other machine, hence the slogan Cube It or Lose It!" Fine gold is defined as anything that is 20 mesh and smaller (mesh refers to the number of holes per linear inch in a screen or classifier). "Once you start getting down below 20 mesh, if you're not using a Gold Cube, you are blowing out most of the fine gold. You are keeping the big stuff, but are losing a lot of fine gold. If it's 50 mesh and minus and you are using a sluicebox, you're losing most of that gold if you're running continuously all day," says Mike. How the Gold Cube was Invented Mike Pung was bitten by the gold bug in 2006 and met co-inventor Steve "Red" Wilcox shortly after his first trip to the Klondike. Besides sharing a passion for prospecting, the two men shared a common enemy: black The Gold Cube is designed to handle up to 1,000 pounds of material an hour. "It can take a thousand pounds of dirt per hour and reduce that material down to a cup and a half of concentrates," said Pung. "If you put a cup and a half in there, you are going to end up with a cup and a half. But if you shovel a half ton of dirt into it, you will still end up with a cup and a half. The longer you run it, the more it's going to concentrate. It's not the number of buckets you have to monitor. It's the weight of the material. For example, 1,000 pounds of regular gravel amounts to about 16 to 18 buckets, whereas the black sands along Lake Superior are much heavier, so 1,000 pounds of material may fit in only 4 or 5 buckets." How the Gold Cube Works Imagine a fine gold particle, 19.3 times heavier than the moving water that suspends it. The trick is to use the water to separate the lighter material from the heavier, through stratification or layering. "The low pressure zone behind a riffle is called an eddy which rolls horizontally, and the vortex churns vertically like a tornado," explains Mike. "What happens is the vortex churns the material, separates the lights from the heavies, and the gold sinks to the btoom. And when it sinks, it stays there until something heavier wants to displace it. As gold sinks to the bottom of a vortex pocket that's already full, it will displace something equal to its size. The Gold Cube and the vortex technology basically operates on a replacement system, so when you've got something heavy it sinks and something else has to get kicked out, so heavier just keeps replacing lighter material. The longer you run it, the heavier that pocket is going to get. And once it is completely full, it's going to have to find another pocket because that pocket is full of gold. Which is not a bad problem to have!" Is a 3 Stack or 4 Stack Best?
The rounder the gold, the faster it's going to sink. If you have fine three dimensional gold you're probably never going to see any gold past the first 2 or 3 inches of the very first try unless you've completely loaded it up with gold. It's going to find some place to sit... that's called hydrodynamics. Mike Pung explains further, "If you've got three dimensional gold closer to the source, you know that all you're going to need is a three-stack Gold Cube because the first tray is going to catch most of the gold." G Force Separator In the G-force separator where the Gold Cube trays drop down and around, the water whips around the bend. Get Rid of Those Bubbles! Setting up your Gold Cube for the first time is not too difficult; some say the hardest part about setup is putting together the stand. It will take 10 or 15 minutes and most of that time is spent getting the mats very wet. You must make sure the mats are wet all the way down to the bottom of the vortex pocket so they don't hold a bubble. If they hold a bubble, gold can ride right over the top of it. Getting rid of the bubbles is very important! If your mat is wet and it looks like there are a bunch of diamonds shining in the sunlight in there, those are really bubbles and that's not where the gold is going to sit. There are 7,000 vortex pockets on that mat. To get rid of the tiny air pockets, put your thumb over the end of a hose to create water pressure to force the water in deep while spraying the mats. When your mat looks black and not shiny with bubbles, you will get good gold retention. There are two main accessories available for use with either the three stack or four stack units. Gold Banker: The Gold Banker is placed over the Gold Cube and serves as a built-in classifier with spray bar, which eliminates the need to classify material before running it. It's available in Stainless (recommended for salt water) or an Anodized punch plate. If you're a rockhound, you'll want a Gold Banker. "You've never had a better way to look at rocks because they're clean and wet. I've found arrowheads, petrified wood, gems, and all kinds of stuff in the Gold Banker," says Mike. Trommel: The trommel allows you to shovel unclassified dirt and rock directly into the hopper. The trommel (16 inch long barrel x 5 inch diameter, classifying to 3/16 inch) then trumbles and washes the material before it enters the Gold Cube trays. Ready to "Go Cubular?!" Click here for more information, to watch videos, and to order the Gold Cube and/or accessories. Saturday, July 02 2016
Although there are many variables that go into catching gold in a sluice, perhaps properly “tuning” your sluice is the most critical. A few months ago, Steven “Doc” Vetter, owner of Gold Hog brand mats, wrote an interesting article for Gold Prospector Magazine that focused on a few key factors that all miners should pay attention to. The following ideas from his article are all about achieving the proper tuning exchange, meaning letting the junk flow out, or be worked out by exchange zones, and holding the stuff you do want—gold. A well-tuned sluice will have heavy gold concentrations up top, medium gold in the middle, and trace gold near the end Hydraulic Equivalence: By definition, “hydraulically equivalent” (HE) refers to particles of varying size, shape and density that fall out of a water flow and deposit in the same area. While quartz rock and gold vary greatly in specific density, you can make them collect in the same place by making the quartz rock bigger and rounder. A 2 inch quartz rock and a 1 mm sphere of gold will fall through water and deposit in about the same place— making them hydraulically equivalent (HE). An opposite example is a .25 inch round piece of gold and a .25 inch round piece of quartz. The gold will sink through the water and likely land straight down. The quartz rock, however, will not fall as fast and will be pushed several feet away before it settles. These two items are not HE. The shape of the gold has a big influence on its HE. Flat things move more easily than spheres when either moving water or air is introduced. HE is a huge factor in gold mining and is often the main reason for classifying material to a certain size— the theory being if everything is about the same size, the heaviest material will stay in the sluice. When you slow down a sluice, you start to have a traffic jam. Things that are HE all want to gather in the same deposit zone and you start to gather/open the window for more non-gold particles to pile up and that’s not good. Incremental Processing: A great analogy of how this principle works is to picture a city bus. Imagine a rule where all passengers must enter through the front and must exit through the back. As they enter, passengers must fill the seats in the front of the bus first. Every time the bus makes a stop (you shoveling dirt into the hopper of your highbanker or sluice), the first few rows fill up quickly and remain full for a short period of time. As a new passenger (each new shovel full of material) gets on and finds the front seats taken, he must move further down the bus (sluice). The result is a bunch of folks all competing for the same seats up front and when there are no seats up front, they must take the next available one. If all the seats get full, a passenger (your paydirt) never even gets to sit down and exits the bus (sluice) without ever sitting (collecting in the riffles). As the working zones in your sluice fill up, slurry material will move down to the next zone before it settles there. During times of heavy loading, the first percentage of your sluice will load up heavy and take some time to exchange out. That means gold will keep traveling until it finds an “empty seat.” If you load too heavy or have too short of a sluice, you’ll have gold flowing over holding zones that are busy working and exchanging. It may take an exchange center (vortex) 3 or 5 seconds to fully process down material and exchange out non-gold and heavies. Fine Tuning: Because of the principles of Hydraulic Equivalence and Incremental Processing, you may have realized that slowing down a sluice can really cause problems and loss of gold. How do you know if your sluice is running too fast or too slow? Experiment! Of course doing so is a little scary because the #1 fear of most gold miners is losing gold, and quite honestly, until your sluice is fine tuned, that just might happen. To avoid losing gold, most miners start running their sluice at the “normal” or widely accepted pitch of 1 inch per foot. But this is just a starting point. If you see gold in your tailings, your first thought is probably to slow it down so you aren’t blowing gold out of the sluice. But perhaps that’s not the cause at all. Perhaps it’s because gold doesn’t have a place to sink down into and hide in your sluice. Experiment by running way too fast, say at a 15-degree pitch. Then take it to 13 degrees, then go down to 12.5. Keep adjusting until you find an acceptable capture rate for the size of gold you want to hold. Lose your fear of losing gold through testing and experimentation. Not only will you fine tune your sluice, but you’ll also get a great education. Good luck! Monday, June 27 2016
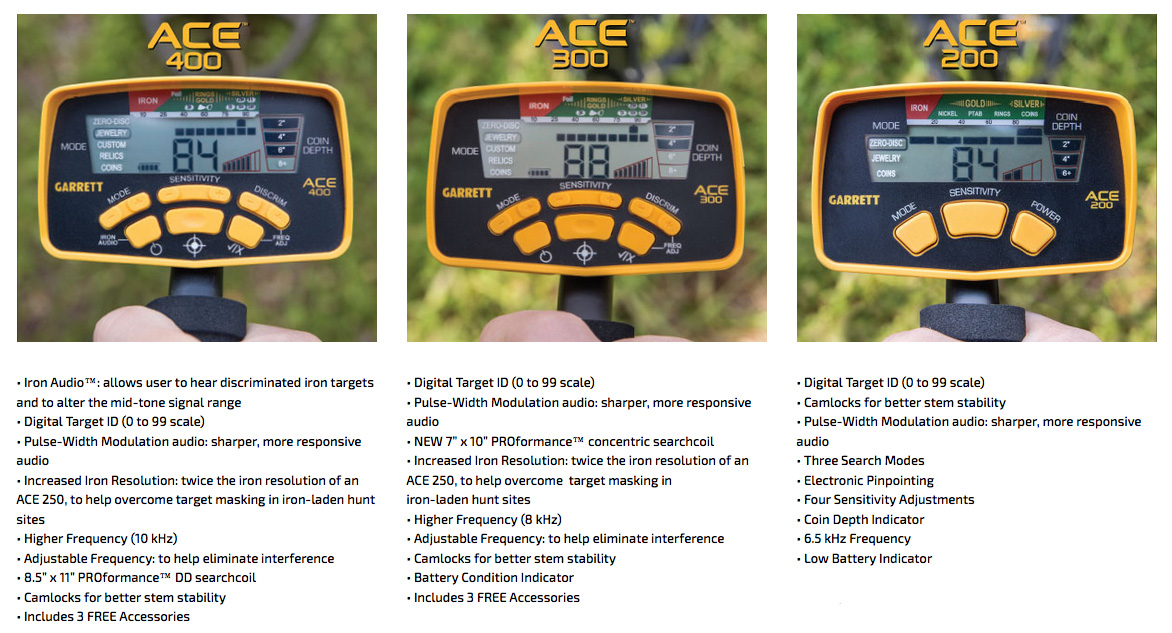
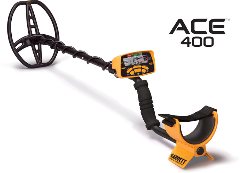
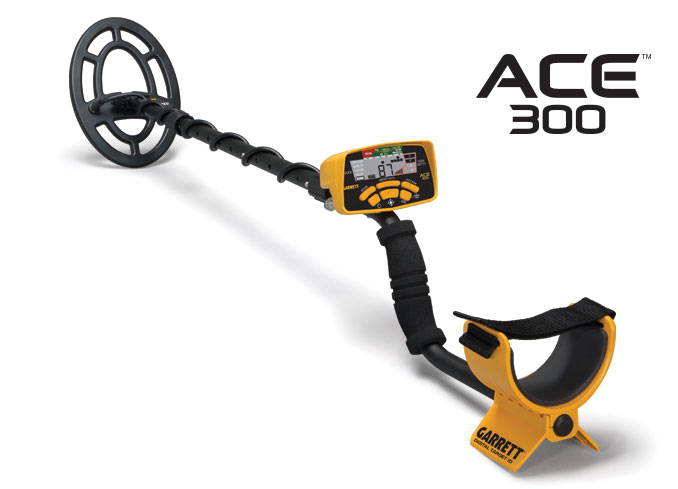
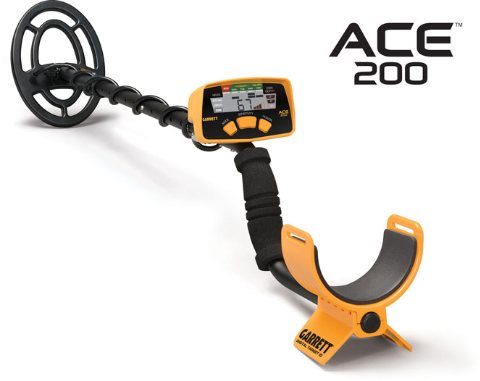
In case you hadn't heard the exciting news... Garrett recently introduced three new detectors in the ACE series— the 200, 300 and 400! Each of the new ACE detectors include Digital Target ID—a large, 100-digit target information display for better target identification—as well as a more robust audio package, and stem locks for additional strength and stability. With the great pricing and features, it's no wonder that all three detectors have proven to be fast movers as soon as they hit the market!
It's healthy to take a break once in a while from the office, the grind, and the daily pressure— especially with great weather and long hours of daylight. Grab your metal detector and get out there— wherever your “there” might be. Take your detector along on a camping trip or on your next hike. And don't forget coin shooting in the park (kids love it!). You never know when you might encounter some long-forgotten site that’s just waiting to be hunted by YOU! Summer is the perfect season for metal detecting and the ideal time to unwind and search for your next great find! Good luck hunting! Wednesday, May 04 2016
GoldRushTradingPost.com is off-line and the office is closed until June 20, 2016. We sincerely apologize for the inconvenience. During the temporary closure, the website cannot accept orders, and no customer service will be available via email or phone. Once we are back in the office on June 20, it's business as usual. We appreciate your understanding. Thank you! |


 urn out to be quite so secret any more.
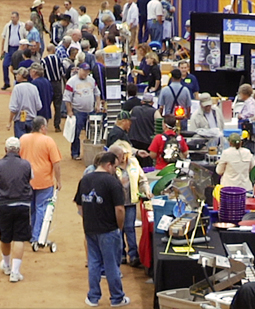 and metal detecting for years, these three shows offer a fun opportunity to rub elbows with some of the best in the business. In addition to browsing the show floor to find the latest and greatest equipment and supplies, meet Kevin Hoagland, host of Gold Trails.

 sands. The real reason the Gold Cube was invented was their nemesis— fine
 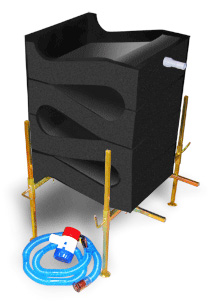 Deciding whether to go with a three-stack or four-stack depends on the type of gold itself. The flatter something is, the more it acts like a kite. Kiting is when the gold is so flat that it catches water, flips, and then sails over the waves. The flatter the gold, the more you'll require a
 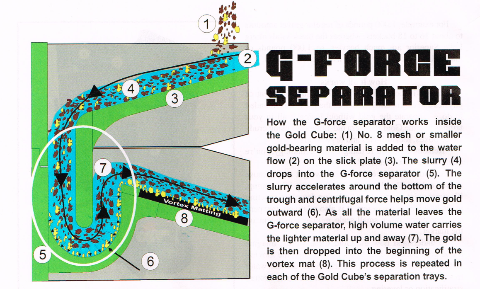 The fine gold becomes heavier and is moved to the outside edge because of centrifugal force. The gold drops to the bottom and starts scooting up that wall. And, as it leaves the G-force separator, it hits a lip just before it gets to the vortex mat. That edge is the only eddy in the entire system— a low-pressure zone necessary to pull the gold in front of the mat. With a sluicebox, you try hard to get the gold underwater, but with a Gold Cube, the gold doesn't have a choice; it goes under water, under that gate and the low pressure eddy exiting the G-force separator sucks the gold right up in front of the mat. The gold has nowhere to go except into the matting.
|
Nugget of News Blog |