


Monday, August 06 2018
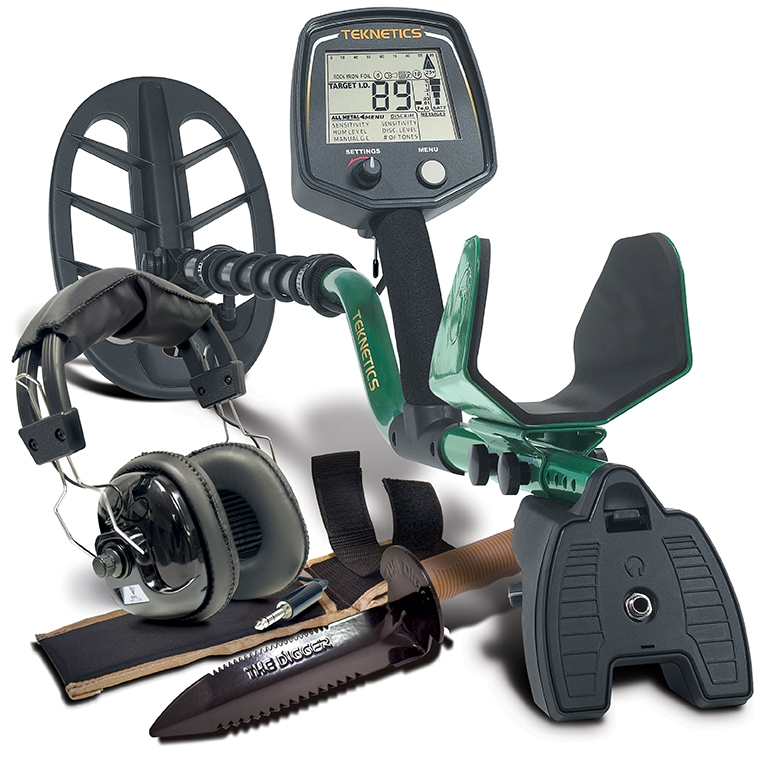
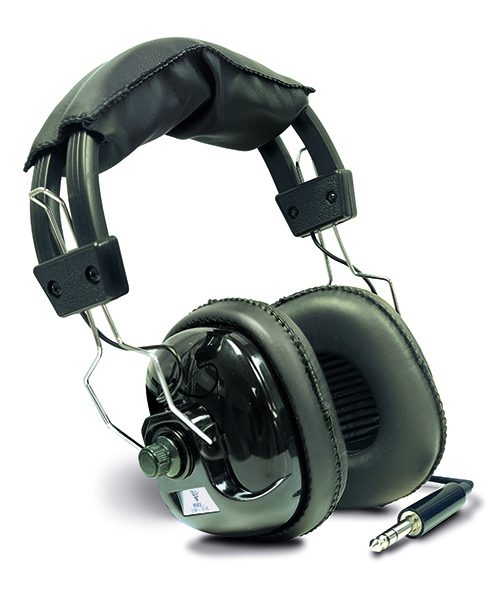
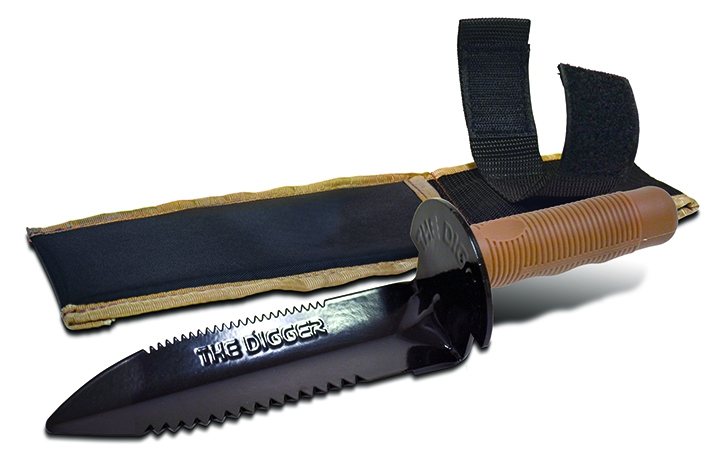
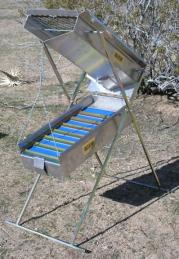
Back to School promo! Limited time only— combo price ends August 18, 2018! Each Teknetics T2 metal detector is now shipping with stereo headphones and a digger recovery tool. ALL FOR $499 with FREE SHIPPING! Buy now using coupon code A1486.
The T2 excels at coins-shooting, relic hunting and gold prospecting.
Teknetics Headphones:
Digger Recovery Tool:
Back-To-School Combo price ends August 18, 2018! Get the package for only $499 with FREE SHIPPING! Buy now using coupon code A1486. Nugget of News Blog Monday, July 30 2018
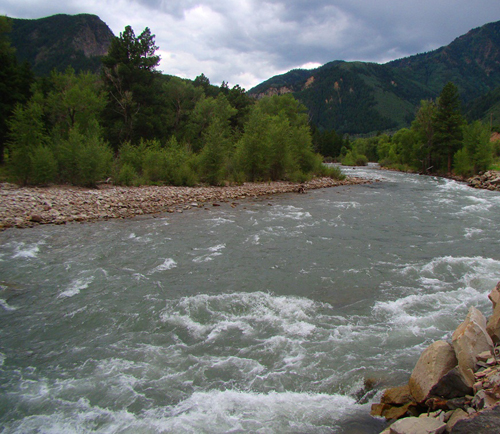
Places where gold naturally concentrates in an environment of streams and drainages are k When deciding where to start sampling, it’s helpful if you think of a river or stream as a sluice box. Waterways obviously don’t have aluminum riffles and matting, however, they do have natural gold traps that do the same thing that a sluice will do— allow gold to settle out of gravels and be caught while the bulk of the sands continue downstream. Heavy material such as gold doesn’t get spread along evenly, it is most likely caught in certain areas. The downstream parts of inside bends in a stream are favorable places to look for pay streaks. Just how good depends on how sharp the bend in the stream actually is. Usually the sharper the bend, the better the pay streak. If a tributary is known to have coarse gold, look at the intersection of the tributary and the main channel. Behind an obstruction (large boulder, an island, or an outcrop of bedrock) is another good place to look for a pay streak. Boulders and other obstructions can create turbulence where ordinarily smooth flowing water turns into fast flowing whitewater. It is between the fast white water and the quiet dark water that gold drops out. The coarsest gold tends to be found on the outer parts of the pay streak, and the finer-sized gold is on the inner part of the pay streak. When you are working, if it seems as if the streak is petering out as you go toward the middle of the water flow because you are finding little gold, this region of the pay streak is often where the biggest number of nuggets are most likely to occur. Once you know where paystreaks form, you might wonder if they are more likely found on bedrock or in gravels. They are nearly always found on bedrock or some sort of false bedrock. False bedrock might include caliche, a clay layer, or just a well-packed hard pan. You may just get lucky and hit something great with your first shovel of dirt, but more likely you’ll need to test a few different places. Even very experienced prospectors need to keep testing to find those hotspots and paystreaks. Good luck and keep sampling! Friday, April 27 2018
A good rule of thumb that most prospectors agree on is to look for placer gold on bedrock and within crevices in the bedrock. This simple principle makes sense— placer gold is heavy and dense and therefore settles at the lowest point as it is pushed around by flowing water. However, gold isn’t always going to make it all the way down to true solid bedrock at the bottom of all gravels. Instead, in certain conditions, it will be found ABOVE bedrock. When these conditions exist, gold will collect on “false bedrock.” For example, a clay layer in streams can act like bedrock and yield more gold than the true bedrock below it.
Tuesday, February 06 2018
Historically, California has been known as the land of the big nuggets. After the Gold Rush began in 1849, Plenty of stories abound from California, but plenty of big gold has come from other states as well. Colorado's biggest nugget weighed in at 156 ounces (13 troy pounds). It came from the Gold Flake mine located on Farmcomb Hill in Summit County, Colorado in 1877. It's easy to see why Montana's nickname is the "Treasure State" since it has produced a few big nuggets, too. One weighed 53 ounces and was displayed at the Paris World Expoition of 1889. The largest in Montana was over 170 ounces and was dug at a depth of 12 feet in Snow Shoe Gulch on the Little Blackfoot River. Nevada's largest nugget was taken from the diggings of the Osceola District in 1878. It weighed 24 pounds (but eight pounds of that was quartz). The old Spanish miners found plenty of big gold in New Mexico, including one nugget in the late 1890s that weighed over 65 ounces.
North Carolina's claim to fame is the Reed Gold Mine located in Cabarrus County. It was the site of the first documented discovery of gold in 1799. For years, that 17 pound nugget was used as a doorstop because no one recognized what it was! At the time, it was worth roughly $4,000 (when the price of gold was $20.67 for an ounce). The Reed Mine actually produced a lot of big gold, including some weighing 28 pounds, 17 pounds, 16 pounds, and 13 pounds. Two different nuggets came from this area that weighed eight pounds each and another two nuggets were nine pounds each. Several more nuggets have been unearthed that weighed five pounds and less. These examples of where large nuggets have been found are by no means exhaustive. A Google search will provide lots of fun stories about past and present finds across the United States. But no matter who has found what, the big question remains: Where do you hunt for big gold these days? Generally, big nuggets occur in places where rich gold-bearing fluids flow through the same pathways for a long period of time, allowing continued deposition of gol The simple answer to where to hunt for big nuggets is to hunt where they have been found in the past. Past finds of big gold indicates these locations have the right geology for their formation. Big nuggets in a stream environment will work their way to bedrock very fast and stay put. They will often be lodged in deep crevices. Keep in mind that big nuggets are also worth more than their actual metal value. The fact they are so rare adds to their value. If you haven't found your big gold yet, keep looking! And if you can't wait to own your own shiny stuff, buy gold nuggets here. Nugget of News Blog Monday, January 29 2018
Make plans this spring to attend a Gold Prospectors Association of America (GPAA) Gold & Treasure Show! No matter your age or experience level, the expos offer something for everyone and provide the best opportunities to learn new skills, see product demos, and rub elbows with some of the most respected miners and metal detectorists in the business!
Nugget of News Blog Friday, December 29 2017
Given a choice, most miners prefer using water to wash and run material, but in some dry, remote areas that Clay is generally known as a great gold robber, making clay-bound gravels the biggest difficulty to overcome. In most of the placers directly derived from weathering lode deposits, the placers are in ravines, gullies and hillsides with sometimes very little gravels and mostly decomposed fragment of rock and fine silt from the decomposing host rock. Host rock containing a lot of feldspars are most problematic. As feldspar breaks down, it creates some difficult clays and silts that bind fine gold to small rocks and sand with the clay and silt particles forming larger clods. Loamy or sandy conditions are much easier to process with a drywasher than clay-bound material due to the absence of clods and clumps. But if dirt clods are giving you grief, break them down with a large hammer on a canvas tarp, or use a mortar and pestle (dolly pot). Once you are set up to run material, process in short runs before cleaning out the riffle tray (perhaps after every three 5-gallon buckets). Frequent clean ups minimize the amount of fine gold that may creep or walk down the riffle tray with the tailings. This method uses your dry washer as a form of a classifier to screen off larger material while getting rid of much of the fine silt and lighter weight material. Re-running tailings can aid in the recovery of lost gold— especially small gold dust and flakes. The second pass through is usually much quicker than the first time because the material has already been classified. With some placers, especially flat, fine gold, rerunning material can be very lucrative. In places where gold is more coarse and angular, very little gold will like be recovered by running the tailings a second time. You may want to experiment with adding a second layer of cloth to a portion of the riffle tray. Doing so reduces airflow by almost half in that section. In addition to the riffle tray, the void under the riffle tray can collect a sizable amount of really fine gold mixed in with fine silt. No doubt there are going to be losses of gold when using a drywasher to recover fine gold (20 minus mesh down into the 200 minus gold), but the end goal should be to limit those losses as much as possible and these tips should help. Good luck! Learn more about Gold Buddy drywashers here. Nugget of News Blog Saturday, December 02 2017
You might have heard the term “flood plain gold” and are wondering what it really means. A very simple definition is “fine-sized gold flakes carried or redistributed by flood waters and deposited on gravel bars as the flood waters recede.” When this “redistribution” occurs, it is usually after heavy winter storms that churned up rivers enough to turn part of the bedload over and move the river bar gravels from one place to another. Within these gravels is fine gold that was previously deposited there. When waterways flow way up and above their normal banks, they generally drop the heavier gold in the front of the bar, and as pressure decreases, the finer gold starts dropping into the mixed gravel. Over time, some of this finer gold will work its way down to bedrock, but generally it stays on the move.
How did the gold get there in the first place? There are many classifications of placer deposits, and their definitions can provide the answer. Among the most well-known is stream placers. Streams carry gold from eroded veins and concentrate them in various ways. Modern streams refer to present-day gold-bearing waterways that are the most common sources of gold for today’s prospectors. Tertiary and intervolcanic channels are rivers buried from mud and volcanic flows that existed prior to our modern-day waterways. High benches were created as rivers cut their way deeper into the bedrock and could be located hundreds of feet above today’s modern rivers. Desert placers are generally the result of torrential flash flooding and not a constant water flow. Glacial stream deposits are created by melting glaciers that can concentrate gold if the water flow is sufficient. Marine or beach deposits can come from wave action against cliffs, from off-shore currents bringing in gold-bearing material from under the ocean, or even from gold-bearing streams that flowed into the beach area eons ago. Since there is a strong possibility that gold can get moved around during storms, it’s now important to know WHERE to find this “dropped out” gold. The secret is to find that drop point and to capitalize on its accumulation. Fine gold looks fantastic in a pan or box, but its weight can be deceivingly light. It takes a lot of fine gold to be equal to a larger piece and to have enough weight to make the recovery effort worthwhile. Some of the best areas to look for flood plain gold are where the stream or river widens out, or levels out, or changes direction. The inside of a bend is good. Rocks and weeds and small shrubs are also potentially good collection spots. When checking out collection spots, be extra careful. Calm water on the surface can hide swift currents underneath. Keep in mind that the effects of heavy winter rains and snow will not be the same on all waterways. Redistribution might occur to a larger degree on larger rivers. Or it could be the opposite where you live and prospect. No one hopes for an especially “bad winter,” but if Mother Nature makes it so, this information could be the silver lining— a way to turn lemons into lemonade come spring when you can get out and take advantage of any gold redistribution that occurs. Good luck and be safe! Nugget of News Blog Thursday, November 16 2017
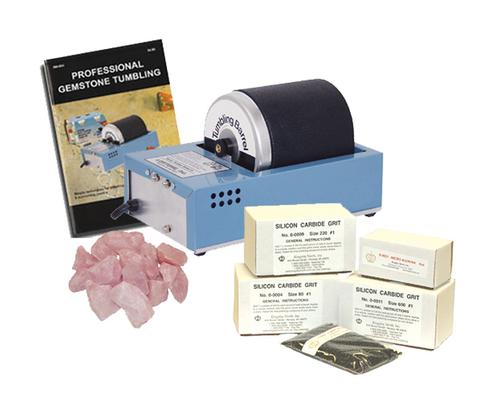
It takes years and years for nature and its elements— dirt, rock, water, and sand— to smooth a rock's surface. But a rock tumbler can get you those same results in considerably less time. Although you should always refer to the owner's manual for the particular rock tumbler you own, if you're just getting interested in the hobby of lapidary and are wondering how a tumbler works, below are general tumbling instructions from Lorton, Inc., a leading manufacturer for the last 50 years. STEP 1: (coarse grit) Fill the tumbler barrel 2/3 to 3/4 full with properly graded and sized stones. If the barrel is not full enough, you won`t get the proper tumbling action in the later steps. Add t
Whether you're just getting started in the hobby of lapidary, or you've been polishing rocks for decades, you'll find the rock tumbling equipment and accessories you need here. Nugget of News Blog Thursday, September 28 2017
For those of us with a strong dose of gold fever, the price of gold doesn't make much difference. Most You might recall when gold peaked in August 2011 at $1890 per ounce. That was a very exciting time in the news— media hype always follows whenever gold takes a strong rise or dips. Over the last few years, the price has come down and is averaging around $1200 per ounce. But you might be wondering where the price is going from here. If you take a look at the chart of gold prices, it can be an indicator of what's to come. The key to the chart is recognizing resistance levels and support levels (high and low points). When a price bottoms out, it establishes a new floor. When it breaks below that floor it is considered "bearish" and likely to drop further since it broke a supporting base price. When it breaks above a resistance level, it indicates there is strong demand which could push the price to higher levels. Between 1978-1980, gold prices went from $172 to $830 per troy ounce. In 1982, gold prices dropped back to $328 an ounce. It was not until 1999 that the price hit the low of $253 after the peak in 1980. Never having broken that price floor, it entered a recovery where it eventually broke above the high set in 1980, pushing to $944 an ounce by February 2008. Later that same year, in October, the price hit just under $830 before skyrocketing to that crazy high of $1890 per ounce! Since then, the price has dropped from its high just as it did in the early 1980s. Gold dropped to a new floor of $1066 at the end of 2015, before bouncing back to its current levels. Since the new floor was established, it has not been broken. Instead, the price climbed to $1340 per oz. by August 2016, dropped but stayed $100 above the prior low to $1163 and has since bounced back to around $1200. If the price continues to set new highs, even if it drops thereafter and continues to set higher lows on its way up, it is considered "bullish" or positive. Why is the price of gold so important? Maybe it's not to the average prospector, but the price of gold has a direct impact on the level of involvement in prospecting. The next sharp rise in price might bring with it additional involvement from more people. The treasure seeker in all of us might just kick in, bringing more families out to the gold fields. Good luck! Sunday, August 20 2017
September 1st of every year is a very important date if you own a mining claim, mill site or tunnel site. That's Maintenance Fee Payment Waiver Certification (Small Miner’s Waiver) The maintenance fee and small miner’s waiver must be paid or filed in the Bureau of Land Management (BLM) state office (in Alaska, the Fairbanks District Office also accepts fee payment) of the state where the claim or site is located. If a claimant owns claims or sites in multiple states, a fee or waiver must be paid or filed in each state where each claim or site is located. Failure to timely pay the fee or file the waiver in the proper BLM office will subject your claims or sites to forfeiture by operation of law. Annual Assessment Work Assessment work is not a requirement for owners of mill or tunnel sites; however, a notice of intent to hold (NOIH) the site must be filed on or before December 30. The BLM requires a $10 processing fee per site for filing a NOIH.
Claimants (except those in Alaska) may pay their annual maintenance fee online through the Mining Claim Maintenance Fee Payment Portal. This site is available 24 hours a day. The BLM payment portal provides the ability to query eligible mining claims and sites for payment through an interface with the Legacy Rehost 2000 (LR2000) public reporting database; select claims and sites to be paid; and then transfer to Pay.gov for payment of the maintenance fees for the selected claims and sites. At this time, only credit card payments are accepted and treasury limits apply. Claimants who file on paper must include a document listing the claim/site name(s) and the BLM serial number(s) assigned to each claim for which the fees are being paid. Form 3830-5 (lode claims) and Form 3830-5(a) (placer claims) may be used to list claims and sites when making payments by check or credit card directly to the BLM state office for the state where the claims or sites are located. |
 nown as paystreaks. No matter if you are panning, sluicing, dry washing, or metal detecting, in many ways your success at gold prospecting comes down to locating these elusive natural pay streak concentrations. Keep in mind that most gold paystreak formations occur during times of flooding and that many factors affect how gold gets deposited. Perhaps the biggest factor is that gold is dense and is more than 19 times heavier than water. The denser an object, the more easily it will resist the flow of moving water. That means it takes a very strong and fast moving water flow to move along a nugget the size of a pea.
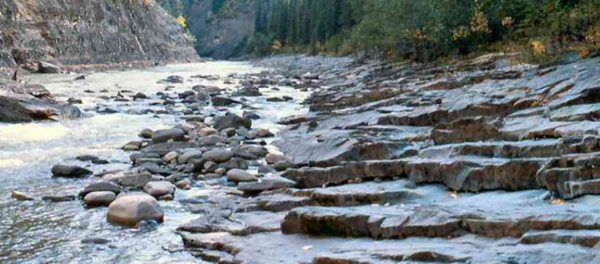
 Unlike many Western states, the largest nugget in Alaska was found rather recently. In 1998, the Alaska Centennial Nugget, weighing 294 ounces, was mined along Swift Creek near the town of Ruby. This area is well known for its past production of large nuggets. A big nugget was also found in Anvil Creek near Nome which weighed 182 ounces.
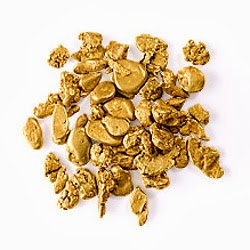


|
Nugget of News Blog |