


Tuesday, October 17 2023
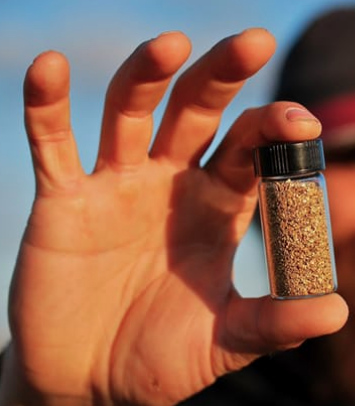
In the words of Tom Massie, son of the late George "Buzzard" Massie who founded Gold Prospectors Association of America... "my favorite way of prospecting is the way that gets me gold." Suction dredging with a wetsuit can be quite lucrative— not only from the material you suck up but there's also the chance of picking SIZES OF GOLD:
Wednesday, March 29 2023
Did you know that “bad” weather can be really GOOD for gold prospectors? Of course no one ever hopes that Mother Nature causes catastrophic loss of life and property, but the ups and downs of weather events in any gold-bearing area are something to take advantage of. Nature can help all of us in our quest for the shiny stuff— especially in light of recent atmospheric rivers causing flooding and lots of snow in California, eastern Idaho, northeast Utah, northwest Colorado, the Cacade Ranges, portions of the northern and central Rockies, and portions of Arizona and Nevada.
How does this help you get more gold? Primarily, multiple weather events cause large amounts of gold to move and replenish areas that already have been worked. And even when the atmospheric rivers die down, the higher than normal snowpack will cause water levels in rivers to flow well into the summer instead of drying up in late spring. Higher water levels extend your mining season, and allow you to run high-production equipment such as highbankers and power sluices. Miners can also work stream bank deposits once the water recedes back to normal flows. Typical winter storms that regularly occur in gold-bearing areas usually do not create enough havoc to force substantial amounts of "new" gold into movement. However, when Mother Nature really goes to work as we’ve seen lately, a great deal of gold can be set free, creating a bonanza for gold hunters. Gold veins that have been hidden for decades suddenly can be exposed. Floods can also sweep gold out of abandoned mines and wash it downriver. Known gold digs can be washed out, trees uprooted, and the landscape eroded— all pluses for prospectors! When tons of rock, cobble, and boulders are swept downstream along bedrock during a huge storm, quite a bit of destruction occurs. Plants, weeds, and trees that normally grow along the river and gravel bars are washed away. And when a major storm or flood tears up large portions of a streambed, a fair amount of this newly-released gold, because of its weight, will be deposited along the riverbed and settle into cracks and crevices (hand dredges are an ideal tool in this situation).
Saturday, November 19 2022
If you’re used to water mining, having success in the desert might seem challenging— that is until you start thinking of desert ground During a river high-water event in a non-arid area, gold is moved over a larger area by massive water flows that continue until the water slows as the source dissipates its energy. Spring snow runoff is a good example. Rivers rise and sometimes flood based on the upstream water source. When the snow has melted, the river will slowly get back to normal. In the desert, gold is moved in the exact same way with the exception that water powerful enough to move gold does so and then just simply stops. In a flash flood, gold is moved very violently and often a very short distance, sometimes percolating into valuable pockets. Here’s where the difference between water and desert mining principles comes into play generally flood gold will concentrate in areas that do not meet the standard thought of inside bends and where the water flow becomes lower. For the most part, desert mining experts recommend staying out of the washes, gulches and dry river beds— that is unless you clearly see exposed bedrock. Gold will settle fairly quickly when it is trapped behind jagged bedrock and small fault lifts that have not been worn down over time by constant water flow. It IS true you can find areas of concentrated gold-bearing material in the washes, however, the amount of time and energy to get through feet of overburden is usually just not worth it, especially when there are higher values to be found outside of the wash. Follow the leads out of the wash to where the gold lives in higher concentration. Test and sample areas you see with a great deal of runoff from a tributary coming into the main wash. Here you are only digging through the current flood layer and testing for flood gold. Make your way out of the wash carefully looking at the bottom of the tributary and the areas where the water flowed into the tributary. Look closely for jagged bedrock and slight lifts in the ground and then prospect. Continue to test each of those spots. What started as a few specks of flood gold in the main wash can lead to larger and larger deposits on the flats or in slight inclines across the desert floor. Keep in mind that when a flash flood is dissipating, there is not enough energy to move a lot of rock, but the sand will continue to flow a bit, creating great clues. In general, cool season precipitation (October through April) is the most extensive source of rain in the desert regions. Rainfall is more widespread and of relatively long duration during the cool season. On the other hand, warm season precipitation (May through September) results largely from short monsoon-type thunderstorms. If you’re ready to head to a sunnier climate this winter, keep these tips in mind and you just might find enough similarities between water and desert mining to make you return every year. Good luck! Saturday, March 26 2022
Gold is gold, so there isn’t necessarily a better type of gold, however, mining for lode gold has many more challenges than mining for placer gold. The formation of gold generally starts as a vein in rock. This is referred to as “lode gold” and is formed when molten rock in the earth’s crust heats groundwater under great pressure. In fractured bedrock with appropriate rock chemistry, super-heated water (hydrothermal) at approximately 400-700 degrees Fahrenheit dissolves certain elements a Placer gold is the gold that most prospectors are more familiar with. Placer gold isn’t really any different than lode gold. It is simply a concentration of gold that is created over time as it erodes from hard rock veins. When exposed at the surface, a mineralized deposit will break down and erode due to reactions with oxygen, water and wind, coupled with temperature fluctuations. Since gold is very dense, it will move downhill much slower than the surrounding sediment. It tends to become concentrated on or near the surface of the lode, forming a “residual placer” close to the original bedrock exposure. Gold found downhill from the immediate outcrop above the nearest watercourse is called an “eluvial placer.” Once it reaches the nearest waterway and is transported by flowing water, the gold now forms an “alluvial placer.” The origin of the dust, flakes and nuggets found by panning and sluicing is usually from a vein up on a nearby mountain. An ore body is a mineral deposit that can be mined, processed and sold at a profit. All ore bodies are deposits. Few deposits are actual ore bodies. Valuable gold deposits in placers are referred to as “pay streaks” instead of ore bodies. Over time, eluvial and alluvial placers can become covered with sediment. When buried long enough and deep enough, these deposits will turn into “fossil placers.” Sometimes the fossil placers are re-cemented into sandstone or conglomerate rock and then must be mined using hard rock techniques. Hard rock ores have mostly fine to micro-fine gold in solid rock; placers contain fine to coarse gold particles in a softer bulk material or matrix. That makes placers much easier to mine and process. Moving soft soil or river gravel is obviously much easier than breaking rock. For small scale miners, though, a rock crusher can pulverize 2 or 3 inch sized rocks into powder in no time! But for the average prospector, panning and sluicing will be more fun and more profitable, and as time goes on, you may wish to upgrade your mining efforts with a highbanker or power sluice, dredge or trommel. Good luck! Monday, February 21 2022
Depending on where you live and where you like to treasure hunt, you might still be buried under feet of snow. Or maybe spring has sprung and temperatures are on the rise there. No matter the weather, you probably have extra time on your hands this time of year, so put that time to good use. Even though you might not have been out in the field for the last few months, you can still be prospecting and getting prepared for a new season of gold hunting! In other words, use your downtime wisely, so you can hit the ground running as soon as Mother Nature allows. Inspect equipment. Did you properly clean and store your sluice and/or highbanker at the end of last season? In advance of heading Prepare your tools. Sharpen digging tools, picks, shovels, chisels and other specialty tools that require sharp edges. Now is also a good time to mark screwdrivers, magnets, crevice tools and other small implements with some bright colored paint. It’s amazing how easily tools can get “lost” in the dirt. A strip of bright yellow or red can help you more easily spot them. Double check the seals on snuffer bottles, hand dredges, and vials to make sure they’re tight. Pack your backpack or tool kit with everything necessary for a full day’s work. Maintain your metal detector. If your metal detector is still under warranty or giving hints of potential issues, the off-season is ideal for sending it to the manufacturer or taking it to an authorized repair shop to be fixed or tuned up. Check your rechargeable battery and make sure it is fully charged. Better yet, purchase a new battery as a back up. It’s also time to dust off the operator manual or search YouTube for “how to” videos pertaining to your brand and model. You’ll likely uncover some helpful tips and tricks, or learn a new recovery method. Is this the year to add a new coil or pinpointer? Now is a good time to consider upgrades and make those purchases earlier than you expect to use them. Do your research. The best kind of research brings together different forms of info from a multitude of sources. It is the info gleaned from combined sources that can help you to determine the best possible place to locate precious metal or gems— old mining district reports, mining history books, topo maps, aerial photos. Consult the Bureau of Land Management's LR2000 searchable database. The legacy system is undergoing upgrades; as the new systems is implemented, information will be easier to find. It can take a lot of time to research new areas, but when you find a new spot with good gold, it will be well worth your time and effort! It’s also a good idea to have alternate sites in mind just in case you cannot access your primary sites due to unforeseen closures.
Monday, March 01 2021
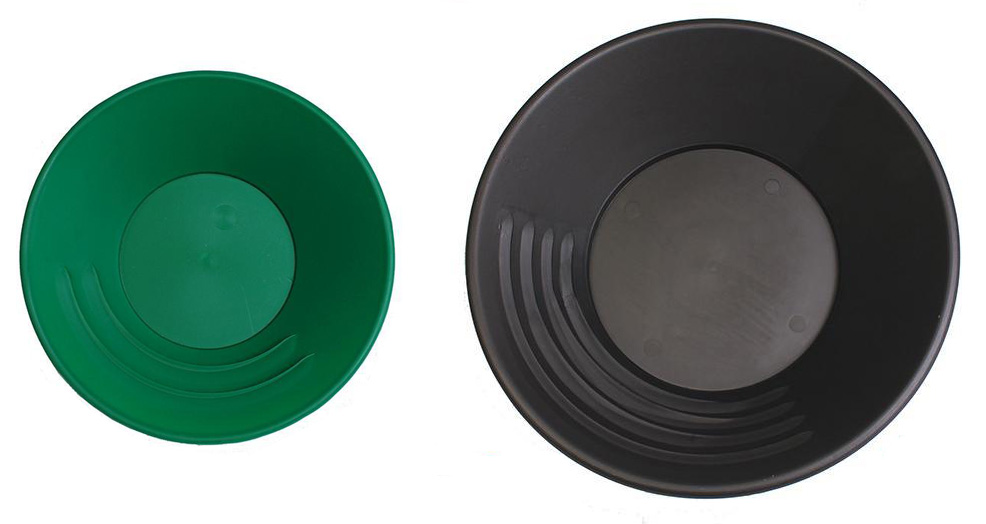
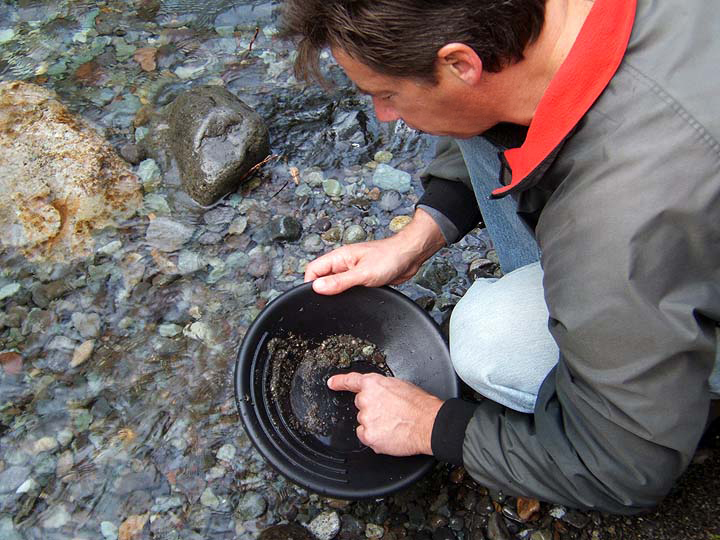
A gold pan is the simplest and most basic prospecting tool and is one of the oldest types of gold concentrating equipment. Plastic pans are recommended over the steel pans used by the 49ers. Plastic is light weight, so when you add water, dirt, and gravel to your pan, your arms won't get as tired compared to using a steel pan. And they do not rust or conflict with the use of a magnet. Size, color, and shape are really a matter of personal preference. You might want to have a couple different sizes of gold pans on hand (10 inch, 12 inch, and 14 inch are the most popular). Plastic pans generally come in green, black, and blue. The color doesn't effect performance, but green is the most common. The bright blue cone-shaped batea is the newest type of gold pan to hit the U.S. market. Gold panning kits are often the most economical way to purchase gold pans and classifiers (often called sifting pans) and other small accessories all in one convenient box. The point of panning is to shake the gravels, allowing the gold to settle downward and then to wash the lighter material off the top. When all the lighter material has been removed, only the heavy concentrates will remain in the bottom of the pan, including, hopefully, some gold! With a little practice, anyone can learn to pan for gold. Buying a bag of gold-bearing paydirt to use over and over again for practice in a tub is one way to get good at panning without ever leaving home. Gold panning “how to” steps founds here.
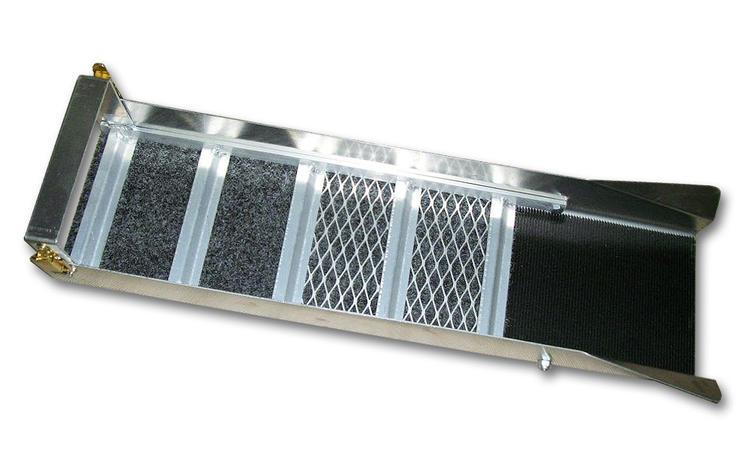
Gold concentrations are spotty, even in known gold-bearing areas, so sample and test often. Be sure to move on with your gold pan and don’t stay in one spot less you have good results. If you find a spot with fairly large amounts of gravel that yields good gold, then it’s time to bring in a sluice box. A sluice is simple to operate and have been used all across the world for thousands of years. After you’ve mastered gold panning and are ready to increase the amount of gravel you can process, a sluice box is your next step up from hand panning. Sluices come in a variety of sizes, most with gold-catching matting in the bottom that you need to clean up at the end of the day. Other models such as the Gold Well Vortex Drop Riffle Sluice, has no matting or carpets and uses vortex technology to catch fine gold.
As with the pan, the real secret of successful prospecting is not in operating the equipment, but in the skill of finding those natural gold catches. Learning to read the river or stream and recognize the places where gold might accumulate and then sampling those places to see if you are correct is the best technique. Inside bends, behind boulders or bedrock outcrops, and inches above the stream flow are all good places that you might sample, but there are plenty of other possibilities as well. The sluice and the gold pan may be among the most basic prospecting tools, but they are tried and true ways of finding some good gold! Saturday, December 05 2020
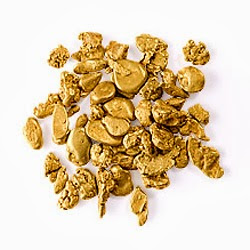
With gold prices on the rise, you might be wondering if now is a good time to sell some of the gold you’ve found over the years. And if Gold dust consists of flour, fines and flakes. This is the stuff most prospectors find as a result of panning, sluicing and dredging. This form of gold is probably the lowest value because it will have the most impurities. Small nuggets start at about 1 gram and are a step up from gold dust in value. Medium nuggets, on average, weigh up to 31 grams or 1 troy ounce. Large nuggets are defined as weighing 1 troy ounce or more. Larger nuggets usually command higher prices, and could be considered museum quality. Gold in quartz is usually a collector’s item or a museum piece, therefore, prices widely vary. Keep in mind, though, that even nuggets that appear to be pure gold are not. They will have impurities embedded and blended into the matrix. There is no such thing as 100% pure gold from nature. In fact, in North America, the average purity for prospected and mined gold averages 60% - 85%. The impurities in natural gold consist of metals such as silver and copper and other minerals that have combined with gold on a molecular level. Tests, referred to as an “assay” must be performed to accurately measure the purity of gold. Some jewelers and pawn shops can analyze your gold to determine purity with an XRF gun (X-Ray Fluorescence); expect to pay a charge for that service. The majority of gold bought and sold from small-scale prospectors include: private buyers (some advertise on eBay, Craigslist, and other online sites) pawn shops, independently owned jewelry stores that craft and repair their own jewelry, museums looking for unusual specimens or rare nuggets, and refiners. Most refiners are contracted by large gold mining operations, but some smaller refiners will purchase gold from prospectors in any form or mesh size. An internet search will reveal refiners that will buy from individuals. If you want to sell your fine gold or nuggets, there are a few things to do first. You may not get a totally accurate assessment of your gold’s value, but you’ll at least have a ballpark estimate. Do NOT melt your gold. Keep it in its original form.
When you make contact with potential buyers who specialize in raw and natural gold, be sure to ask about and understand their procedures and policies and payments. Ask how your gold will be assayed and how the purity is determined. If you are shipping your gold to a buyer, understand their requirements for packaging and shipping, insurance, and other safeguards. Some buyers pay for the testing and shipping, others pass along the costs to the seller. Remember that buyers have costs and will not pay 100% of the spot price. The exception to this would be if you have museum specimens or very large nuggets. In those instances, buyers will pay more than the spot price. Be patient and shop around to not only get the best price, but to find a buyer who you can work with now and in the future. Get recommendations from fellow prospectors, or clubs such as GPAA (Gold Prospectors Association of America). If possible, make your first transaction with a new buyer a small one to assess your experience and satisfaction with the overall sales process. When you feel you have had a successful first transaction, you’ll feel confident you can continue that relationship in the future. If you've not yet found your first gold, get Alaska paydirt here. Sunday, September 13 2020
The most basic piece of prospecting equipment is the gold pan. Size, color, and shape are really a matter of personal preference. Plastic pans generally come in green, black, and blue. The color doesn't effect performance, but green is the most common. Plastic is light weight, so when you add water, dirt, and gravel to your pan, your arms won't get as tired compared to using a steel pan. It's good to have a couple different sizes of gold pans on hand (10 inch, 12 inch, and 14 inch are the most popular). Tuesday, February 11 2020
The big gold rushes of the 19th century have long since ended, but in most cases you can still prospect for the precious metal in these Below is a very short list that offers a few ideas only. Beginners should search the internet or join a local gold prospecting organization for more information.
Keep in mind that even if there has been no major “rush,” major amounts of gold have been found in many other states, too, including Georgia, Michigan, Montana, New Mexico, Oregon, South Carolina, Tennessee, Texas, Utah, Virginia, Washington, Wisconsin, and Wyoming. Good luck! Sunday, July 14 2019
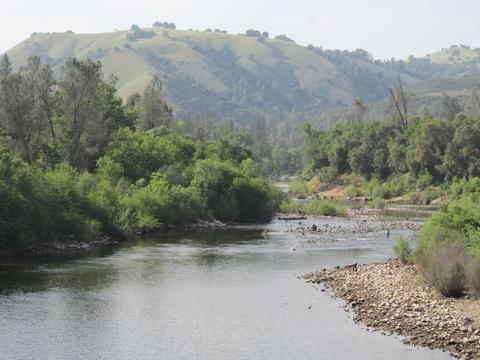
Alluvial gold refers to tiny gold flakes that come to be through water erosion and movement. In geology, alluvium The alluvial environment is a very complex one, with many natural forces competing with each other. The forces that lay down gold are a summation of many flood water events of varying intensity that cause the reworking of sands and gravels. Between major flood events, water naturally flows along the already created path and typically the gold present in the gravel or on the surface will not move much. But the larger flooding events can change the drainage routes and even the river’s shape. Some curves can be shut off from the stream and bypassed. Where the water speed decreases, gravels will drop out of suspension, creating alluvial pay streaks that are typically located along and near the riverbed. To identify where a pay streak might be located, take the flow of the waterway into consideration. The most productive streaks are formed as a result of major floods that are significant in terms of both water flow and intensity of erosion. Greater amounts of gold are present here as compared to regular gravels. Pay streaks tend to possess a comet-like form. At the “head” or “heart” is found the richest concentration of gold. At this location, the gravel is coarser and the sandy and silty fraction is much less. This little bit of silt is present only for a few centimeters on the surface, laid down in the last phases of the flood as the silt is dropped. The gold in these gravels is typically small flat flakes, with maybe a small picker or two. As gold prospectors, our objective is to learn to read a stream and recognize the pay streaks it contains. Think about where you are going to dig before you start and then repeatedly test the gravel you are processing. It is important to consider the presence, form, and depth of the bedrock on which the water and all the alluvial gravel deposits are sitting. In many cases, the gold will naturally concentrate in the lowest part of the riverbed, making a gold-rich path. During high water events, much of the gold is picked up and put back into motion, which leads to forming new pay streaks. Some will be laid back down along the low line of the stream, but may also end up a little farther downstream. The gravels in contact with the bedrock or false bedrock base are often the richest. The same facts apply to the alluvial pay streaks that are formed on gravel bars— the lowest level of the gold-bearing gravel is normally the richest. The alluvial environment changes over time. Alluvial pay streaks generated 100 years ago could become buried, then subsequently be eroded and exposed again. The erosion might be in part or in total, generating a new series of paystreaks further downstream. Pay particular attention to large boulders and trees. Obstacles like these may partially block the water flow and provide an opportunity for increased gold concentrations, especially behind the obstructions. If there are fissures, holes or natural traps in the stream, be sure to sample these areas, too. Although high water events are sporadic, when you do find a paystreak caused by one, it can be a very productive spot. Stick with it and keep in mind most are small and narrow and best worked by hand with a sluice and gold pans. Nugget of News Blog Friday, February 01 2019
Did you know... there is actually more gold still out there waiting to be found today than the old-timers ever
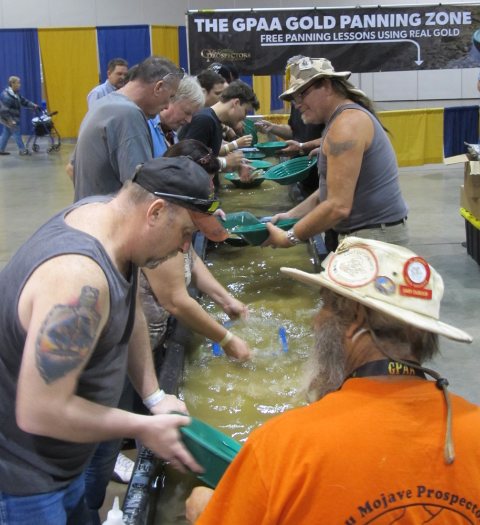
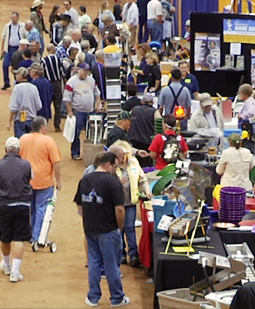 recovered way back in the 1800s gold rush era? And did you also know that attending a GPAA Gold and Treasure Show (Gold Prospector's Association of America) is a great place to get started on your modern day treasure hunt?! recovered way back in the 1800s gold rush era? And did you also know that attending a GPAA Gold and Treasure Show (Gold Prospector's Association of America) is a great place to get started on your modern day treasure hunt?!Browse the show floor to find dozens of leading worldwide manufactures and local vendors demonstrating the latest and greatest gold mining and metal detecting equipment, attend free seminars, ask questions of the pros, and enter to win thousands of dollars in door prizes. Pick up a pan for the first time or hone your skills at the panning zone, where skilled instructors will help you recover gold, for free. Keep all the gold you find!
Saturday show hours 10 am - 5 pm and Sundays 10 am - 4 pm in these cities:
Visit the GPAA website for more details and to buy your $5 adult tickets; kids 12 and under plus military and veterans with ID are FREE. If you can, make a family road trip out of attending one or more of the shows this spring. In addition to the show itself, each city has fun touristy things to do, and if you're a GPAA member, you can visit nearby mining claims.
Whether you’re a family with kids or a lone enthusiast, a GPAA Gold & Treasure Show is your one-stop-shop for all of your gold prospecting and treasure hunting wants and needs. By attending a show, you're sure to have a blast, meet interesting people, find new tools, and learn new tricks of the trade. All of that is enough to make you hollar Eureka!
Nugget of News Blog Monday, July 30 2018
Places where gold naturally concentrates in an environment of streams and drainages are k When deciding where to start sampling, it’s helpful if you think of a river or stream as a sluice box. Waterways obviously don’t have aluminum riffles and matting, however, they do have natural gold traps that do the same thing that a sluice will do— allow gold to settle out of gravels and be caught while the bulk of the sands continue downstream. Heavy material such as gold doesn’t get spread along evenly, it is most likely caught in certain areas. The downstream parts of inside bends in a stream are favorable places to look for pay streaks. Just how good depends on how sharp the bend in the stream actually is. Usually the sharper the bend, the better the pay streak. If a tributary is known to have coarse gold, look at the intersection of the tributary and the main channel. Behind an obstruction (large boulder, an island, or an outcrop of bedrock) is another good place to look for a pay streak. Boulders and other obstructions can create turbulence where ordinarily smooth flowing water turns into fast flowing whitewater. It is between the fast white water and the quiet dark water that gold drops out. The coarsest gold tends to be found on the outer parts of the pay streak, and the finer-sized gold is on the inner part of the pay streak. When you are working, if it seems as if the streak is petering out as you go toward the middle of the water flow because you are finding little gold, this region of the pay streak is often where the biggest number of nuggets are most likely to occur. Once you know where paystreaks form, you might wonder if they are more likely found on bedrock or in gravels. They are nearly always found on bedrock or some sort of false bedrock. False bedrock might include caliche, a clay layer, or just a well-packed hard pan. You may just get lucky and hit something great with your first shovel of dirt, but more likely you’ll need to test a few different places. Even very experienced prospectors need to keep testing to find those hotspots and paystreaks. Good luck and keep sampling! Friday, April 27 2018
A good rule of thumb that most prospectors agree on is to look for placer gold on bedrock and within crevices in the bedrock. This simple principle makes sense— placer gold is heavy and dense and therefore settles at the lowest point as it is pushed around by flowing water. However, gold isn’t always going to make it all the way down to true solid bedrock at the bottom of all gravels. Instead, in certain conditions, it will be found ABOVE bedrock. When these conditions exist, gold will collect on “false bedrock.” For example, a clay layer in streams can act like bedrock and yield more gold than the true bedrock below it.
Wednesday, June 14 2017
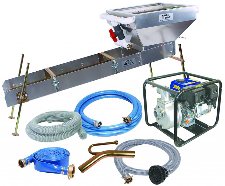
Fun and exercise are two great reasons to go gold prospecting, but you might as well make some money while you're at it, right? The best way to do that is to increase production rates. Assuming you are mining on a known gold-bearing claim or waterway, volume is the key to your success!
A dredge or highbanker/suction dredge combo is the next step up. A dredge uses a gas motor to generate the suction that will load and transport the material to the sluice, which greatly increases volume, as well as allows you to reach gravel on the river bottom that would otherwise be inaccessible (unless the river is seasonal or there is a prolonged drought). The more material a dredger can push across the riffles, the more gold can be recovered. An additional benefit to dredging is that it also allows you to clean gold out of all the cracks and crevices in the bedrock. A shovel just cannot do that. The size of the dredge intake nozzle is the most important factor in how much material a dredge can process, but it is not a direct one-to-one relationship. For example, a 5 inch dredge will not move twice the material that a 2.5 inch dredge can move. It actually can move much more. The surface of the hose is figured in square Beyond dredges or highbanker/suction dredge combos, you can get into some professional mining set-ups that use trommels and jigs and shaker tables and earth moving equipment. Every deposit is different, varying in size and grade and structure. Environmental conditions and access will dictate mining methods and knowing the rock types and size of the gravel is critical in determining which equipment will work best for increasing your production. Finding a suitable deposit to mine and finding a way to work it economically— to justify your time and expense— is the first step. Then choose the right equipment to increase your recovery rate and speed of recovery and make more money. Good luck! Sunday, January 29 2017
Make plans this spring to attend a GPAA Gold & Treasure Show! Whether young, old, or in the middle, the expos offer something for everyone and provide the best opportunities to learn new skills, see product demos, and rub elbows with some of the most respected miners and metal detectorists in the business! Also on the show floor are panning troughs for both kids and adults where you can learn new techniques— and keep all the gold you find! Saturday show hours 10 am - 5 pm and Sundays 10 am - 4 pm in these cities:
Visit the GPAA website for details and to buy your $5 adult tickets online ($10 adult admission at the door; kids 12 and under plus military and veterans with ID are free).
Sunday, November 20 2016
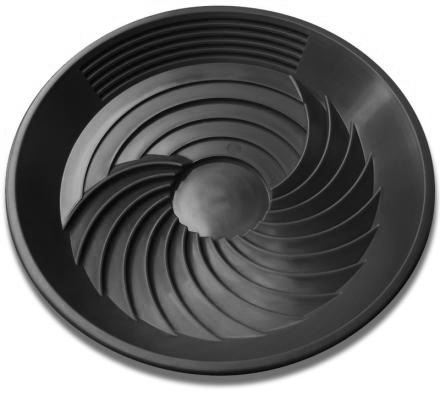
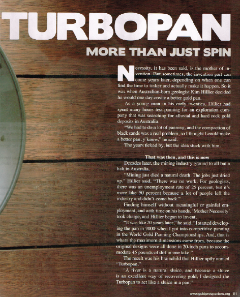
Recently, Gold Prospectors magazine published an article in the November/December 2016 issue about the Turbopan. Read an excerpt of that article below: Turbopan was designed by Kim Hillier, an Australian geologist and prospector with over 20 years experience in "A river is a natural sluice, and because a sluice is an excellent way of recovering gold, I designed the Turbopan to act like a sluice in a pan," explains Mr. Hillier. The pan's riffles act like a circular sluice and were designed to use gravity to accelerate the gold to the bottom of the pan. The bottom well of the Turbo pan is in the center of the pan-- as far away from the lip of the pan as possible, so you don't accidentally lose any of your precious metal. The design of the Turbopan combines the best features of the traditional batea, a deep conical shaped wooden bowl used as far back as the Mayans, and the basic copper pan used in the Klondike Gold Rush. The unique design allows the whole circumference of the pan to eject waste material and many more riffles trap much more gold. This is a huge advantage over traditional pans which tend to concentrate all material on one side of the pan. "The Turbopan is really fast!" says Hillier. "You've got maximum riffles if you're panning out over the front and also you can get the waste out before you start the clean up. It's sort of a bit of a hydrocyclone as well if used to its maximum ability, and its also good for wet sifting through gravels for gems." How to Use the Turbopan: 1. Place your material in the Turbopan. Be careful not to overload it. The pan is meant to hold up to about pounds. With the clean-up riffles facing away from you, submerge the pan into water, and then spin the pan counter-clockwise and then clockwise 180 degrees to allow the water to saturate the materials. TIP: Use a catch tub so you don't lose any gold in a fast-flowing stream! 2. Before panning, use your finger to feel the texture of the material in the bottom of the central trap. Does it feel too tightly compacted? If so, simply shake up the material for better stratification. 3. With your Turbo pan partially submerged, begin moving it in a counter-clockwise circular motion so that the material moves over the circular riffle bed. This action will break up clumps of dirt and prevent compaction. 4. Because gold-bearing black sands are much heavier than dirt and gravel, it will sink and become trapped in the spiral riffle grooves and gravity will move gold into the central trap. The circular motion creates centrifugal force, pushing light sands and clays to the outside of the pan, leaving the heavier black sands and gold in the center of the pan. Alternate between a "centering swirl" to get the gold-bearing heavies to the middle of the pan and the "lights" to the surface, and an "ejection swirl" to get rid of the waste materials. 5. Because the pan is shallow, you'll notice how easily you can clear the small rocks, pebbles and debris from the pan with a single sweep of your hand. 6. When the amount of material remianing in the pan barely covers the central trap, do two or three more clockwise swirls, then about five seconds of vigorous back-to-front and side-to-side motions. 7. Tilt the pan away from you and gently shake it side to side while tilting the pan up at about a 30 degree angle. 8. Pan off any waste until you have only a small amount of concentrates containing gold (about the diameter of a 50 cent piece). 9. Tilt the pan towards you and look for your gold in the bottom of the central trap. 10. If you see gold in the cleanup riffles, don't worry. With a little more practice you'll master your own technique. To watch how-to videos or shop for the Turbopan, click here. Sunday, January 11 2015
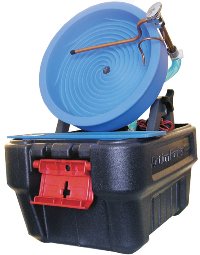
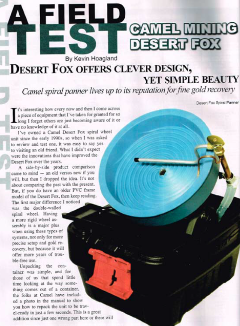
"... The Desert Fox ships in an Action Packer case that is the storage, transport, and water container unit. It provides excellent protection for the Fox while giving you a true compact recirculating unit that can be transported easily. Unpacking the container was simple and for those of us that spend little time looking at the way something comes out of a container, the manufacturer has included a photo in the manual to show you how to repack the unit so it's back to being travel-ready in just a few seconds. In the container you will find:
Setup takes just a few moments. The wheel frame is a single point A-frame that sits perfectly in place in the container and allows you a stable, easy-to-set-up base for the spiral unit. The A-frame construction also allows the unit to be set up directly in a stream. Stand the A-frame in the container, lift the drive unit to a beginning angle, slide the double-wall wheel into the slot on the drive motor, attach the spray bar, fill with water, hook up to a 12-volt power supply (not included), and after a couple of fine tuning adjustments, the Desert Fox is ready to start running your concentrates. Total time from cased to running is about two minutes! The A-frame mounted drive motor allows you to easily make small adjustments to the angle of the wheel. This ease-of-use factor can become critical when running materials that require more precision. Water flow is controlled by a single-point knob on the spray bar assembly, and the speed control is located on the back of the unit. These 3 adjustments are all you need to ensure efficient gold recovery. Before first use, be sure to clean with a good quality dish washing soap to remove all the manufacturing oils (mold-release agents from the plastic parts). Do NOT use a citrus-scented soap because the scent is derived from oils, which is exactly what you are trying to remove. Use hot soapy water and a non-abrasive pad. Spiral panners work in reverse of traditional hand panning. Instead of gravity separating gold from concentrates with the heavies sinking to the bottom of a pan, a spiral machine uses speed, water, and the angle of the spiral wheel to keep lighter material in the bottom of the wheel, while the heavier black sand and gold is brought up the leads. When set correctly, the sands drop off at the last moment and only gold is moved through the center of the unit and recovered in the cup.
Starting with the water first, find the lowest water pressure that will clean the light material from the leads as it climbs up the pan, adjust the angle and speed as needed so the heavy sands drop off at the right spot and you're ready to start processing your concentrates. After completing the basic setup, I adjusted the speed to keep the unit tuned in to variations in the types of material I ran. There are two models of the Desert Fox— a constant speed ($339) and a variable speed ($359). Since the difference in price is just $20, I highly recommend the variable speed model. The Desert Fox is a straight-forward and simple spiral wheel system that recovers gold efficiently, and has been manufactured by Camel Mining since 1969. It is compact, weighs about 10 pounds, and is ideal for carrying into the field. Gold recovery is exceptional and the learning curve is short..." Click here to learn more about the Desert Fox Spiral Panner on this website. Click image to download .pdf of field test review. Monday, August 01 2011
Fool's gold, iron pyrite, mica... no matter what you call it, at first glance it looks like real gold and sparkles like real gold in the sunlight or when viewed under water, but how do you know FOR SURE if those gleaming flakes are worth something... or exactly nothing? Tuesday, March 22 2011
In Sam Radding's publication "The $3.25 How to Gold Pan Book" that's included in the Gold Panning Beginners Kit, he reminds us that there is no single "right" technique to gold panning. After a little practice, everyone develops their own style, but Mr. Radding does give some very good pointers and tips to get beginners started, including 3 very important rules:
1. All of the material placed in your gold pan must be thoroughly washed while the pan is UNDER water. Break up all of the paydirt before you begin to discard material from your pan because gold may be trapped in clay, small roots, or cracks in the small pieces of bedrock you have in your pan. 2. Shake the pan VIGOROUSLY for about 15 seconds to settle the gold to the bottom after the material has been broken up. Fully submerse your pan in water to do this. Once the gold has been settled the first time, it's OK to pick out the larger rocks. Repeat several times. 3. Oil of any type on your pan can cause flat flakes of gold to float on top of the water. Thin flakes as large as 3/16" can be floated up and you don't want that because it can easily wash right out of the pan. A single drop of biodegradable detergent per pan will solve the problem! Have Fun and Good Luck Getting the Gold! |
 nuggets out of a crack in the bedrock.
 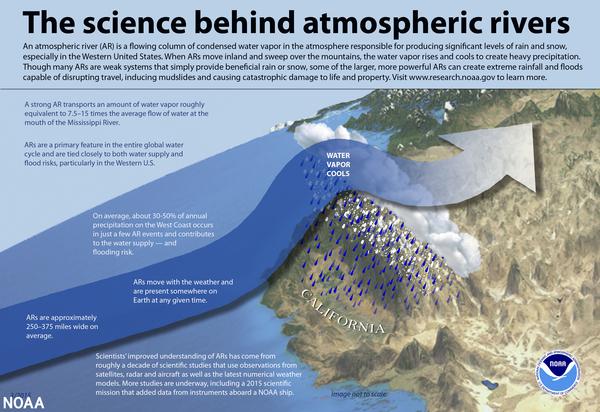 Atmospheric rivers are large, narrow sections of the earth's atmosphere that carry moisture from the earth's tropics near the equator to the poles. On average, the earth has four to five active atmospheric rivers at any time. A vast majority of atmospheric rivers happen in the fall and winter. The northern Pacific Coast receives the bulk of activity in the fall, and the California coast receives more in the winter. Since December 2022, the U.S. West has been slammed with back-to-back-to-back atmospheric rivers. These events provide as much as half of the region’s annual precipitation, bringing much-needed water to parched lands and adding to the snowpack in the high mountains. This year’s storms have done a lot to restore the landscape drought and is “greening up” the landscape and refilling many smaller reservoirs.
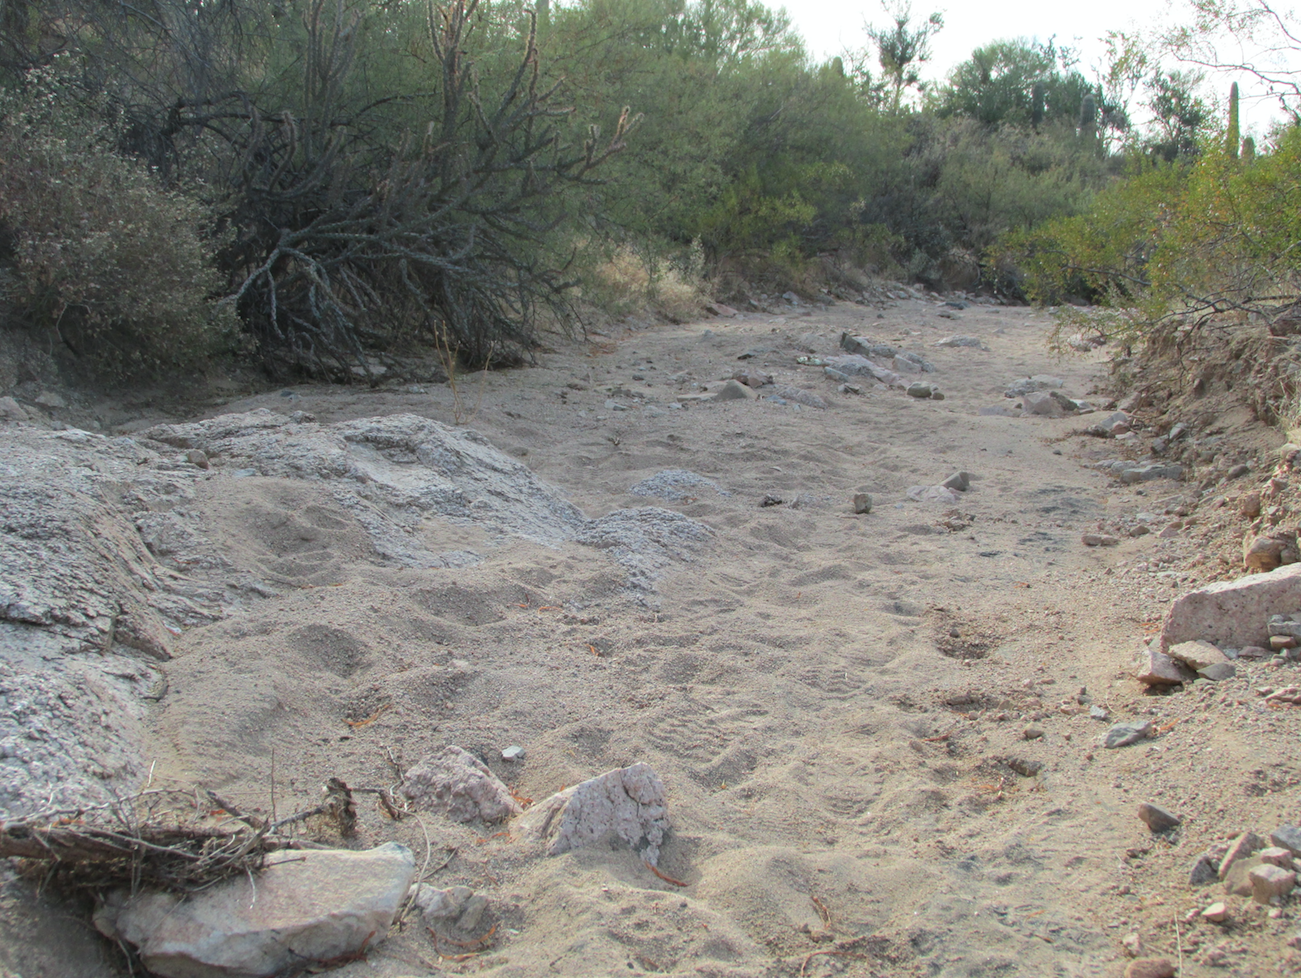 as a massive sluice box. Many of the principles you’re used to when prospecting and mining in waterways, will translate into desert mining. The most important thing to remember is that water is crucial to gold movement. Unlike a running river or creek with highs and lows, desert placers are much different in that gold is moved quickly during a flash flood, leaving gold stranded as opposed to being moved further by continual water flow in a creek.
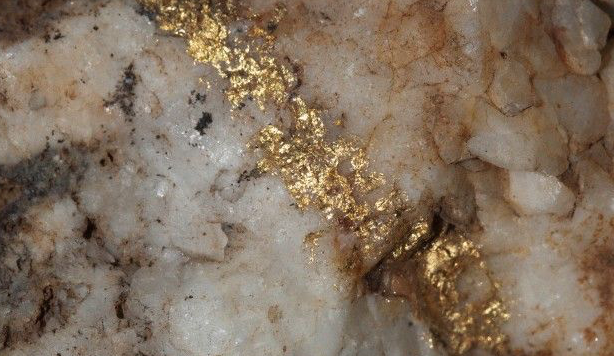 nd molecules from cubic miles of crust and transports them in a circulation loop. When this hydrothermal solution cools or chemically reacts with local rocks, the elements and molecules will come out of the solution and solidify (precipitate), forming ore deposits. The hydrothermal solution will begin precipitating on the sides of the opening and slowly fill the entire crack over time. This is how gold veins can form. These geologic processes take place over millions of years, and can happen many times over many years in the same location. Since the gold is locked up in rock, it is usually pretty hard to get to— usually requiring specialized mining techniques to mine and extract. Lode mining takes a lot more equipment and generally a lot more expense and is usually undertaken by large commercial operations instead of the average prospector.
 same historic areas. If you’re interested in giving recreational gold mining a try but not sure where to go, below are some key locations where you can still find the yellow metal by gold panning or metal detecting. Since gold was found in these areas, likely the old-timers didn’t get it all— so you may get lucky and strike it rich (or at least catch gold fever)! Rules and regulations differ from state to state, so always be aware of the local laws. And if you want to
 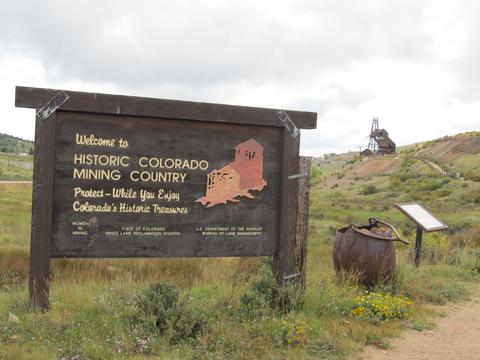 Clear Creek, Colorado. A gold-hunter's paradise, this river in Colorado is hands-down the best place in the state for recreational prospecting. Panning and sluicing for gold is permitted on the river bed at Arapahoe Bar in west Denver, and digging is allowed on the north side of the river there. There's also a large stretch of river about 10 miles upstream from Arapahoe Bar at Clear Creek Canyon where gold panning and sluicing are permitted. You may even have better luck here since the location is up-river.
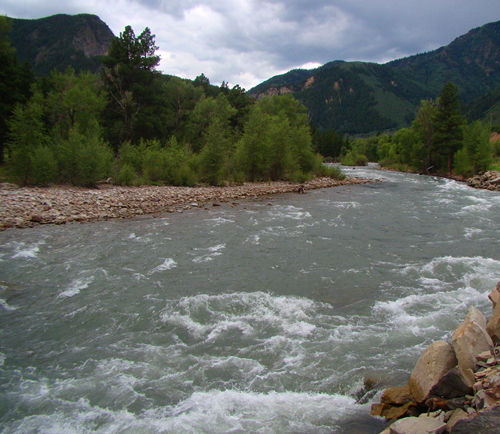 is loose sediment which has been eroded from a primary source, transported and further eroded by water, and redeposited. Since gold is extremely dense, it is easily trapped alongside other dense alluvial particles. The bits of gold found in these deposits of alluvium are called “alluvial gold.”
 nown as paystreaks. No matter if you are panning, sluicing, dry washing, or metal detecting, in many ways your success at gold prospecting comes down to locating these elusive natural pay streak concentrations. Keep in mind that most gold paystreak formations occur during times of flooding and that many factors affect how gold gets deposited. Perhaps the biggest factor is that gold is dense and is more than 19 times heavier than water. The denser an object, the more easily it will resist the flow of moving water. That means it takes a very strong and fast moving water flow to move along a nugget the size of a pea.
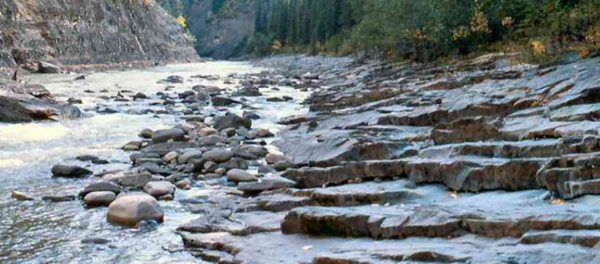

|
Nugget of News Blog |