


Friday, September 30 2022
In an area either rumored or known to hold gold, where should you look first? The creek, the surrounding hills, washouts, or just where? The characteristics of the gold in that area will help you to know where to start. If the gold is flat and pounded, that indicates it’s been in the water a long time. If the gold is coarse and chunky, you know you’re getting closer to the source. When gold is smoother, stop and go back to the coarsest gold and start working upwards until you find the source.
Keep in mind that gold is gold, so there isn’t necessarily a better type of gold. Some is just easier to recover. There are only two types  of gold deposits. The first type is “lode” which is simply everything that is still in the matrix and in the ground, and the other is “placer” —or everything else. of gold deposits. The first type is “lode” which is simply everything that is still in the matrix and in the ground, and the other is “placer” —or everything else.Lode deposits refer to gold that is still locked within its original solid rock formation. This formation of gold generally starts as a vein in rock and is formed over millions of years. Since the gold is locked up in rock, and can be mixed with quartz, calcite, pyrite, and other minerals, lode gold usually requires specialized mining techniques to extract. Lode mining takes a lot more equipment and generally a lot more expense and is usually undertaken by large commercial operations instead of the average prospector. Placer gold is the gold that most prospectors are more familiar with. Placer gold isn’t really any different than lode gold. It is simply a concentration of that same gold that has eroded and traveled away from the vein. Since gold is very dense, it will move downhill much slower than the surrounding sediment. It tends to become concentrated on or near the surface of the lode, forming a “residual placer” close to the original bedrock exposure. Gold found downhill from the immediate outcrop above the nearest watercourse is called an “eluvial placer.” Once it reaches the nearest waterway and is transported by flowing water, the gold now is known as “alluvial placer.” The origin of the dust, flakes and nuggets found by panning and sluicing is usually from a vein up on a nearby mountain. Bench placers were originally stream placers. Benches are simply where the water used to be, maybe even millions of years ago. They are formed by erosion or geological events such as uplifts, earthquakes or plate drops that changed the stream flow. Some of the most profitable mining is performed on benches. Many benches are highly concentrated by the alluvial deposits that still feed them. Stream deposits are the last resting place for gold. Once the gold has been released from the lode, gravity and nature does the rest. And unless gold gets stranded on a bench, it will find its way to the water someday. It may take a million years, but it will get there. When deciding where to begin prospecting, most of the time you’ll want to start panning in a water way, or a wash in the desert where water once flowed. Then let the gold tell you where to go from there. When the gold gets coarse and ragged, start to move up, looking in reverse of how it got to the spot where you found it. In addition to panning and sluicing you may wish to upgrade your mining efforts with a highbanker or power sluice, dredge or trommel. Moving soft soil or river gravel is obviously much easier than breaking rock, but for small scale miners, a rock crusher can pulverize 2 or 3 inch sized rocks into powder in no time. Move more material faster— get more gold! Thursday, September 22 2022
Gold can hide down in the deepest part of a crack or crevice or behind a boulder and often is best reached with a hand dredge, also called a "sucker gun" or "suction gun." This gold prospecting tool is ideal for working below the water line when a motorized dredge cannot be used. It helps you get the gold out of some really tight spaces, a hand dredge is well, handy, when you're prospecting along a river. If you've found a rich spot that is hard to access, these two hand dredges can produce some decent gold! Also check out the many accessories that make your hand dredge even better!
Clamps are not necessary unless you plan to use the system in strong current and want to be extra cautious. For users in deeper water or stronger current, consider wrapping a leash around the lid and tie it off at your waist to prevent the bucket from breaking away.
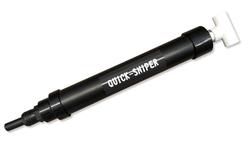
The Quick Sniper is a tool that uses some new ideas to help you collect the hard-to-get gold from heavy sands under boulders, in crevices, and behind obstructions. The “NOZZLE” of the Quick-Sniper is where the magic happens. Inside the nozzle is a short white plastic pipe that extends into the tube. This allows you to pump the handle four or five times before you need to take steps to collect sand and gravel. Instead of pulling the handle and then ejecting the material into a pan or bucket after each pull, the cavity created inside the tube will hold your heavies, allowing water and the lightest material to swirl out and go back into the water before you pull again. Shaking the pump gently will transfer the heaviest of sands and gravel deeper into the cavity. Then, after you have repeated this action a few times, pull off the cap and dump the contents of the pump into your pan or bucket. The flexible tube extending from the end of the nozzle is designed to pull out, allowing you to extend the reach of the tube about 4-5 inches. If this tube is sliding too easily, wrap some electrical tape around the inner end, and it will be more secure within the Quick-Sniper.
Saturday, March 26 2022
Gold is gold, so there isn’t necessarily a better type of gold, however, mining for lode gold has many more challenges than mining for placer gold. The formation of gold generally starts as a vein in rock. This is referred to as “lode gold” and is formed when molten rock in the earth’s crust heats groundwater under great pressure. In fractured bedrock with appropriate rock chemistry, super-heated water (hydrothermal) at approximately 400-700 degrees Fahrenheit dissolves certain elements a Placer gold is the gold that most prospectors are more familiar with. Placer gold isn’t really any different than lode gold. It is simply a concentration of gold that is created over time as it erodes from hard rock veins. When exposed at the surface, a mineralized deposit will break down and erode due to reactions with oxygen, water and wind, coupled with temperature fluctuations. Since gold is very dense, it will move downhill much slower than the surrounding sediment. It tends to become concentrated on or near the surface of the lode, forming a “residual placer” close to the original bedrock exposure. Gold found downhill from the immediate outcrop above the nearest watercourse is called an “eluvial placer.” Once it reaches the nearest waterway and is transported by flowing water, the gold now forms an “alluvial placer.” The origin of the dust, flakes and nuggets found by panning and sluicing is usually from a vein up on a nearby mountain. An ore body is a mineral deposit that can be mined, processed and sold at a profit. All ore bodies are deposits. Few deposits are actual ore bodies. Valuable gold deposits in placers are referred to as “pay streaks” instead of ore bodies. Over time, eluvial and alluvial placers can become covered with sediment. When buried long enough and deep enough, these deposits will turn into “fossil placers.” Sometimes the fossil placers are re-cemented into sandstone or conglomerate rock and then must be mined using hard rock techniques. Hard rock ores have mostly fine to micro-fine gold in solid rock; placers contain fine to coarse gold particles in a softer bulk material or matrix. That makes placers much easier to mine and process. Moving soft soil or river gravel is obviously much easier than breaking rock. For small scale miners, though, a rock crusher can pulverize 2 or 3 inch sized rocks into powder in no time! But for the average prospector, panning and sluicing will be more fun and more profitable, and as time goes on, you may wish to upgrade your mining efforts with a highbanker or power sluice, dredge or trommel. Good luck! Monday, February 21 2022
Depending on where you live and where you like to treasure hunt, you might still be buried under feet of snow. Or maybe spring has sprung and temperatures are on the rise there. No matter the weather, you probably have extra time on your hands this time of year, so put that time to good use. Even though you might not have been out in the field for the last few months, you can still be prospecting and getting prepared for a new season of gold hunting! In other words, use your downtime wisely, so you can hit the ground running as soon as Mother Nature allows. Inspect equipment. Did you properly clean and store your sluice and/or highbanker at the end of last season? In advance of heading Prepare your tools. Sharpen digging tools, picks, shovels, chisels and other specialty tools that require sharp edges. Now is also a good time to mark screwdrivers, magnets, crevice tools and other small implements with some bright colored paint. It’s amazing how easily tools can get “lost” in the dirt. A strip of bright yellow or red can help you more easily spot them. Double check the seals on snuffer bottles, hand dredges, and vials to make sure they’re tight. Pack your backpack or tool kit with everything necessary for a full day’s work. Maintain your metal detector. If your metal detector is still under warranty or giving hints of potential issues, the off-season is ideal for sending it to the manufacturer or taking it to an authorized repair shop to be fixed or tuned up. Check your rechargeable battery and make sure it is fully charged. Better yet, purchase a new battery as a back up. It’s also time to dust off the operator manual or search YouTube for “how to” videos pertaining to your brand and model. You’ll likely uncover some helpful tips and tricks, or learn a new recovery method. Is this the year to add a new coil or pinpointer? Now is a good time to consider upgrades and make those purchases earlier than you expect to use them. Do your research. The best kind of research brings together different forms of info from a multitude of sources. It is the info gleaned from combined sources that can help you to determine the best possible place to locate precious metal or gems— old mining district reports, mining history books, topo maps, aerial photos. Consult the Bureau of Land Management's LR2000 searchable database. The legacy system is undergoing upgrades; as the new systems is implemented, information will be easier to find. It can take a lot of time to research new areas, but when you find a new spot with good gold, it will be well worth your time and effort! It’s also a good idea to have alternate sites in mind just in case you cannot access your primary sites due to unforeseen closures.
Saturday, November 27 2021
If you’re ready to head to a sunnier climate this winter to do some desert prospecting, understanding the weather a Friday, October 01 2021
Sluicing is one of the most popular gold-recovery methods, and a sluice box is often a miner’s first purchase after a basic gold pan. There are many options to consider— riffles, matting, brands, and sizes. You might want to stick with traditional z-riffle sluices with ribbed matting and miner’s carpet, try the new mini or vortex Dream Mats without riffles, or a combination of different types of miner’s moss. No matter what you choose or upgrade to, sluicing techniques are fairly straight forward. The three main things to concentrate on for best gold capture are: proper selection and set up, material classification and processing, and monitoring. These three key steps will allow you to maximize gold recovery. Proper Set Up. This is by far the most important aspect of gold separation and recovery and includes angle, horizontal leveling, and water flow. Improper sluice angle is probably the most common error most miners make. The old rule of thumb of setting your sluice to “one inch per foot” is just a starting point and can result in too much water velocity. Too much water leads to improper breakdown and separation of heavy concentrates and material moving through the box too quickly, which can mean loss of fine gold. A Sluice Setter Digital Pitch Gauge can help, and so can focusing on water velocity instead of just the angle. Try the “one second per foot” method. Measure 12 inches down your sluice and mark that spot. As you feed material into your sluice using a side-to-side motion, count “one thousand one.” Your material should be passing the 12 inch mark as you finish that count. If it needs to be faster, increase the rear angle. If it needs to be slower, decrease the rear angle. As material travels down the sluice, be sure you are utilizing the entire capture area. If material is being forced to one side or the other, leaving one side clogged with too much material, while the other side is not processing at all, it could mean the sluice is not properly leveled horizontally. Material Classification and Processing. In order to capture small gold in quantity, finer classification is usually necessary, even though it’ll take more time to do so. Processing speed and the volume of material to put into the sluice (by hand or by scoop) must be matched to the volume and velocity of the water. If too much material is introduced into the flow, the water velocity will slow down causing the sluice to back up and lose gold. Gradually add smaller amounts of material to the flow using a wide scoop. Monitoring Your Sluice. When using stream flows, you are bound by the characteristics of that waterway—water speed, depth, and the ability to change your sluice angle. Mechanical flow is not limited by nature since you can control it. But no matter who is controlling the water (you or Mother Nature) monitor two factors while running gold-bearing material: how the sluice is processing the material, and the capacity of your sluice. How much can the sluice hold before it loses the ability to separate heavy materials and capture gold? If you see movement of heavy material down the sluice or movement of captured gold, it’s time to remove your sluice from the river, clean it, and reset it. When processing difficult material, set up a regular cleaning schedule so you don’t lose gold. Applying these three main techniques while sluicing — proper selection and set up, material classification and processing, and monitoring — will allow you to adapt to changing conditions no matter the type or brand of sluice box you prefer. And remember that old saying "practice makes perfect" — using the same gold-bearing paydirt over and over again means you can learn these techniques and tips much quicker and recover more gold! Monday, March 01 2021
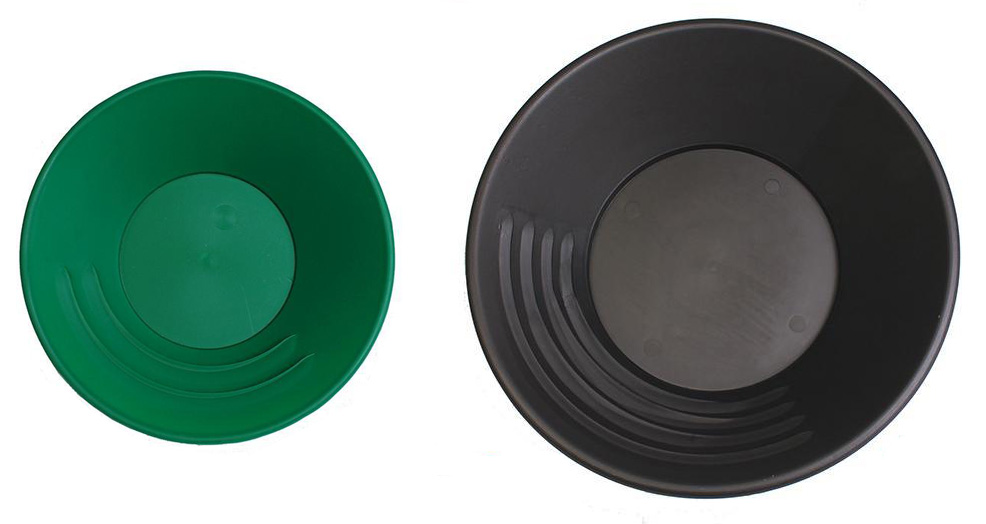
A gold pan is the simplest and most basic prospecting tool and is one of the oldest types of gold concentrating equipment. Plastic pans are recommended over the steel pans used by the 49ers. Plastic is light weight, so when you add water, dirt, and gravel to your pan, your arms won't get as tired compared to using a steel pan. And they do not rust or conflict with the use of a magnet. Size, color, and shape are really a matter of personal preference. You might want to have a couple different sizes of gold pans on hand (10 inch, 12 inch, and 14 inch are the most popular). Plastic pans generally come in green, black, and blue. The color doesn't effect performance, but green is the most common. The bright blue cone-shaped batea is the newest type of gold pan to hit the U.S. market. Gold panning kits are often the most economical way to purchase gold pans and classifiers (often called sifting pans) and other small accessories all in one convenient box. The point of panning is to shake the gravels, allowing the gold to settle downward and then to wash the lighter material off the top. When all the lighter material has been removed, only the heavy concentrates will remain in the bottom of the pan, including, hopefully, some gold! With a little practice, anyone can learn to pan for gold. Buying a bag of gold-bearing paydirt to use over and over again for practice in a tub is one way to get good at panning without ever leaving home. Gold panning “how to” steps founds here.
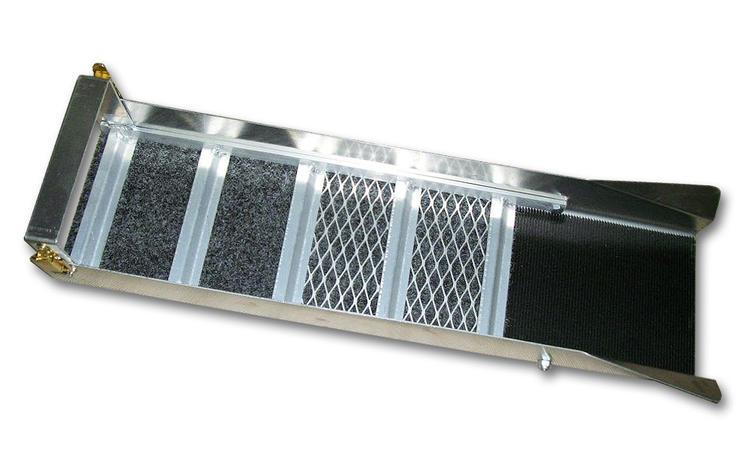
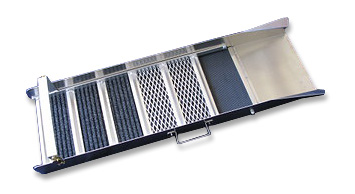
Gold concentrations are spotty, even in known gold-bearing areas, so sample and test often. Be sure to move on with your gold pan and don’t stay in one spot less you have good results. If you find a spot with fairly large amounts of gravel that yields good gold, then it’s time to bring in a sluice box. A sluice is simple to operate and have been used all across the world for thousands of years. After you’ve mastered gold panning and are ready to increase the amount of gravel you can process, a sluice box is your next step up from hand panning. Sluices come in a variety of sizes, most with gold-catching matting in the bottom that you need to clean up at the end of the day. Other models such as the Gold Well Vortex Drop Riffle Sluice, has no matting or carpets and uses vortex technology to catch fine gold.
As with the pan, the real secret of successful prospecting is not in operating the equipment, but in the skill of finding those natural gold catches. Learning to read the river or stream and recognize the places where gold might accumulate and then sampling those places to see if you are correct is the best technique. Inside bends, behind boulders or bedrock outcrops, and inches above the stream flow are all good places that you might sample, but there are plenty of other possibilities as well. The sluice and the gold pan may be among the most basic prospecting tools, but they are tried and true ways of finding some good gold! Saturday, December 05 2020
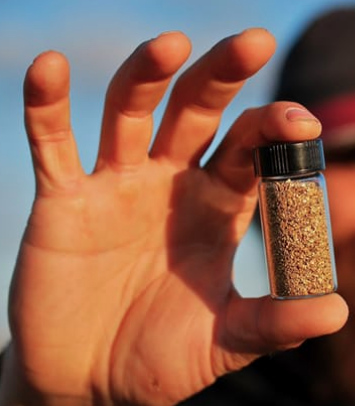
With gold prices on the rise, you might be wondering if now is a good time to sell some of the gold you’ve found over the years. And if Gold dust consists of flour, fines and flakes. This is the stuff most prospectors find as a result of panning, sluicing and dredging. This form of gold is probably the lowest value because it will have the most impurities. Small nuggets start at about 1 gram and are a step up from gold dust in value. Medium nuggets, on average, weigh up to 31 grams or 1 troy ounce. Large nuggets are defined as weighing 1 troy ounce or more. Larger nuggets usually command higher prices, and could be considered museum quality. Gold in quartz is usually a collector’s item or a museum piece, therefore, prices widely vary. Keep in mind, though, that even nuggets that appear to be pure gold are not. They will have impurities embedded and blended into the matrix. There is no such thing as 100% pure gold from nature. In fact, in North America, the average purity for prospected and mined gold averages 60% - 85%. The impurities in natural gold consist of metals such as silver and copper and other minerals that have combined with gold on a molecular level. Tests, referred to as an “assay” must be performed to accurately measure the purity of gold. Some jewelers and pawn shops can analyze your gold to determine purity with an XRF gun (X-Ray Fluorescence); expect to pay a charge for that service. The majority of gold bought and sold from small-scale prospectors include: private buyers (some advertise on eBay, Craigslist, and other online sites) pawn shops, independently owned jewelry stores that craft and repair their own jewelry, museums looking for unusual specimens or rare nuggets, and refiners. Most refiners are contracted by large gold mining operations, but some smaller refiners will purchase gold from prospectors in any form or mesh size. An internet search will reveal refiners that will buy from individuals. If you want to sell your fine gold or nuggets, there are a few things to do first. You may not get a totally accurate assessment of your gold’s value, but you’ll at least have a ballpark estimate. Do NOT melt your gold. Keep it in its original form.
When you make contact with potential buyers who specialize in raw and natural gold, be sure to ask about and understand their procedures and policies and payments. Ask how your gold will be assayed and how the purity is determined. If you are shipping your gold to a buyer, understand their requirements for packaging and shipping, insurance, and other safeguards. Some buyers pay for the testing and shipping, others pass along the costs to the seller. Remember that buyers have costs and will not pay 100% of the spot price. The exception to this would be if you have museum specimens or very large nuggets. In those instances, buyers will pay more than the spot price. Be patient and shop around to not only get the best price, but to find a buyer who you can work with now and in the future. Get recommendations from fellow prospectors, or clubs such as GPAA (Gold Prospectors Association of America). If possible, make your first transaction with a new buyer a small one to assess your experience and satisfaction with the overall sales process. When you feel you have had a successful first transaction, you’ll feel confident you can continue that relationship in the future. If you've not yet found your first gold, get Alaska paydirt here. Monday, November 16 2020
The use of water for grinding and milling has been in practice for thousands of years. From simple water wheels to inventors such as Water Flow. The easiest example of how water dynamics affect gold is the classic inside bend in a waterway. When stream flow is straight and velocities are at their highest, gold will be suspended in the flow. As a bend in the stream causes flow to begin slowing down, the heaviest gold begins to drop out because the water no longer has enough velocity to suspend the material. The stream continues to lose power as the bend length increases and smaller and smaller gold continues to be deposited until there is no longer any in suspension, or the remaining water flow and speed cannot carry it farther downstream. Water velocity and flow affect attempts at recovery in all capture devices in exactly the same way. Each piece of gold in classified material requires a certain flow and length of time to separate, drop out, and be captured based solely on its relative size and weight. If the velocity and flow are too great, the gold will remain suspended and will exit the machine regardless of machine length or method of recovery. This is why some miners are lured into a false sense of security just by using longer sluices. Improper water depth in the sluice can create additional problems in recovery. Methods of material collection have much less effect if the gold is suspended in the upper part of the water flow. Most sluices provide little or no material agitation to break up the classified material and provide the necessary change in flow that facilitates gold separation. Lack of agitation allows smaller pieces to be carried through the equipment. Classification. There is a direct relationship between material classification and water speed, which is often overlooked. It is common to classify for ease and speed of filling buckets rather than size of gold being targeted. Larger classification requires increased water speed to push the material through most recovery systems. The trade-off is forfeiting recovery of finer gold by increasing the length of drop time. This reduces the number of gold capture attempts and even machine effectiveness by having concentrations of larger material wedging into riffles, drops, etc. Running dry material requires the sluice to liquefy the material while it is passing through. Gold particles will suspend in the dry material, reducing the chance of capture. Many miners use a scoop and drop their material into the machine in large clumps. This also allows particles to suspend instead of being processed. Material should always be wet prior to processing, and material should be cast (sprinkled) side to side across the machine when using a scoop. Riffles. Some riffle designs are actually not that ideal for gold recovery. Some sluice riffles are evenly spaced, making them too far apart to impart the “vortex” or reverse underflow. What actually happens is an up-and-down wave motion as the water travels down the sluice. The only “action” imparted is the same negative flow that happens when water flows over a rock or some other obstacle in a stream. Material suspended at the bottom of the flow is deposited as the water climbs over the riffle and slows. Material that is heavy enough and can no longer be suspended drops. The rest of the material remains in the flow and continues to be carried down (and possibly out of) the sluice. Flare. Most modern riffle sluices (standard and drop designs) are susceptible to improper setup angle, which can either clog the machine with material or blow it out completely. Either problem results in the loss of gold. Another big mistake in sluice design and operation is the “V” fallacy. The idea that channeling your water towards the center of the sluice using a wide-angle flare will increase its effectiveness and therefore increase gold recovery is false. On top of that, miners drop material into the center of the slick plate. This forces material into the center of the sluice, which is quickly overloaded by the volume of material and will cause the first series of riffles to lose their effectiveness. Remove the flare from your sluice to eliminate the center concentration and create an even flow across the machine. You can create a V-shaped wing dam with a short straight section in front of your sluice if you need increased water flow or speed. Casting your material across the width of the sluice will eliminate overloading of the riffles. Understanding how water height and speed changes your recovery can also make all the difference in boosting gold returns: Water height. Begin with the water flowing just above the riffles or drops. Run small amounts of material and watch as the dirt passes through the sluice. Notice how the material enters the riffles or droops. Be sure to use the correct method of casting material evenly from side to side. Gradually increase the water height until processing suffers. This will determine the minimum and maximum water height for your sluice or highbanker. Water velocity (speed). Set your sluice water height for max processing and a fairly fast flow, then gradually reduce water speed as you process small amounts of material. You may have to adjust your sluice to maintain proper water height through this process. Note how changes in water speed decrease the quality of material processing. Spend some time exploring water dynamics. Introduce only one variable at a time, and verify how your gold recovery is affected before moving on. No doubt, with a little more understanding and experimentation, you’ll recover more gold with your sluice! Saturday, August 01 2020
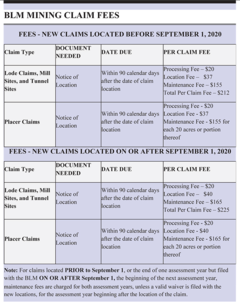
The maintenance fee for an existing lode claim, tunnel site, or mill site will increase to $165 on September 1, 2020. For placer mining claims only, the fees will be $165 for every 20 acres of land or portion thereof. Miners who file a Small Miner’s Waiver on or before September 1 will be required to file an Affidavit of Assessment Work Form on or before December 30, 2020, including the $15 processing fee per claim. Each payment must be accompanied by a written list of the claim names and BLM serial numbers for which the maintenance fee is being paid. You can find your state BLM office at www.blm.gov. Please note that new mining claims filed on or after September 1, 2020, will be subject to the new fee schedule. It's highly recommended that you send your documents by registered mail or hand deliver them while retaining copies for your records.
When you get to the claim search page, select the state where your claims are located and enter either the last name of the claimant, the claim serial number, or the lead serial number to search for your claim. Claimants who file on paper must include a document listing the claim/site name(s) and the BLM serial number(s) assigned to each claim for which the fees are being paid. Do not forget to file new claim forms or affidavits of assessment with your county recorder as well. Saturday, May 02 2020
Researching new areas in which to prospect for gold, gems, or whatever you are seeking can be a lot of work, but since we’re now
Tuesday, February 11 2020
The big gold rushes of the 19th century have long since ended, but in most cases you can still prospect for the precious metal in these Below is a very short list that offers a few ideas only. Beginners should search the internet or join a local gold prospecting organization for more information.
Keep in mind that even if there has been no major “rush,” major amounts of gold have been found in many other states, too, including Georgia, Michigan, Montana, New Mexico, Oregon, South Carolina, Tennessee, Texas, Utah, Virginia, Washington, Wisconsin, and Wyoming. Good luck! Monday, December 23 2019
Did you know that “bad” weather can be a plus for prospectors? No one ever hopes that Mother Nature causes catastrophic loss of life and property, but the ups and downs of weather events in any gold-bearing area are something to take advantage of. Nature can help all of us in our quest for the shiny stuff! Typical winter storms usually do not create enough havoc to force substantial amounts of "new" gold into movement. However, when Mother Nature really goes to work over a “bad” winter or for an extended period of time, a great deal of gold can be set free, creating a bonanza for gold hunters in spring and summer. Gold veins that have been hidden for decades suddenly can be exposed. Floods can also sweep gold out of abandoned mines and wash it downriver. Known gold digs can be washed out, trees uprooted, and the landscape eroded. Benched gold deposits can be released and transported back into running streams. If you’re in an area that experiences high-water events, get out and keep an eye on the water flow so you can try to figure out where the gold actually drops out. Watch the flow lines around boulders and trees. Watch where the flows slow down. The rule of thumb — gold is in the inside bend where water is slowest — is a rule of thumb, but not always 100% accurate. On the flip side, if drought conditions prevailed last fall and continue this winter, adequate water levels needed for panning and sluicing may be difficult to find. By knowing this ahead of time, you won’t waste your time. You can plan to travel to better areas in the coming months. Water isn’t the only force that can work in a treasure hunter’s favor. If you are a detectorist, keep an eye on the wind. Downslope winds can strip and scrub away a great deal of surface material. This wind-driven movement of top sands can make an exciting difference— areas that came up empty just last year may suddenly be productive for a metal detector! Whether you’re in the midwest, southeast, or way out west, water table elevations and annual precipitation can have a significant impact on the amount of gold exposed in waterways, which can affect the probability of what you’ll find in your pan. Greater than average winter precipitation may swell waterways, liberating trace gold previously stranded in ground by droughts of late summer and early autumn. Good luck and be safe! Sunday, July 14 2019
Alluvial gold refers to tiny gold flakes that come to be through water erosion and movement. In geology, alluvium The alluvial environment is a very complex one, with many natural forces competing with each other. The forces that lay down gold are a summation of many flood water events of varying intensity that cause the reworking of sands and gravels. Between major flood events, water naturally flows along the already created path and typically the gold present in the gravel or on the surface will not move much. But the larger flooding events can change the drainage routes and even the river’s shape. Some curves can be shut off from the stream and bypassed. Where the water speed decreases, gravels will drop out of suspension, creating alluvial pay streaks that are typically located along and near the riverbed. To identify where a pay streak might be located, take the flow of the waterway into consideration. The most productive streaks are formed as a result of major floods that are significant in terms of both water flow and intensity of erosion. Greater amounts of gold are present here as compared to regular gravels. Pay streaks tend to possess a comet-like form. At the “head” or “heart” is found the richest concentration of gold. At this location, the gravel is coarser and the sandy and silty fraction is much less. This little bit of silt is present only for a few centimeters on the surface, laid down in the last phases of the flood as the silt is dropped. The gold in these gravels is typically small flat flakes, with maybe a small picker or two. As gold prospectors, our objective is to learn to read a stream and recognize the pay streaks it contains. Think about where you are going to dig before you start and then repeatedly test the gravel you are processing. It is important to consider the presence, form, and depth of the bedrock on which the water and all the alluvial gravel deposits are sitting. In many cases, the gold will naturally concentrate in the lowest part of the riverbed, making a gold-rich path. During high water events, much of the gold is picked up and put back into motion, which leads to forming new pay streaks. Some will be laid back down along the low line of the stream, but may also end up a little farther downstream. The gravels in contact with the bedrock or false bedrock base are often the richest. The same facts apply to the alluvial pay streaks that are formed on gravel bars— the lowest level of the gold-bearing gravel is normally the richest. The alluvial environment changes over time. Alluvial pay streaks generated 100 years ago could become buried, then subsequently be eroded and exposed again. The erosion might be in part or in total, generating a new series of paystreaks further downstream. Pay particular attention to large boulders and trees. Obstacles like these may partially block the water flow and provide an opportunity for increased gold concentrations, especially behind the obstructions. If there are fissures, holes or natural traps in the stream, be sure to sample these areas, too. Although high water events are sporadic, when you do find a paystreak caused by one, it can be a very productive spot. Stick with it and keep in mind most are small and narrow and best worked by hand with a sluice and gold pans. Nugget of News Blog Sunday, December 30 2018
When prospecting an area that’s known for gold, put yourself in the boots of the old-timers who came before to Host rock (or bedrock) could be shale, diorite, granite, quartz, clay or other material. Keep an eye out for changes in the area’s host rock and notice the direction in which it’s running. Contact zones occur when a rock or mineral cuts or crosses the host rock. Generally, gold is deposited along contact zones, which can be a few inches or several hundred feet wide. If bedrock in your area runs north to south and you notice a color change in material that runs east to west, you’ve found a contact zone. Outcroppings are a lump of high ground with weather-worn rocks which are generally rounded and usually situated on ridges, but can be located anywhere. Especially look for iron staining on outcroppings. Ditch lines of yesteryear were generally dug into and run along somewhat level ground. Very close to diggings, especially in hilly or steep terrain, they may have been cut loose to wash downhill. Follow the old water ditches and see where they end up. Exploratory trenches were not used for water but most of the time were deeper and would often circumnavigate a rich area that may be throwing gold from clay lines, pockets, quartz seams and any other local contacts. Trenches were dug simply to expose any contacts that may be present. As a contact was crossed, old-timers checked it out in both directions for values. Rock cairns are piles of rock or stone used for claim corners. Standing high on a slope looking down is a great vantage point from which to spot cairns and other man-made landmarks. By locating a historic claim, you definitely have a great place to begin! Monday, October 01 2018
A highbanker, sometimes called a power sluice, is a very flexible and efficient piece of equipment when you’re gold mining in areas with a good amount of water. Their main use is to allow you to pump the water to the gravels rather than carrying heavy buckets of gravel to the water. The optimal place to use a high banker is a location along a river where there are lots of bench gravels that have been left Hopper: The feed box contains a grizzly screen with a water spray bar. The water is normally sprayed from simple plastic pipes with a series of small holes drilled into them. A water valve located ahead of the spray pipe controls the amount of water flow going into the feed box sprays. A series of rods are arranged to make a slat-type screen (called a grizzly) that allows water and smaller material to fall through and go down into the sluice box. The large rocks that are caught by the grizzly are washed with the spray and then rejected. The slats should be set on an angle so that most of the larger gravel will slide off the slats by the pull of gravity without you needing to push them off by hand. Some rocks may hang up, but for the most part, they will slide off on their own. The spray water comes out under a lot of pressure and washes any loose sand or clay into the sluice and also provides part of the water needed to move material through the sluicebox area. Sluice: High bankers utilize a normal sluice to recover the gold from the gravels, and the operation of the sluice box portion of a high banker is basically the same as that of a hand or stream sluice. With a highbanker, the water is supplied by a pump rather than the flowing water of a stream. The matting and miners moss underneath the sluice’s riffles are the same. Gold flakes get caught in the riffles and moss the very same way as it does in a hand sluice. A nice back-saving bonus on a high banker is that it will be on legs, so you can operate it on any terrain. A normal hand sluice lays on the bottom of a streambed. Pump: The centrifugal type pump should be set near the water as it is more efficient to pump water uphill to the sluice than to suck it up to the pump. This is only important where there is a lot of vertical distance between the pump and the sluice. If there is less than 10 feet of vertical distance, it does not matter much. Pumps can be set up quite a distance away horizontally from the sluice. It will work so long as there is sufficient water at the source where the pump is located. Vertical distance is more of a problem than horizontal distance; 30-40 feet is the maximum vertical climb for most pumps. The standard lay flat type of hose is used to carry the water up to the feed hopper. Be sure to have enough hose and some extra in case you spring a leak! Remember to position the pump so that you aren’t breathing motor exhaust fumes all day! The big advantage of a highbanker is working materials that are found in a location away from a river, like benches and other isolated patches of gravel. Moving the water to the sluice with a pump saves you from carrying the material down to the stream. The only disadvantage to highbanking for gold might be that it’s more equipment to pack around than just your usual digging equipment. It would be wise to test your ground before hauling in your high banker. Testing will indicate if there is enough gold in the gravels to warrant bringing in more than a hand sluice. If you have at least an amount of gravel that represents a full day of digging and sluicing, bring in a highbanker. The adjustment of a high banker is much less than the steep slope you usually would use with a hand sluice. Adjust the water flow to the minimum flow rate that it takes to get all the rocks that fall through the screen to keep moving down the sluice box section. If rocks or gravel hang up and bury the sluice, you need more water and perhaps a steeper box angle to wash that stuff away. The height of the feed box is another important adjustment. You want it low to allow you an ease of feeding in the material. If too high, you will hurt your back lifting heavy shovels full of gravel. Too low and you may be constantly sweeping away tailings at the back of the sluice. The feed box itself should be adjusted to ensure the angle of the slat screen rods (the grizzly) allow the gravel to be well washed before it moves out as waste. This is because a lot of small gold adheres too the larger cobbles. If rocks and cobbles just roll through without getting a thorough washing, you will be losing gold. The rejection of the large oversize rocks is important as it lets your sluice to a better job. If those bigger rocks make it into the sluice, you’ll be getting much worse recovery of fine gold. Be sure the foot valve or strainer on the intake hose is clear and able to deliver a full water flow. Sometimes the foot valve can get clogged with leaves or other debris. A blocked or partially obstructed foot-valve won’t allow the high banker to operate properly. For environmental reasons, it is a good idea to have your water drain into a pond or pit that is not directly connected to the stream. This is so that the clay and mud can settle out, otherwise make sure there are no legal issues of putting that mud back into a flowing stream. Some models of highbankers can also be run as a dredge. These highbanker/dredge combos can save you money, offer flexibility, but are also a bit of a compromise since the dredge portion is generally small. Combo units will be equipped with a suction nozzle type of intake. This design is best for working small shallow streams and tributaries. These systems are designed to be set up alongside the stream edge and have adjustable legs rather than float systems that you’d normally see on a larger suction dredge. With a suction nozzle and more hoses, the combo unit will operate as a suction dredge, picking up material from underwater crevices and delivering it to the sluice. Highbanker/dredge combos also can be ideal for working in and around ponds in old hydraulic mining pits. The next time you are out in the field, consider if a highbanker or power sluice can help you get more gold. To determine if the answer is yes, ask yourself these questions: Where is the nearest water? Can I shovel directly from the diggings into the feed hopper? Can I set it up to allow gravity to do a lot of the tailings clearing work? Where will the pump go? With a little thought and planning, you’ll be able to decide if highbanking for gold will increase your productivity. In most cases it will. Move more dirt, get more gold! Good luck! Monday, July 30 2018
Places where gold naturally concentrates in an environment of streams and drainages are k When deciding where to start sampling, it’s helpful if you think of a river or stream as a sluice box. Waterways obviously don’t have aluminum riffles and matting, however, they do have natural gold traps that do the same thing that a sluice will do— allow gold to settle out of gravels and be caught while the bulk of the sands continue downstream. Heavy material such as gold doesn’t get spread along evenly, it is most likely caught in certain areas. The downstream parts of inside bends in a stream are favorable places to look for pay streaks. Just how good depends on how sharp the bend in the stream actually is. Usually the sharper the bend, the better the pay streak. If a tributary is known to have coarse gold, look at the intersection of the tributary and the main channel. Behind an obstruction (large boulder, an island, or an outcrop of bedrock) is another good place to look for a pay streak. Boulders and other obstructions can create turbulence where ordinarily smooth flowing water turns into fast flowing whitewater. It is between the fast white water and the quiet dark water that gold drops out. The coarsest gold tends to be found on the outer parts of the pay streak, and the finer-sized gold is on the inner part of the pay streak. When you are working, if it seems as if the streak is petering out as you go toward the middle of the water flow because you are finding little gold, this region of the pay streak is often where the biggest number of nuggets are most likely to occur. Once you know where paystreaks form, you might wonder if they are more likely found on bedrock or in gravels. They are nearly always found on bedrock or some sort of false bedrock. False bedrock might include caliche, a clay layer, or just a well-packed hard pan. You may just get lucky and hit something great with your first shovel of dirt, but more likely you’ll need to test a few different places. Even very experienced prospectors need to keep testing to find those hotspots and paystreaks. Good luck and keep sampling! Tuesday, February 06 2018
Historically, California has been known as the land of the big nuggets. After the Gold Rush began in 1849, Plenty of stories abound from California, but plenty of big gold has come from other states as well. Colorado's biggest nugget weighed in at 156 ounces (13 troy pounds). It came from the Gold Flake mine located on Farmcomb Hill in Summit County, Colorado in 1877. It's easy to see why Montana's nickname is the "Treasure State" since it has produced a few big nuggets, too. One weighed 53 ounces and was displayed at the Paris World Expoition of 1889. The largest in Montana was over 170 ounces and was dug at a depth of 12 feet in Snow Shoe Gulch on the Little Blackfoot River. Nevada's largest nugget was taken from the diggings of the Osceola District in 1878. It weighed 24 pounds (but eight pounds of that was quartz). The old Spanish miners found plenty of big gold in New Mexico, including one nugget in the late 1890s that weighed over 65 ounces.
North Carolina's claim to fame is the Reed Gold Mine located in Cabarrus County. It was the site of the first documented discovery of gold in 1799. For years, that 17 pound nugget was used as a doorstop because no one recognized what it was! At the time, it was worth roughly $4,000 (when the price of gold was $20.67 for an ounce). The Reed Mine actually produced a lot of big gold, including some weighing 28 pounds, 17 pounds, 16 pounds, and 13 pounds. Two different nuggets came from this area that weighed eight pounds each and another two nuggets were nine pounds each. Several more nuggets have been unearthed that weighed five pounds and less. These examples of where large nuggets have been found are by no means exhaustive. A Google search will provide lots of fun stories about past and present finds across the United States. But no matter who has found what, the big question remains: Where do you hunt for big gold these days? Generally, big nuggets occur in places where rich gold-bearing fluids flow through the same pathways for a long period of time, allowing continued deposition of gol The simple answer to where to hunt for big nuggets is to hunt where they have been found in the past. Past finds of big gold indicates these locations have the right geology for their formation. Big nuggets in a stream environment will work their way to bedrock very fast and stay put. They will often be lodged in deep crevices. Keep in mind that big nuggets are also worth more than their actual metal value. The fact they are so rare adds to their value. If you haven't found your big gold yet, keep looking! And if you can't wait to own your own shiny stuff, buy gold nuggets here. Nugget of News Blog Wednesday, June 14 2017
Fun and exercise are two great reasons to go gold prospecting, but you might as well make some money while you're at it, right? The best way to do that is to increase production rates. Assuming you are mining on a known gold-bearing claim or waterway, volume is the key to your success!
A dredge or highbanker/suction dredge combo is the next step up. A dredge uses a gas motor to generate the suction that will load and transport the material to the sluice, which greatly increases volume, as well as allows you to reach gravel on the river bottom that would otherwise be inaccessible (unless the river is seasonal or there is a prolonged drought). The more material a dredger can push across the riffles, the more gold can be recovered. An additional benefit to dredging is that it also allows you to clean gold out of all the cracks and crevices in the bedrock. A shovel just cannot do that. The size of the dredge intake nozzle is the most important factor in how much material a dredge can process, but it is not a direct one-to-one relationship. For example, a 5 inch dredge will not move twice the material that a 2.5 inch dredge can move. It actually can move much more. The surface of the hose is figured in square Beyond dredges or highbanker/suction dredge combos, you can get into some professional mining set-ups that use trommels and jigs and shaker tables and earth moving equipment. Every deposit is different, varying in size and grade and structure. Environmental conditions and access will dictate mining methods and knowing the rock types and size of the gravel is critical in determining which equipment will work best for increasing your production. Finding a suitable deposit to mine and finding a way to work it economically— to justify your time and expense— is the first step. Then choose the right equipment to increase your recovery rate and speed of recovery and make more money. Good luck! Saturday, April 01 2017
Typical winter storms that regularly occur in gold-bearing areas usually do not create enough havoc to force substantial amounts of "new" gold into movement. However, when Mother Nature really goes to work over a “bad” winter, a great deal of gold can be set free, creating a bonanza for gold hunters in spring and summer. Gold veins that have been hidden for decades suddenly can be exposed. Floods can also sweep gold out of abandoned mines and wash it downriver. Known gold digs can be washed out, trees uprooted, and the landscape eroded— all pluses for prospectors! When tons of rock, cobble, and boulders are swept downstream along bedrock during a huge storm, quite a bit of destruction occurs. Plants, weeds, and trees that normally grow along the river and gravel bars are washed away. And when a major storm or flood tears up large portions of a streambed, a fair amount of this newly-released gold, because of its weight, will be deposited along the riverbed and settle into cracks and crevices (hand dredges are an ideal tool in this situation). Flooding on this scale occurred in Colorado in 2013. After the heavy rains in the west this winter (in California, Oregon, and Washington to name just a few affected states), this summer promises to be one of the best seasons for small scale miners in many areas. Even farmers in Thailand are looking for gold now to try and make up for the economic loss of ruined pineapple crops caused by floods. Stream bed layers caused by several floods over time are referred to as “flood layers.” Flood layers are usually a different color, consistency and hardness from the other layers of material within the streambed, making them easy to recognize. Larger, heavier pieces of gold will work their way down toward the bottom of a flood layer as they are washed downstream. The smallest and lightest flakes of gold might not work their way down through a flooding layer at all, but might remain dispersed within the material. Of course not all flood layers contain gold in large quantities, but it’s a good place to start. In early spring, rivers are still high in most places, but in the next few months, stream beds could be exposed for better gold hunting. Some of the best areas to look for flood gold are where the stream or river widens out, or levels out, or changes direction. These areas can allow concentrations of gold to collect either on bedrock or in the contact zones between layers. Another place that tends to collect gold are gravel bars, especially the ones located towards the inside of bends in a waterway. No one ever hopes that Mother Nature releases the type of fury that causes loss of life and property, but when a catastrophic weather event occurs in a gold-bearing area, take advantage of it. Get out there and get your share of the shiny stuff! With so much more runoff than normal shaking gold from them thar hills, the best prospecting will come in the summer months when the water has receded. Good luck and be safe! Tuesday, November 01 2016
Researching and exploring new areas in which to prospect for gold, gems, or whatever you are seeking can be a lot of work, but the process can go much quicker and easier when you know where to start. If the weather where you live is keeping you indoors much of the time this winter, use your downtime wisely by researching and planning for next spring and summer. But don’t rely on just one source of information. Confirm it through several sources. It’s not that you don’t trust Uncle Joe or a “friend of a friend” tip, but facts can be distorted or forgotten over time and that “secret” nugget patch found 30 years ago just might not t The best kind of research brings together different forms of info from a multitude of sources. It is the info gleaned from COMBINED sources that can help you to determine the best possible place to locate precious metal or gems. The more info you can lay your hands on, the better. Consider these resources: Old mining district reports and mining history books. Most western states have some form of mining and geology agency, although they all have different names depending on the state. Find out what information is publicly available at the agencies located in the area you will want to prospect. Old history books can be more help than any state agency because they were written by folks with ties to the area they wrote about. That means they often include valuable information on old mining discoveries or operations that didn’t make it into a government report. Topographic maps. Many old mining areas are shown on topo maps, but usually not on the newer versions, so try and find older topo maps. Many of the newer versions may have old mines removed as a way for the government to “keep the general public safe” by not advertising the whereabouts of the old and “dangerous” mine shafts. Aerial photos. Google Earth is amazing in its quality and detail of photos. Many times you can see individual trees, hiking trails, rock outcrops and even hand-stacked piles of rocks left behind by old-timers. Sometimes larger features and patterns (areas where miners removed a lot of brush, for example) cannot be seen from ground level, but are obvious from far up in the sky. This is also a good way to get an idea of the condition of the roads in the area so you’ll know in advance which look to be commonly traveled. Google Earth ties in with GPS, too. You can review the photos, check them against maps, and get the GPS coordinates of the precise location you want to visit. No more guessing if you have arrived! You will know for sure with GPS that you are in the right spot. Reference libraries. The librarians at state mining divisions and university libraries are generally very friendly and helpful. These libraries are open to the public, so don’t feel shy about requesting help. Any university with a good-sized geology or mining program should have quite a few geologic reference resources including old reports, magazines on the mining industry, thesis reports by graduate students, and even reports by engineers and geologists who were on site at the big operating gold mines in the late 1800s. Many of the old books and reports found in the university libraries will be out of print and cannot be purchased anywhere, so be sure to make photocopies of any documents you need while you are onsite. Many prospectors are discouraged by the amount of work and time that can be involved in researching new areas, but when you find a new spot with good gold, it will be well worth your time and effort! Monday, July 20 2015
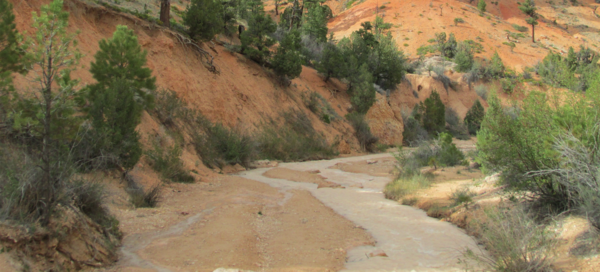
As you read this, water levels in many Western states will be at their lowest of Gold sniping, also called crevicing or cracking, is basically cleaning out cracks and crevices in and around bedrock— areas that were submerged for many, many years but are accessible during times of drought. These areas have the potential to trap and retain gold. After visually determining the best places to snipe (more on that later), all you need are a few simple tools for collecting and panning the high-grade material from those cracks. Basic, yet effective! When normally rushing rivers and streams are reduced to a trickle and boulders and bedrock are exposed, you won’t need a wet suit or snorkel, only some waders. The boulders can still be very slippery, though, so keep that in mind when crossing waterways. Most snipers do use a mask and snorkel and wetsuit. In addition, the basic tools for sniping include a plastic gold pan, long stainless steel tweezers, snuffer bottle, plastic vials, pry bars to loosen jammed-together rocks, a garden trowel or similar tool to dig behind boulders, and a bucket. A hand dredge or nugget sucker can really come in handy, too. The first step in prospecting, of course, is to stop by the appropriate BLM or Forest Service office to determine where you can recreationally hunt for gold. You don’t want to accidentally trespass on someone else’s claim. Once you’re there, visually study the river and think about all the areas that gold might be hiding. Loose flakes or nuggets of placer gold are much heavier than the surrounding sand and gravel, therefore, the dense metal gradually works its way downward and collects in seams in the bedrock. The inside bends of rivers tend to be good collection spots because the water slows there, allowing the heavier sands and metals to collect in and around anything that obstructs its path. Try investigating the exposed underwater root systems of any trees found along the bank, too. These act as natural gold traps. Large boulders offer opportunities as well. It's best to snipe on the downstream side of these monoliths since the back eddies occurring there sometimes pull gold and other heavy materials out of the passing current and force them to settle.
When you need a break from getting your feet wet (or the rest of you), panning along the bank or using a gold vacuum in the dry material along the shoreline can be lucrative. When the water level is low, plants, logs, and smaller rocks that used to be below the waterline are now visible. Gold might have collected around these obstructions when they were under water, but no one thinks to look here because they’re now in plain sight and almost too obvious. What others miss could be your bonanza! Bigger is not always better. With most mining operations, the more dirt you move, the more gold you get. As difficult as drought conditions are for farmers, ranchers, and many others, prospectors can use the low water levels to our advantage. Now is the time to work potential bedrock hot spots that could never be reached in normal years. Summer won’t last long, so get out there and get your share of the gold… sniping is just one more mining method that could have you yelling “Eureka!” Saturday, May 09 2015
In July 1986, Life magazine described Nevada’s U.S. Highway 50 between Ely and Fernley as the “Loneliest Lead and silver ore was first discovered in Eureka during the fall of 1864 when a party of five prospectors traveling 70 mile from the silver camp of Austin to explore the area. Unlike most new mining strikes, not much excitement was caused by this find— not because the assays of the rock weren’t favorable, because they were, but because the smelting methods available at the time were not suited to treat the oxidized gold-silver-lead ores (those which are found above the water level) they had found. The ore was rich in iron and arsenic and occurred in a form that was hard for the miners to process economically. When smelters were perfected and constructed several years later, mining boomed. The 16 smelters around town certainly didn’t improve air quality, but perhaps it was the 100 saloons that helped the nearly 10,000 residents forget about the pollution! At about that same time, several rich ore bodies on Ruby Hill were discovered, and as a result, the Eureka mining district became quite prosperous. Because of the town's central location in the state, it became a railhead for the whole area, which kept Eureka alive even after production decreased. Most of the district’s production was made between 1870 and 1890. Although there have been large amounts of gold produced in the last 50 years, the recorded production up to 1964 was approximately 313,000 tons of lead, 7,000 tons of zinc, 1,000 tons of copper, 1.65 million ounces of gold, and 39 million ounces of silver. These production totals are probably understated since records prior to 1901 were incomplete. Since 1964, nearly 1.5 million ounc To get a sense of Eureka’s past, and see dozens of historic buildings and sites in downtown, pick up a self-guided walking tour map at the Sentinel Museum, then spend a couple of hours or all day stepping back in time. A few highlights include: Eureka Opera House, built 1879, has been fully restored and now serves as a convention center and auditorium. Elegant features such as a chandelier, curtain, wood floors and horseshoe balcony (one of only three horseshoe-shaped balconies in Nevada) have been preserved. Historic graffiti has been preserved back stage from the early days, and the tradition has been continued with signatures of the people who have performed at the Eureka Opera House since it was reopened.
The 1877 Jackson House next door to the Opera House has been beautifully restored and has nine Victorian bedrooms upstairs, and a bar and restaurant downstairs. The brick Eureka Sentinel Newspaper Building dates from 1879 and now houses a museum. This structure was used as the newspaper office and residence until 1960, and was made into a county historical museum in 1982. The downstairs press room, shown above, features all original equipment on which the Sentinel was printed in the boom days of Eureka. Old copies of the Sentinel are tacked on the walls. In the mining history room upstairs you will see tools from the early days of mining, as well as historic stock certificates, ledgers and personal miners items. Lifestyle artifacts from the early days of Eureka are there, too, including items from schools, homes, and businesses. IF YOU GO: 10 North Monroe Street (right behind the Courthouse) Eureka, Nevada Phone: 775-237-5010 November – April: Tuesday through Saturday 10 a.m. to 6 p.m. May – October: 7 days per week 10 a.m. to 6 p.m.
31 South Main Street, Eureka, NV 89316 Phone: 775-237-6006 Monday, September 01 2014
In the spring of 1859, flakes of gold were found in Clear Creek, a tributary of the South Platte River in north central Colorado. Some prospectors were happy finding rich gold dust, but John Gregory w Within two months of Gregory’s initial gold discovery, 900 fortune-seekers were living in log shanties and tents. By the following summer, the population had swollen to 10,000. In no time, businesses and mills were thriving and the area became the leading mining center in the Kansas Territory. At this time, Colorado wasn’t yet a state, but its prominent place in mining history was already secured. Between 1859 and 1918 (considered by the National Register of Historical Places to be the area’s “period of significance”), the total gold output was $83,364,157! Most of this was in the form of placer gold, which was extracted with pans and sluices. This “easy” gold played out within the first five years of discovery, and by the end of 1863, most work had shifted to hard rock mining. The promise of riches continues to lure people to Central City today, but it’s not so much to find gold— but to gamble. Limited stakes gaming was legalized in 1991, and has made this area an important destination once again. Gambling was big business here in the 1880s, drawing the likes of Doc Holliday, and even Soapy Smith all the way from Alaska. The downtown core is now a National Historic District, and casinos reside in many of the restored historic buildings. Much of the beautiful and original woodwork, ceilings, and ornate furnishings date back to the 1870s. A scenic loop drive in the hills above the town is the place to find gold rush cemeteries, abandoned mines, headframes, and many other mining relics. Take a Walk The best way to learn more about Central City’s gold rush and admire its architecture at the same time is to stop at the Visitor Center on Eureka Street for a walking tour map. Choose from several self-guided walking tours, depending on your interests. Many of the town’s most magnificent buildings are in downtown, whereas Victorian residences are located outside of the business district. No matter how much ground you want to cover on foot, keep in mind you’re above 8,000 feet in elevation here, so pace yourself. Some buildings are open for guided tours (admission charged) but even if you don’t peek inside, you’ll get a good sense of the town’s history right from the street. If you want to shake hands with one-armed bandits or play poker at any time during your walk, you’ll find a chance to meet Lady Luck every step of the way.
In April of 1873, President Ulysses S. Grant came to see his friend Henry Teller. To impress the president, mine owners decided to lay 26 ingots of solid silver to make a path to the entrance to the Teller House so President Grant wouldn’t have to dirty his boots when he stepped from his carriage. Those wealthy citizens also had an ulterior political motive. At the time, Congress was debating whether gold or silver should back the dollar. Legend has it that Grant became angry when he saw the silver bars and walked up the boardwalk instead of on the silver path so as not to show favoritism. As we know, gold eventually won. The grand opening of the Opera House in 1878 (next door to the Teller House Hotel) started a tradition of community theatre, ranging from opera to vaudeville. Buffalo Bill Cody performed here as well as P. T. Barnum’s circus. The Opera House is known for its elaborately frescoed ceiling and perfect acoustics. In addition to Central City’s very popular Opera Festival held each summer, performances are held year round in this beautifully restored 550-seat theatre. The Opera Association also owns the Williams Stables building on Eureka Street. Initially constructed in 1876 for the use of Teller House guests, the building was purchased a few years later by Sheriff Dick Williams and his son. It was from here that a Stanley Steamer automobile could be had for hire— quite an achievement back in the day! Many of the Main Street establishments are identified by “blocks” and named for their original builders. In addition to the Teller House Hotel, Henry Teller also built the Teller Block for $6,000 in 1874. The upper floor was purchased a few years later by the Independent Order of Odd Fellows, which retained ownership until the 1990s. The Mullen Block was completed in 1874 by Thomas Mullen. Originally a drug store and clothing store, the Elks Lodge bought the building in 1902. The Harris Block was built in 1875 by Robert Harris and was home to the New York Store Mercantile that sold dry goods, clothing, and furnishings. Gold in Them Thar Hills The scenic forested hills above town offer evidence of the thousands of mining claims that placed Central City and the surrounding area in the history books. When you’re ready to take a short loop drive, the helpful staff at the Visitor Center will point you in the right direction. The route is mostly a well-maintained dirt road that takes you past headframes, abandoned mines, and sites of once thriving communities. Nevadaville is one such mining camp that 1,200 gold seekers used to call home. Along the route you’ll see the Coeur d’Alene Mine. Originally opened by Robert Cameron in 1894, the shaft reaches some 700 feet into the depths of Gunnell Hill. Records indicated that in 1915 this mine employed nine men who earned from $3-$4 per day. You’ll also see the shaft house of the Boodle Mill. Because of the serious safety hazard posed by abandoned mines, trespassing laws are strictly enforced. Although tempting to explore, keep away from old mines and tailings to avoid accidents.
The loop drive also takes you through the “cemetery district.” Many stories are told through the memorials and headstones. Harsh weather, less-than-clean water, mining accidents, and few physicians were the norm during the gold rush. So were epidemics of scarlet fever, diphtheria, and the Spanish flu. Sadly, you’ll notice that a large number of children are interred within the cemetery fences. When you visit, please remember these sites are historical grounds, but are also still in use today. The Gilpin County Historical Society also holds an annual “Cemetery Crawl.” "Oh My Gawd Road" After getting your fill of gold rush history and gambling, a popular route leading out of Central City to Idaho Springs takes about 30 minutes. It isn’t quite as bad as its moniker, but it’s not for the faint of heart either. The “Oh My Gawd” Road (CR 279) is more dirt than pavement and wouldn’t be wise for drivers who don’t like narrow, twisty roads, but the mountain views make it worth it. Along the bumpy route you’ll pass the famous “Glory Hole” mine workings, drive through Russell Gulch, and see many more mining relics that attest to “The Richest Square Mile on Earth” in days gone by. IF YOU GO: Central City is located in the Rocky Mountains, only 35 miles west of Denver. With the newly opened, Central City Parkway, visitors can reach Central City 12 minutes after exiting off of I-70 at exit 243. The Central City Visitors Center is located at 103 Eureka Street, at the northern end of Main Street in the old Wells Fargo Building. Articles and photos by Denise Seith. This article first appeared in the May 2014 issue of Gold Prospectors Magazine, published by the Gold Prospectors Association of America (GPAA). Monday, March 04 2013
Once primarily used by landscapers and construction contractors, gold miners are now using Rock Crushers / Pulverizers to save time and get more gold. In most cases, you can take your rock crusher straight from the shipping container and use it in less than half an hour. No wasted time trying to find the right pulleys or chains because you get everything you need when you place an order. A rock crusher that has been designed and built by miners for miners can be an invaluable tool -- these tough machines are built well and rigorously tested in the field.
Whether you need a manual rock crusher or a power rock crusher (choose gas or electric), turn rock into talcum powder and get ALL the gold! 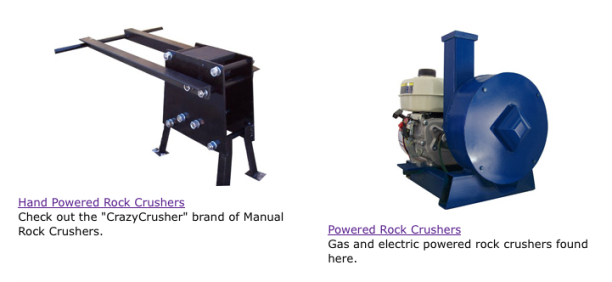 |

 nd molecules from cubic miles of crust and transports them in a circulation loop. When this hydrothermal solution cools or chemically reacts with local rocks, the elements and molecules will come out of the solution and solidify (precipitate), forming ore deposits. The hydrothermal solution will begin precipitating on the sides of the opening and slowly fill the entire crack over time. This is how gold veins can form. These geologic processes take place over millions of years, and can happen many times over many years in the same location. Since the gold is locked up in rock, it is usually pretty hard to get to— usually requiring specialized mining techniques to mine and extract. Lode mining takes a lot more equipment and generally a lot more expense and is usually undertaken by large commercial operations instead of the average prospector.
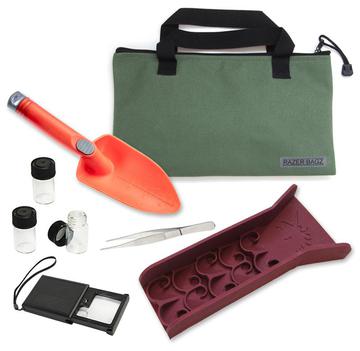
 nd topography can add to your success. Before loading up and heading to the Southwest, only to be disappointed by bad weather, first check out the weather patterns for the last 60 days and the predicted weather for the next 30-60 days. Why is that important? Well, it mostly comes down to rainfall— how much and how fast. For example, if there will be a lot of rainfall over an extended time, soils will be loosened and gravity will do its job and cause deeper, and sometimes more concentrated, pay streaks. In general, cool season precipitation (October through April) is the most extensive source of rain in the desert regions. Rainfall is more widespread and of relatively long duration during the cool season. On the other hand, warm season precipitation (May through September) results largely from convective precipitation in the form of short monsoon-type thunderstorms.
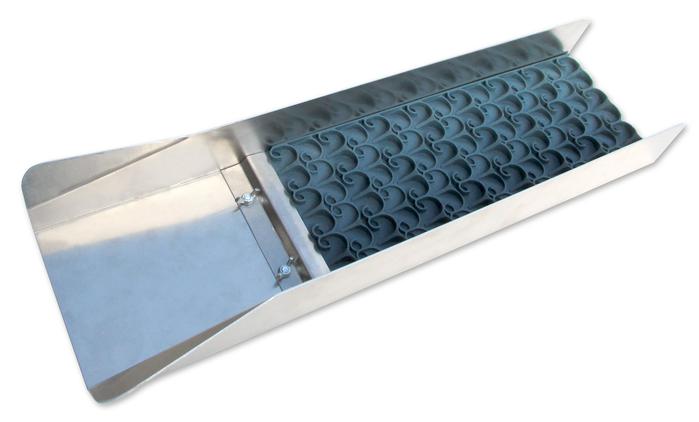
 Mining claimants who wish to retain their mining claims on Bureau of Land Management and Forest Service lands through the 2021 assessment year must pay a maintenance fee or file a maintenance fee waiver certificate on or before September 1, 2020, to prevent the mining claim from being forfeited.
 same historic areas. If you’re interested in giving recreational gold mining a try but not sure where to go, below are some key locations where you can still find the yellow metal by gold panning or metal detecting. Since gold was found in these areas, likely the old-timers didn’t get it all— so you may get lucky and strike it rich (or at least catch gold fever)! Rules and regulations differ from state to state, so always be aware of the local laws. And if you want to
  Clear Creek, Colorado. A gold-hunter's paradise, this river in Colorado is hands-down the best place in the state for recreational prospecting. Panning and sluicing for gold is permitted on the river bed at Arapahoe Bar in west Denver, and digging is allowed on the north side of the river there. There's also a large stretch of river about 10 miles upstream from Arapahoe Bar at Clear Creek Canyon where gold panning and sluicing are permitted. You may even have better luck here since the location is up-river.
 is loose sediment which has been eroded from a primary source, transported and further eroded by water, and redeposited. Since gold is extremely dense, it is easily trapped alongside other dense alluvial particles. The bits of gold found in these deposits of alluvium are called “alluvial gold.”
 help you decide where to begin. Look at your site from all directions and think about what they could and could not do way back then. Your modern-day equipment and knowledge are a lot more advanced than what they had to work with, so you’re already a step ahead! Many times miners jumped in with both feet and started mining to beat the other guys. But being in a hurry meant they could have missed a lot, or moved on too quickly from their original discovery before it was completely worked out. Considering the lay of the land will reveal important clues that can help you better formulate a plan when you're out in the field. Here’s what to look for:
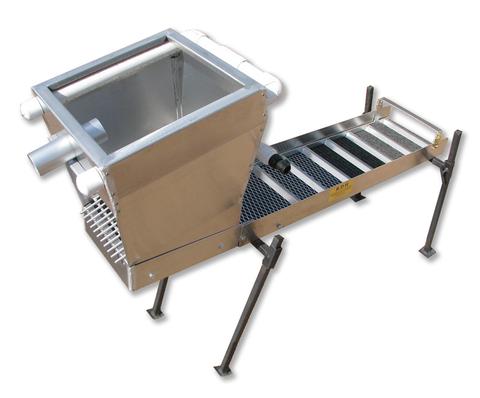
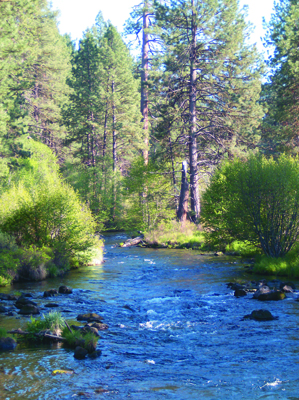 nown as paystreaks. No matter if you are panning, sluicing, dry washing, or metal detecting, in many ways your success at gold prospecting comes down to locating these elusive natural pay streak concentrations. Keep in mind that most gold paystreak formations occur during times of flooding and that many factors affect how gold gets deposited. Perhaps the biggest factor is that gold is dense and is more than 19 times heavier than water. The denser an object, the more easily it will resist the flow of moving water. That means it takes a very strong and fast moving water flow to move along a nugget the size of a pea.
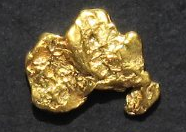
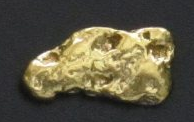 Unlike many Western states, the largest nugget in Alaska was found rather recently. In 1998, the Alaska Centennial Nugget, weighing 294 ounces, was mined along Swift Creek near the town of Ruby. This area is well known for its past production of large nuggets. A big nugget was also found in Anvil Creek near Nome which weighed 182 ounces.
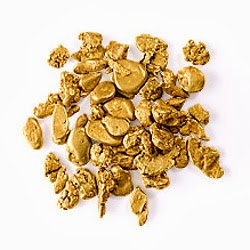
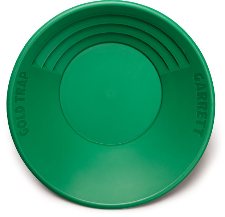
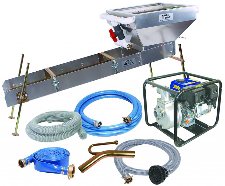
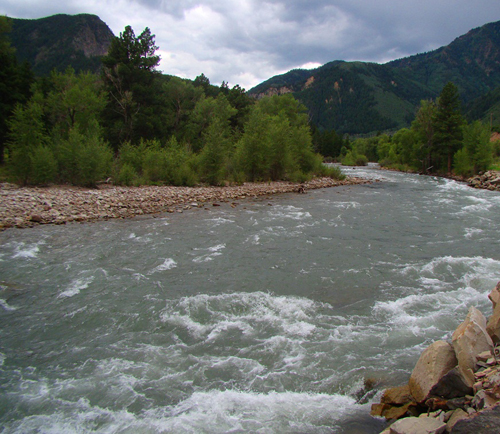
 urn out to be quite so secret any more.
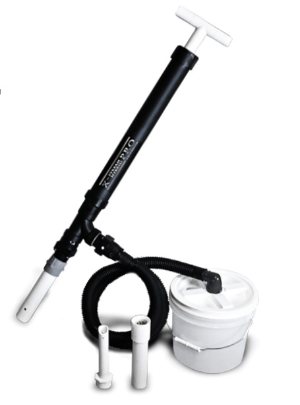 If you’re sniping underwater, float on the water with your mask and snorkel, going downstream with the current. Look for crevices below the waterline that are reachable. When you locate a likely spot, remove the loose sand that commonly fills crevices in the bedrock. “Fan” away the sand and lighter debris with your hand, then use a pry bar or other
 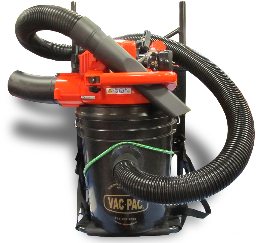 Sniping is about the little things— working smaller areas very thoroughly. Perhaps the most pleasurable thing about sniping is its simplicity. You can hike in and get away from the crowds, and enjoy some peace and quiet and lovely scenery. It is a cool way to spend a hot summer day, and if you have patience and really learn to read the stream, you will find more and more gold using this method. If you’re new to gold sniping, you also might want to search YouTube for videos showing snipers in action.
  Road in America.” At the same time, AAA representatives warned travelers to avoid this empty 287-mile stretch unless they were “confident of their survival skills.” Much has changed in the last 30 years. The scenery is still wide open, there’s not a lot of traffic, but it’s far from lacking in amenities. This scenic corridor retraces the route of the Pony Express and Overland Stagecoach trails, connects you to plenty of recreational opportunities, and passes through five full-service communities. Eureka is one such stop along the route, and is one of the best-preserved 19th century mining towns in the state.
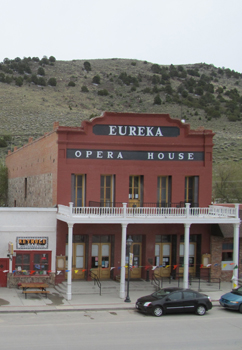
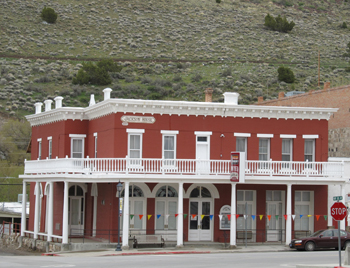
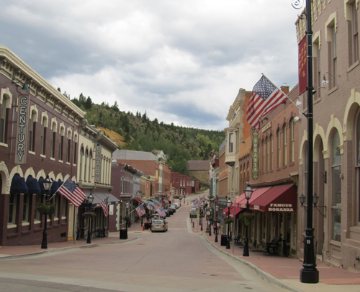 as determined to find the source. For months, the Georgia native followed North Clear Creek upstream from the present-day city of Golden, and on May 6, 1859, made the first lode discovery in the Rockies! Gregory sold his two claims for $21,000 a few months later and left the area, but his name carries on. “Gregory Gulch” is located between the towns of Central City and Black Hawk. The Gregory Mining District encompasses these towns plus several other mining camps, and as a whole, this area is referred to as "The Richest Square Mile On Earth.” Central City takes it name from being “central” to all the mining activity.
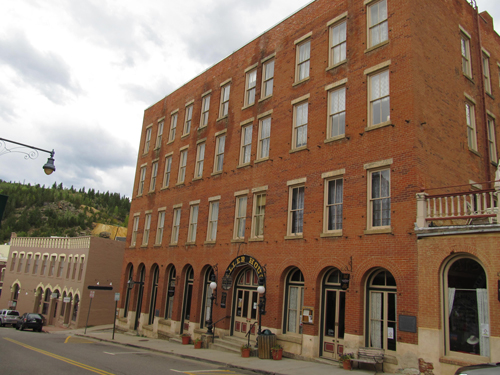 One of the most notable buildings in downtown is the 150-room Teller House Hotel. Located on the corner of Eureka and Pine Streets, it was built in 1872 at a cost of $87,000, plus another $20,000 to furnish. From its non-descript exterior, you’d never believe that the Teller House was once considered to be the most elegant hotel between Chicago and San Francisco. Financed largely by Henry Teller, who became the first senator from Colorado and later, Secretary of the Interior, it’s no longer used as a hotel but is the center for opera-related activities (Central City Opera House is next door).
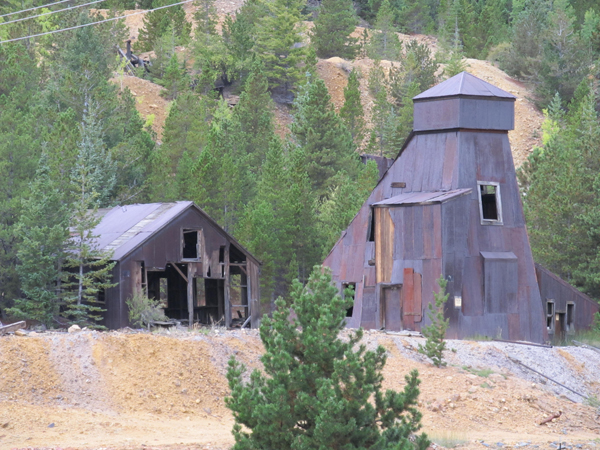 Known for their excellent stonework, the rock retaining walls visible in various places along the route were built by a very large population of Cornish miners. The walls were part of the former Gilpin Tramway, a 26-mile narrow gauge railroad that once looped around the gulches and through the surrounding communities. Sidings went to many of the major mines. Most of the retaining walls don’t use mortar, and were instead constructed using a dry-stack method. After more than a century, most of the rockwork is still holding up— no maintenance required.
|
Nugget of News Blog |