


Sunday, December 30 2018
When prospecting an area that’s known for gold, put yourself in the boots of the old-timers who came before to Host rock (or bedrock) could be shale, diorite, granite, quartz, clay or other material. Keep an eye out for changes in the area’s host rock and notice the direction in which it’s running. Contact zones occur when a rock or mineral cuts or crosses the host rock. Generally, gold is deposited along contact zones, which can be a few inches or several hundred feet wide. If bedrock in your area runs north to south and you notice a color change in material that runs east to west, you’ve found a contact zone. Outcroppings are a lump of high ground with weather-worn rocks which are generally rounded and usually situated on ridges, but can be located anywhere. Especially look for iron staining on outcroppings. Ditch lines of yesteryear were generally dug into and run along somewhat level ground. Very close to diggings, especially in hilly or steep terrain, they may have been cut loose to wash downhill. Follow the old water ditches and see where they end up. Exploratory trenches were not used for water but most of the time were deeper and would often circumnavigate a rich area that may be throwing gold from clay lines, pockets, quartz seams and any other local contacts. Trenches were dug simply to expose any contacts that may be present. As a contact was crossed, old-timers checked it out in both directions for values. Rock cairns are piles of rock or stone used for claim corners. Standing high on a slope looking down is a great vantage point from which to spot cairns and other man-made landmarks. By locating a historic claim, you definitely have a great place to begin! Monday, October 01 2018
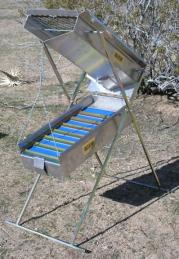
A highbanker, sometimes called a power sluice, is a very flexible and efficient piece of equipment when you’re gold mining in areas with a good amount of water. Their main use is to allow you to pump the water to the gravels rather than carrying heavy buckets of gravel to the water. The optimal place to use a high banker is a location along a river where there are lots of bench gravels that have been left Hopper: The feed box contains a grizzly screen with a water spray bar. The water is normally sprayed from simple plastic pipes with a series of small holes drilled into them. A water valve located ahead of the spray pipe controls the amount of water flow going into the feed box sprays. A series of rods are arranged to make a slat-type screen (called a grizzly) that allows water and smaller material to fall through and go down into the sluice box. The large rocks that are caught by the grizzly are washed with the spray and then rejected. The slats should be set on an angle so that most of the larger gravel will slide off the slats by the pull of gravity without you needing to push them off by hand. Some rocks may hang up, but for the most part, they will slide off on their own. The spray water comes out under a lot of pressure and washes any loose sand or clay into the sluice and also provides part of the water needed to move material through the sluicebox area. Sluice: High bankers utilize a normal sluice to recover the gold from the gravels, and the operation of the sluice box portion of a high banker is basically the same as that of a hand or stream sluice. With a highbanker, the water is supplied by a pump rather than the flowing water of a stream. The matting and miners moss underneath the sluice’s riffles are the same. Gold flakes get caught in the riffles and moss the very same way as it does in a hand sluice. A nice back-saving bonus on a high banker is that it will be on legs, so you can operate it on any terrain. A normal hand sluice lays on the bottom of a streambed. Pump: The centrifugal type pump should be set near the water as it is more efficient to pump water uphill to the sluice than to suck it up to the pump. This is only important where there is a lot of vertical distance between the pump and the sluice. If there is less than 10 feet of vertical distance, it does not matter much. Pumps can be set up quite a distance away horizontally from the sluice. It will work so long as there is sufficient water at the source where the pump is located. Vertical distance is more of a problem than horizontal distance; 30-40 feet is the maximum vertical climb for most pumps. The standard lay flat type of hose is used to carry the water up to the feed hopper. Be sure to have enough hose and some extra in case you spring a leak! Remember to position the pump so that you aren’t breathing motor exhaust fumes all day! The big advantage of a highbanker is working materials that are found in a location away from a river, like benches and other isolated patches of gravel. Moving the water to the sluice with a pump saves you from carrying the material down to the stream. The only disadvantage to highbanking for gold might be that it’s more equipment to pack around than just your usual digging equipment. It would be wise to test your ground before hauling in your high banker. Testing will indicate if there is enough gold in the gravels to warrant bringing in more than a hand sluice. If you have at least an amount of gravel that represents a full day of digging and sluicing, bring in a highbanker. The adjustment of a high banker is much less than the steep slope you usually would use with a hand sluice. Adjust the water flow to the minimum flow rate that it takes to get all the rocks that fall through the screen to keep moving down the sluice box section. If rocks or gravel hang up and bury the sluice, you need more water and perhaps a steeper box angle to wash that stuff away. The height of the feed box is another important adjustment. You want it low to allow you an ease of feeding in the material. If too high, you will hurt your back lifting heavy shovels full of gravel. Too low and you may be constantly sweeping away tailings at the back of the sluice. The feed box itself should be adjusted to ensure the angle of the slat screen rods (the grizzly) allow the gravel to be well washed before it moves out as waste. This is because a lot of small gold adheres too the larger cobbles. If rocks and cobbles just roll through without getting a thorough washing, you will be losing gold. The rejection of the large oversize rocks is important as it lets your sluice to a better job. If those bigger rocks make it into the sluice, you’ll be getting much worse recovery of fine gold. Be sure the foot valve or strainer on the intake hose is clear and able to deliver a full water flow. Sometimes the foot valve can get clogged with leaves or other debris. A blocked or partially obstructed foot-valve won’t allow the high banker to operate properly. For environmental reasons, it is a good idea to have your water drain into a pond or pit that is not directly connected to the stream. This is so that the clay and mud can settle out, otherwise make sure there are no legal issues of putting that mud back into a flowing stream. Some models of highbankers can also be run as a dredge. These highbanker/dredge combos can save you money, offer flexibility, but are also a bit of a compromise since the dredge portion is generally small. Combo units will be equipped with a suction nozzle type of intake. This design is best for working small shallow streams and tributaries. These systems are designed to be set up alongside the stream edge and have adjustable legs rather than float systems that you’d normally see on a larger suction dredge. With a suction nozzle and more hoses, the combo unit will operate as a suction dredge, picking up material from underwater crevices and delivering it to the sluice. Highbanker/dredge combos also can be ideal for working in and around ponds in old hydraulic mining pits. The next time you are out in the field, consider if a highbanker or power sluice can help you get more gold. To determine if the answer is yes, ask yourself these questions: Where is the nearest water? Can I shovel directly from the diggings into the feed hopper? Can I set it up to allow gravity to do a lot of the tailings clearing work? Where will the pump go? With a little thought and planning, you’ll be able to decide if highbanking for gold will increase your productivity. In most cases it will. Move more dirt, get more gold! Good luck! Monday, August 06 2018
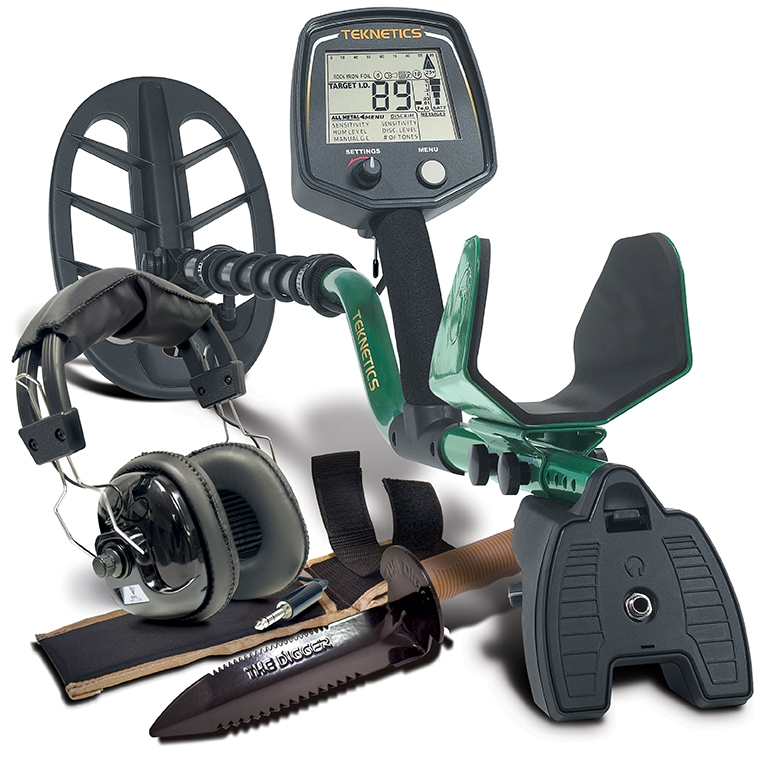
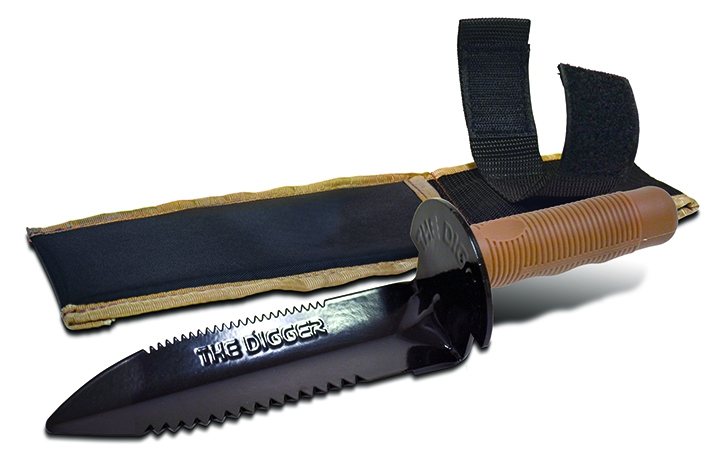
Back to School promo! Limited time only— combo price ends August 18, 2018! Each Teknetics T2 metal detector is now shipping with stereo headphones and a digger recovery tool. ALL FOR $499 with FREE SHIPPING! Buy now using coupon code A1486.
The T2 excels at coins-shooting, relic hunting and gold prospecting.
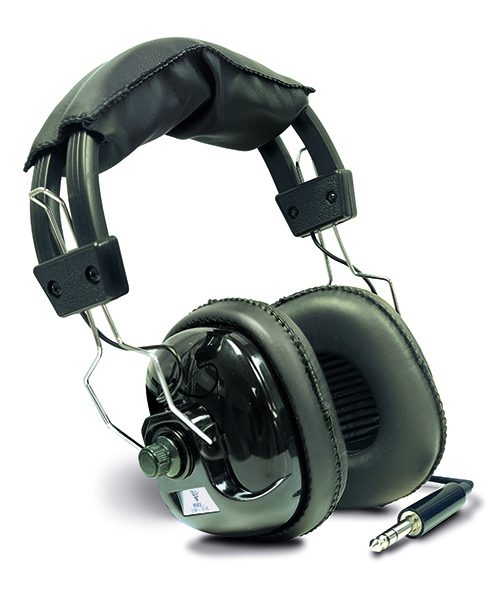
Teknetics Headphones:
Digger Recovery Tool:
Back-To-School Combo price ends August 18, 2018! Get the package for only $499 with FREE SHIPPING! Buy now using coupon code A1486. Nugget of News Blog Monday, July 30 2018
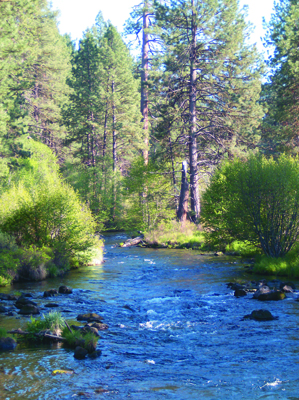
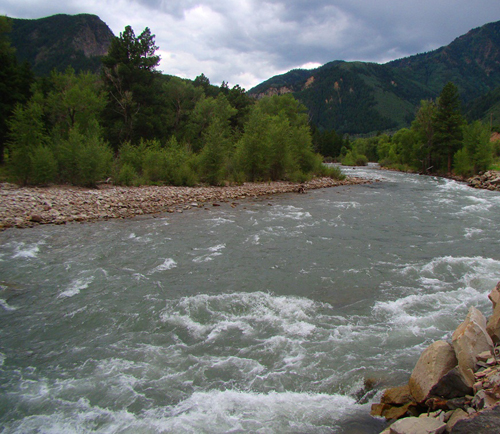
Places where gold naturally concentrates in an environment of streams and drainages are k When deciding where to start sampling, it’s helpful if you think of a river or stream as a sluice box. Waterways obviously don’t have aluminum riffles and matting, however, they do have natural gold traps that do the same thing that a sluice will do— allow gold to settle out of gravels and be caught while the bulk of the sands continue downstream. Heavy material such as gold doesn’t get spread along evenly, it is most likely caught in certain areas. The downstream parts of inside bends in a stream are favorable places to look for pay streaks. Just how good depends on how sharp the bend in the stream actually is. Usually the sharper the bend, the better the pay streak. If a tributary is known to have coarse gold, look at the intersection of the tributary and the main channel. Behind an obstruction (large boulder, an island, or an outcrop of bedrock) is another good place to look for a pay streak. Boulders and other obstructions can create turbulence where ordinarily smooth flowing water turns into fast flowing whitewater. It is between the fast white water and the quiet dark water that gold drops out. The coarsest gold tends to be found on the outer parts of the pay streak, and the finer-sized gold is on the inner part of the pay streak. When you are working, if it seems as if the streak is petering out as you go toward the middle of the water flow because you are finding little gold, this region of the pay streak is often where the biggest number of nuggets are most likely to occur. Once you know where paystreaks form, you might wonder if they are more likely found on bedrock or in gravels. They are nearly always found on bedrock or some sort of false bedrock. False bedrock might include caliche, a clay layer, or just a well-packed hard pan. You may just get lucky and hit something great with your first shovel of dirt, but more likely you’ll need to test a few different places. Even very experienced prospectors need to keep testing to find those hotspots and paystreaks. Good luck and keep sampling! Friday, April 27 2018
A good rule of thumb that most prospectors agree on is to look for placer gold on bedrock and within crevices in the bedrock. This simple principle makes sense— placer gold is heavy and dense and therefore settles at the lowest point as it is pushed around by flowing water. However, gold isn’t always going to make it all the way down to true solid bedrock at the bottom of all gravels. Instead, in certain conditions, it will be found ABOVE bedrock. When these conditions exist, gold will collect on “false bedrock.” For example, a clay layer in streams can act like bedrock and yield more gold than the true bedrock below it.
Tuesday, February 06 2018
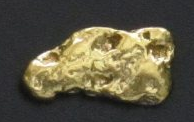
Historically, California has been known as the land of the big nuggets. After the Gold Rush began in 1849, Plenty of stories abound from California, but plenty of big gold has come from other states as well. Colorado's biggest nugget weighed in at 156 ounces (13 troy pounds). It came from the Gold Flake mine located on Farmcomb Hill in Summit County, Colorado in 1877. It's easy to see why Montana's nickname is the "Treasure State" since it has produced a few big nuggets, too. One weighed 53 ounces and was displayed at the Paris World Expoition of 1889. The largest in Montana was over 170 ounces and was dug at a depth of 12 feet in Snow Shoe Gulch on the Little Blackfoot River. Nevada's largest nugget was taken from the diggings of the Osceola District in 1878. It weighed 24 pounds (but eight pounds of that was quartz). The old Spanish miners found plenty of big gold in New Mexico, including one nugget in the late 1890s that weighed over 65 ounces.
North Carolina's claim to fame is the Reed Gold Mine located in Cabarrus County. It was the site of the first documented discovery of gold in 1799. For years, that 17 pound nugget was used as a doorstop because no one recognized what it was! At the time, it was worth roughly $4,000 (when the price of gold was $20.67 for an ounce). The Reed Mine actually produced a lot of big gold, including some weighing 28 pounds, 17 pounds, 16 pounds, and 13 pounds. Two different nuggets came from this area that weighed eight pounds each and another two nuggets were nine pounds each. Several more nuggets have been unearthed that weighed five pounds and less. These examples of where large nuggets have been found are by no means exhaustive. A Google search will provide lots of fun stories about past and present finds across the United States. But no matter who has found what, the big question remains: Where do you hunt for big gold these days? Generally, big nuggets occur in places where rich gold-bearing fluids flow through the same pathways for a long period of time, allowing continued deposition of gol The simple answer to where to hunt for big nuggets is to hunt where they have been found in the past. Past finds of big gold indicates these locations have the right geology for their formation. Big nuggets in a stream environment will work their way to bedrock very fast and stay put. They will often be lodged in deep crevices. Keep in mind that big nuggets are also worth more than their actual metal value. The fact they are so rare adds to their value. If you haven't found your big gold yet, keep looking! And if you can't wait to own your own shiny stuff, buy gold nuggets here. Nugget of News Blog Monday, January 29 2018
Make plans this spring to attend a Gold Prospectors Association of America (GPAA) Gold & Treasure Show! No matter your age or experience level, the expos offer something for everyone and provide the best opportunities to learn new skills, see product demos, and rub elbows with some of the most respected miners and metal detectorists in the business!
Nugget of News Blog Friday, December 29 2017
Given a choice, most miners prefer using water to wash and run material, but in some dry, remote areas that Clay is generally known as a great gold robber, making clay-bound gravels the biggest difficulty to overcome. In most of the placers directly derived from weathering lode deposits, the placers are in ravines, gullies and hillsides with sometimes very little gravels and mostly decomposed fragment of rock and fine silt from the decomposing host rock. Host rock containing a lot of feldspars are most problematic. As feldspar breaks down, it creates some difficult clays and silts that bind fine gold to small rocks and sand with the clay and silt particles forming larger clods. Loamy or sandy conditions are much easier to process with a drywasher than clay-bound material due to the absence of clods and clumps. But if dirt clods are giving you grief, break them down with a large hammer on a canvas tarp, or use a mortar and pestle (dolly pot). Once you are set up to run material, process in short runs before cleaning out the riffle tray (perhaps after every three 5-gallon buckets). Frequent clean ups minimize the amount of fine gold that may creep or walk down the riffle tray with the tailings. This method uses your dry washer as a form of a classifier to screen off larger material while getting rid of much of the fine silt and lighter weight material. Re-running tailings can aid in the recovery of lost gold— especially small gold dust and flakes. The second pass through is usually much quicker than the first time because the material has already been classified. With some placers, especially flat, fine gold, rerunning material can be very lucrative. In places where gold is more coarse and angular, very little gold will like be recovered by running the tailings a second time. You may want to experiment with adding a second layer of cloth to a portion of the riffle tray. Doing so reduces airflow by almost half in that section. In addition to the riffle tray, the void under the riffle tray can collect a sizable amount of really fine gold mixed in with fine silt. No doubt there are going to be losses of gold when using a drywasher to recover fine gold (20 minus mesh down into the 200 minus gold), but the end goal should be to limit those losses as much as possible and these tips should help. Good luck! Learn more about Gold Buddy drywashers here. Nugget of News Blog Saturday, December 02 2017
You might have heard the term “flood plain gold” and are wondering what it really means. A very simple definition is “fine-sized gold flakes carried or redistributed by flood waters and deposited on gravel bars as the flood waters recede.” When this “redistribution” occurs, it is usually after heavy winter storms that churned up rivers enough to turn part of the bedload over and move the river bar gravels from one place to another. Within these gravels is fine gold that was previously deposited there. When waterways flow way up and above their normal banks, they generally drop the heavier gold in the front of the bar, and as pressure decreases, the finer gold starts dropping into the mixed gravel. Over time, some of this finer gold will work its way down to bedrock, but generally it stays on the move.
How did the gold get there in the first place? There are many classifications of placer deposits, and their definitions can provide the answer. Among the most well-known is stream placers. Streams carry gold from eroded veins and concentrate them in various ways. Modern streams refer to present-day gold-bearing waterways that are the most common sources of gold for today’s prospectors. Tertiary and intervolcanic channels are rivers buried from mud and volcanic flows that existed prior to our modern-day waterways. High benches were created as rivers cut their way deeper into the bedrock and could be located hundreds of feet above today’s modern rivers. Desert placers are generally the result of torrential flash flooding and not a constant water flow. Glacial stream deposits are created by melting glaciers that can concentrate gold if the water flow is sufficient. Marine or beach deposits can come from wave action against cliffs, from off-shore currents bringing in gold-bearing material from under the ocean, or even from gold-bearing streams that flowed into the beach area eons ago. Since there is a strong possibility that gold can get moved around during storms, it’s now important to know WHERE to find this “dropped out” gold. The secret is to find that drop point and to capitalize on its accumulation. Fine gold looks fantastic in a pan or box, but its weight can be deceivingly light. It takes a lot of fine gold to be equal to a larger piece and to have enough weight to make the recovery effort worthwhile. Some of the best areas to look for flood plain gold are where the stream or river widens out, or levels out, or changes direction. The inside of a bend is good. Rocks and weeds and small shrubs are also potentially good collection spots. When checking out collection spots, be extra careful. Calm water on the surface can hide swift currents underneath. Keep in mind that the effects of heavy winter rains and snow will not be the same on all waterways. Redistribution might occur to a larger degree on larger rivers. Or it could be the opposite where you live and prospect. No one hopes for an especially “bad winter,” but if Mother Nature makes it so, this information could be the silver lining— a way to turn lemons into lemonade come spring when you can get out and take advantage of any gold redistribution that occurs. Good luck and be safe! Nugget of News Blog Thursday, November 16 2017
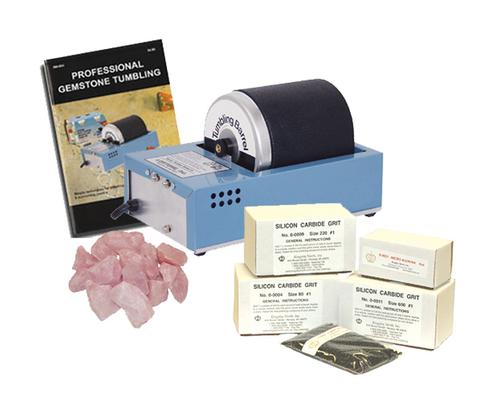
It takes years and years for nature and its elements— dirt, rock, water, and sand— to smooth a rock's surface. But a rock tumbler can get you those same results in considerably less time. Although you should always refer to the owner's manual for the particular rock tumbler you own, if you're just getting interested in the hobby of lapidary and are wondering how a tumbler works, below are general tumbling instructions from Lorton, Inc., a leading manufacturer for the last 50 years. STEP 1: (coarse grit) Fill the tumbler barrel 2/3 to 3/4 full with properly graded and sized stones. If the barrel is not full enough, you won`t get the proper tumbling action in the later steps. Add t
Whether you're just getting started in the hobby of lapidary, or you've been polishing rocks for decades, you'll find the rock tumbling equipment and accessories you need here. Nugget of News Blog |
 help you decide where to begin. Look at your site from all directions and think about what they could and could not do way back then. Your modern-day equipment and knowledge are a lot more advanced than what they had to work with, so you’re already a step ahead! Many times miners jumped in with both feet and started mining to beat the other guys. But being in a hurry meant they could have missed a lot, or moved on too quickly from their original discovery before it was completely worked out. Considering the lay of the land will reveal important clues that can help you better formulate a plan when you're out in the field. Here’s what to look for:
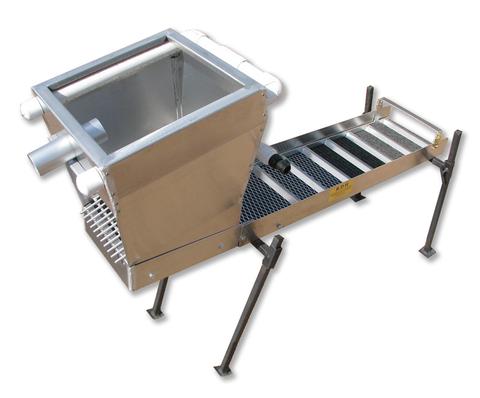
 nown as paystreaks. No matter if you are panning, sluicing, dry washing, or metal detecting, in many ways your success at gold prospecting comes down to locating these elusive natural pay streak concentrations. Keep in mind that most gold paystreak formations occur during times of flooding and that many factors affect how gold gets deposited. Perhaps the biggest factor is that gold is dense and is more than 19 times heavier than water. The denser an object, the more easily it will resist the flow of moving water. That means it takes a very strong and fast moving water flow to move along a nugget the size of a pea.
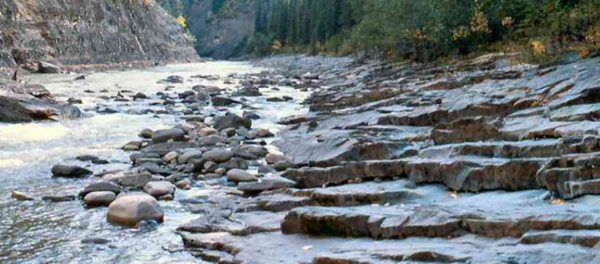
 Unlike many Western states, the largest nugget in Alaska was found rather recently. In 1998, the Alaska Centennial Nugget, weighing 294 ounces, was mined along Swift Creek near the town of Ruby. This area is well known for its past production of large nuggets. A big nugget was also found in Anvil Creek near Nome which weighed 182 ounces.
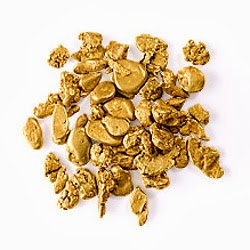

|
Nugget of News Blog |