


Monday, February 19 2024
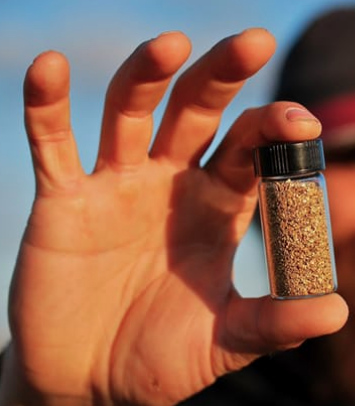
Gold is generally considered a time-tested safe-haven asset, the price of which has historically held up well in times For those of us afflicted with gold fever and who enjoy prospecting and mining as a hobby, the price of gold doesn't make much difference. Most small-scale prospectors seem to get much more pleasure from the process of finding the gold rather than selling it. It's the thrill of the hunt! And, of course, all the great memories you make. Plus, it's just plain old fun buying a new highbanker or gold wheel. Even if you have no intention of selling any of the nuggets or fine gold you recover, you still might be wondering where the price is going from here. Whether or not gold has reached its peak is a point of contention.What drives the price of gold can be confusing and conflicting. While other commodities are mostly driven by supply and demand, gold is often affected by the psychological effects of economic downturns. Gold prices are affected by numerous economic factors such as: • Value of the U.S. dollar Numerous factors influence gold pricing, so no one person or organization is fully responsible for setting prices. However, the London Bullion Market Association (LBMA) publishes gold prices twice a day via the ICE Benchmark Administration (IBA). The IBA consists of multiple banks, an oversight committee and a panel of internal and external chair members. The IBA sets gold spot prices and gold fixed prices based on supply and demand as well as the gold futures derivative markets. If you do want to sell your gold, you can sell to a variety of buyers, including precious metals dealers, refiners, coin dealers, and jewelry makers. Research potential buyers and compare prices before selling to ensure you receive the best possible price.The amount of market value you can get depends on several factors: • Quality and Purity: The value of gold is determined by its weight and purity. Higher-quality, purer gold is worth more than lower-quality, less pure gold. A gold prospector will typically have their gold assayed to determine its quality and purity.
Tuesday, October 17 2023
In the words of Tom Massie, son of the late George "Buzzard" Massie who founded Gold Prospectors Association of America... "my favorite way of prospecting is the way that gets me gold." Suction dredging with a wetsuit can be quite lucrative— not only from the material you suck up but there's also the chance of picking SIZES OF GOLD:
Saturday, November 19 2022
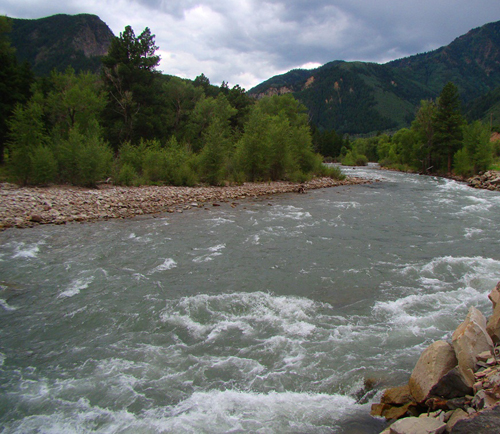
If you’re used to water mining, having success in the desert might seem challenging— that is until you start thinking of desert ground During a river high-water event in a non-arid area, gold is moved over a larger area by massive water flows that continue until the water slows as the source dissipates its energy. Spring snow runoff is a good example. Rivers rise and sometimes flood based on the upstream water source. When the snow has melted, the river will slowly get back to normal. In the desert, gold is moved in the exact same way with the exception that water powerful enough to move gold does so and then just simply stops. In a flash flood, gold is moved very violently and often a very short distance, sometimes percolating into valuable pockets. Here’s where the difference between water and desert mining principles comes into play generally flood gold will concentrate in areas that do not meet the standard thought of inside bends and where the water flow becomes lower. For the most part, desert mining experts recommend staying out of the washes, gulches and dry river beds— that is unless you clearly see exposed bedrock. Gold will settle fairly quickly when it is trapped behind jagged bedrock and small fault lifts that have not been worn down over time by constant water flow. It IS true you can find areas of concentrated gold-bearing material in the washes, however, the amount of time and energy to get through feet of overburden is usually just not worth it, especially when there are higher values to be found outside of the wash. Follow the leads out of the wash to where the gold lives in higher concentration. Test and sample areas you see with a great deal of runoff from a tributary coming into the main wash. Here you are only digging through the current flood layer and testing for flood gold. Make your way out of the wash carefully looking at the bottom of the tributary and the areas where the water flowed into the tributary. Look closely for jagged bedrock and slight lifts in the ground and then prospect. Continue to test each of those spots. What started as a few specks of flood gold in the main wash can lead to larger and larger deposits on the flats or in slight inclines across the desert floor. Keep in mind that when a flash flood is dissipating, there is not enough energy to move a lot of rock, but the sand will continue to flow a bit, creating great clues. In general, cool season precipitation (October through April) is the most extensive source of rain in the desert regions. Rainfall is more widespread and of relatively long duration during the cool season. On the other hand, warm season precipitation (May through September) results largely from short monsoon-type thunderstorms. If you’re ready to head to a sunnier climate this winter, keep these tips in mind and you just might find enough similarities between water and desert mining to make you return every year. Good luck! Thursday, April 28 2022
Over the years, metal detecting has continued to become one of the most popular forms of gold prospecting, especially with folks new to prospecting. Panning, sluicing, and highbanking can be lucrative ways to recover the shiny stuff, but when you’re first bitten by the gold bug, you might opt for the simplest, quickest approach — swinging a detector. Not only is it physically easier than processing heavy dirt and rock, it offers the added bonus of finding more than just gold, such as coins, jewelry, relics, and other buried metallic treasures, too. Aside from record gold prices, another reason that people are eager to try metal detecting i The basic premise of metal detecting is allowing the detector to introduce an energy field into the ground, and allowing that field the opportunity to return any target information that it finds via the detector’s control box. The two most common types of metal detectors to consider: VLF (very low frequency) metal detectors are the most common type of detector. They work by sending out energy that is either reflected off or conducts through an object containing metal. The device then measures how long it takes for the signal to return. Frequency refers to how fast a metal detector sends signals into the ground. As the name indicates, these detectors use very low frequency coils (generally below 30 kHz.) The outer coil serves as the transmitter and the inner coil serves as a receiver. PI (pulse induction) metal detectors send energy into the ground and measure the decay of that signal. Anything that slows or speeds the decaying signal is a target. This technology sends powerful, short bursts (pulses) of current through a coil of wire. Each pulse generates a brief magnetic field. When the pulse ends, the magnetic field reverses polarity and collapses very suddenly, resulting in a sharp electrical spike. This spike lasts a few microseconds (millionths of a second) and causes another current to run through the coil. This current is called the reflected pulse and is extremely short, lasting only about 30 microseconds. Another pulse is then sent and the process repeats. Generally speaking, the higher the price of a metal detector, the more features it will have. More features translate into more knobs. The more features and/or knobs that a detector has, the more you are able to tune the metal detector to the type of hunting conditions that you are likely to encounter. With that being said, the downside to a large number of features is that even though you are able to fine tune the detector to match the local conditions, there are also more ways of setting up the detector incorrectly. Setting up a machine "wrong" may result in a decrease in depth and sensitivity and your $900 metal detector may be outdone by a $200 model! It is critical to read the owner’s manual that comes with your detector and learn to use it properly for maximum results. Keep in mind when shopping for a detector that gold detectors are not necessarily higher in cost, but they are built with a higher sensitivity to detecting gold nuggets, have better ground balancing and discrimination abilities, and could be the best option for you. The #1 question that everyone asks is “What is the best metal detector?” Unfortunately, there is no one single answer. Each metal detectorist has specific needs that cannot be met by one single detector. The easiest way to find the "best" detector is to evaluate YOUR detecting style, your experience level, what items you hope to find, and the time that you will spend metal detecting. After taking all of these things into consideration, then you will be able to find a metal detector that fits your needs and your budget. If you’re wondering how deep a detector can detect, realize that there are too many variables to be able to unequivocally quote a depth for any particular brand or model. The size of the target, how it is positioned, ground mineralization, ground moisture, and more are just some of the factors that affect the depth of a detector. When treasure hunting with your detector for coins, relics, or jewelry, use your imagination as to where to hunt — anywhere people are likely to have lost something or left something behind is a likely place to dig up good finds—playgrounds at schools and parks, picnic areas, campgrounds, new construction sites, ghost towns, old homesteads, woodlands, plowed fields and pastures, sports fields, showgrounds, and racetracks, swimming holes, beaches, jetties, and piers. Right under your feet might be a good place to start; you never know what you'll find in your own backyard! Remember to always know local laws before using your metal detector. Many state and national parks and historic sites do not permit detecting. Be sure to first ask permission to treasure hunt on private property. If you want to get out there this year and get your share of the gold but the idea of panning, sluicing, highbanking, or using another piece of gold mining equipment just isn't your idea of fun, that's OK. Consider a metal detector instead. Since the lure of uncovering a gold nugget of any size is addictive, you'll see people in known gold bearing areas swinging a detector, listening intently through their headphones for that magic tone that says DIG. Go ahead and join the fun! Today it is easier and more productive than ever to go treasure hunting. The metal detecting hobby has gone to a whole new level using state of the art technology that makes metal detecting equipment more high tech than ever. Monday, March 01 2021
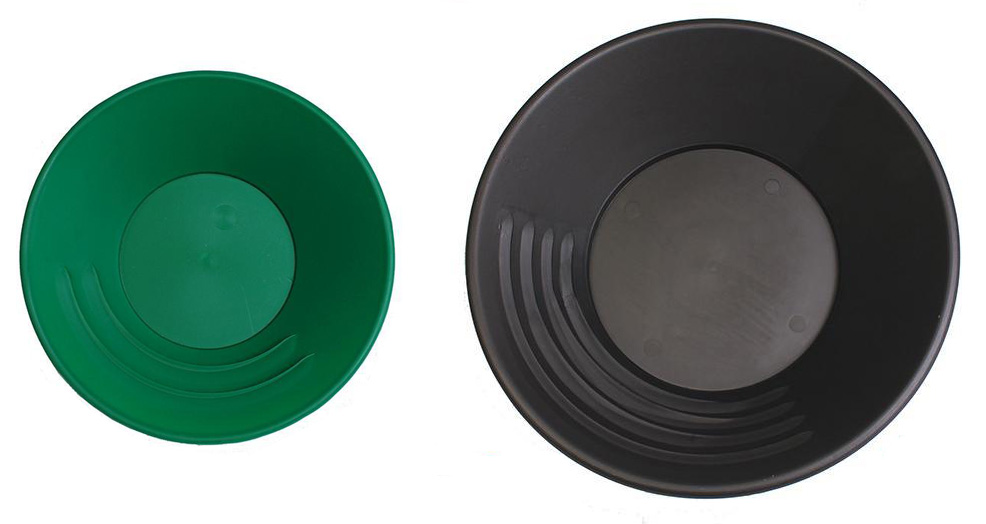
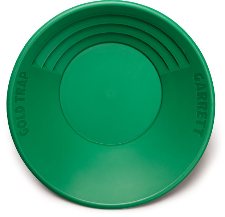
A gold pan is the simplest and most basic prospecting tool and is one of the oldest types of gold concentrating equipment. Plastic pans are recommended over the steel pans used by the 49ers. Plastic is light weight, so when you add water, dirt, and gravel to your pan, your arms won't get as tired compared to using a steel pan. And they do not rust or conflict with the use of a magnet. Size, color, and shape are really a matter of personal preference. You might want to have a couple different sizes of gold pans on hand (10 inch, 12 inch, and 14 inch are the most popular). Plastic pans generally come in green, black, and blue. The color doesn't effect performance, but green is the most common. The bright blue cone-shaped batea is the newest type of gold pan to hit the U.S. market. Gold panning kits are often the most economical way to purchase gold pans and classifiers (often called sifting pans) and other small accessories all in one convenient box. The point of panning is to shake the gravels, allowing the gold to settle downward and then to wash the lighter material off the top. When all the lighter material has been removed, only the heavy concentrates will remain in the bottom of the pan, including, hopefully, some gold! With a little practice, anyone can learn to pan for gold. Buying a bag of gold-bearing paydirt to use over and over again for practice in a tub is one way to get good at panning without ever leaving home. Gold panning “how to” steps founds here.
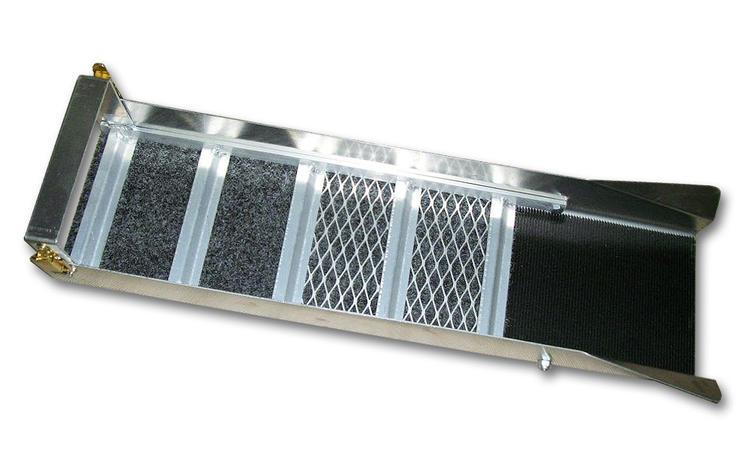
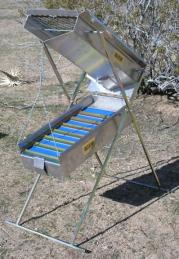
Gold concentrations are spotty, even in known gold-bearing areas, so sample and test often. Be sure to move on with your gold pan and don’t stay in one spot less you have good results. If you find a spot with fairly large amounts of gravel that yields good gold, then it’s time to bring in a sluice box. A sluice is simple to operate and have been used all across the world for thousands of years. After you’ve mastered gold panning and are ready to increase the amount of gravel you can process, a sluice box is your next step up from hand panning. Sluices come in a variety of sizes, most with gold-catching matting in the bottom that you need to clean up at the end of the day. Other models such as the Gold Well Vortex Drop Riffle Sluice, has no matting or carpets and uses vortex technology to catch fine gold.
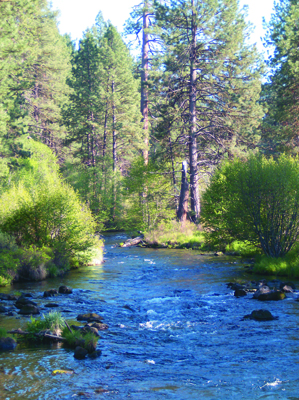
As with the pan, the real secret of successful prospecting is not in operating the equipment, but in the skill of finding those natural gold catches. Learning to read the river or stream and recognize the places where gold might accumulate and then sampling those places to see if you are correct is the best technique. Inside bends, behind boulders or bedrock outcrops, and inches above the stream flow are all good places that you might sample, but there are plenty of other possibilities as well. The sluice and the gold pan may be among the most basic prospecting tools, but they are tried and true ways of finding some good gold! Saturday, December 05 2020
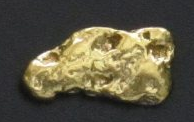
With gold prices on the rise, you might be wondering if now is a good time to sell some of the gold you’ve found over the years. And if Gold dust consists of flour, fines and flakes. This is the stuff most prospectors find as a result of panning, sluicing and dredging. This form of gold is probably the lowest value because it will have the most impurities. Small nuggets start at about 1 gram and are a step up from gold dust in value. Medium nuggets, on average, weigh up to 31 grams or 1 troy ounce. Large nuggets are defined as weighing 1 troy ounce or more. Larger nuggets usually command higher prices, and could be considered museum quality. Gold in quartz is usually a collector’s item or a museum piece, therefore, prices widely vary. Keep in mind, though, that even nuggets that appear to be pure gold are not. They will have impurities embedded and blended into the matrix. There is no such thing as 100% pure gold from nature. In fact, in North America, the average purity for prospected and mined gold averages 60% - 85%. The impurities in natural gold consist of metals such as silver and copper and other minerals that have combined with gold on a molecular level. Tests, referred to as an “assay” must be performed to accurately measure the purity of gold. Some jewelers and pawn shops can analyze your gold to determine purity with an XRF gun (X-Ray Fluorescence); expect to pay a charge for that service. The majority of gold bought and sold from small-scale prospectors include: private buyers (some advertise on eBay, Craigslist, and other online sites) pawn shops, independently owned jewelry stores that craft and repair their own jewelry, museums looking for unusual specimens or rare nuggets, and refiners. Most refiners are contracted by large gold mining operations, but some smaller refiners will purchase gold from prospectors in any form or mesh size. An internet search will reveal refiners that will buy from individuals. If you want to sell your fine gold or nuggets, there are a few things to do first. You may not get a totally accurate assessment of your gold’s value, but you’ll at least have a ballpark estimate. Do NOT melt your gold. Keep it in its original form.
When you make contact with potential buyers who specialize in raw and natural gold, be sure to ask about and understand their procedures and policies and payments. Ask how your gold will be assayed and how the purity is determined. If you are shipping your gold to a buyer, understand their requirements for packaging and shipping, insurance, and other safeguards. Some buyers pay for the testing and shipping, others pass along the costs to the seller. Remember that buyers have costs and will not pay 100% of the spot price. The exception to this would be if you have museum specimens or very large nuggets. In those instances, buyers will pay more than the spot price. Be patient and shop around to not only get the best price, but to find a buyer who you can work with now and in the future. Get recommendations from fellow prospectors, or clubs such as GPAA (Gold Prospectors Association of America). If possible, make your first transaction with a new buyer a small one to assess your experience and satisfaction with the overall sales process. When you feel you have had a successful first transaction, you’ll feel confident you can continue that relationship in the future. If you've not yet found your first gold, get Alaska paydirt here. Monday, July 30 2018
Places where gold naturally concentrates in an environment of streams and drainages are k When deciding where to start sampling, it’s helpful if you think of a river or stream as a sluice box. Waterways obviously don’t have aluminum riffles and matting, however, they do have natural gold traps that do the same thing that a sluice will do— allow gold to settle out of gravels and be caught while the bulk of the sands continue downstream. Heavy material such as gold doesn’t get spread along evenly, it is most likely caught in certain areas. The downstream parts of inside bends in a stream are favorable places to look for pay streaks. Just how good depends on how sharp the bend in the stream actually is. Usually the sharper the bend, the better the pay streak. If a tributary is known to have coarse gold, look at the intersection of the tributary and the main channel. Behind an obstruction (large boulder, an island, or an outcrop of bedrock) is another good place to look for a pay streak. Boulders and other obstructions can create turbulence where ordinarily smooth flowing water turns into fast flowing whitewater. It is between the fast white water and the quiet dark water that gold drops out. The coarsest gold tends to be found on the outer parts of the pay streak, and the finer-sized gold is on the inner part of the pay streak. When you are working, if it seems as if the streak is petering out as you go toward the middle of the water flow because you are finding little gold, this region of the pay streak is often where the biggest number of nuggets are most likely to occur. Once you know where paystreaks form, you might wonder if they are more likely found on bedrock or in gravels. They are nearly always found on bedrock or some sort of false bedrock. False bedrock might include caliche, a clay layer, or just a well-packed hard pan. You may just get lucky and hit something great with your first shovel of dirt, but more likely you’ll need to test a few different places. Even very experienced prospectors need to keep testing to find those hotspots and paystreaks. Good luck and keep sampling! Tuesday, February 06 2018
Historically, California has been known as the land of the big nuggets. After the Gold Rush began in 1849, Plenty of stories abound from California, but plenty of big gold has come from other states as well. Colorado's biggest nugget weighed in at 156 ounces (13 troy pounds). It came from the Gold Flake mine located on Farmcomb Hill in Summit County, Colorado in 1877. It's easy to see why Montana's nickname is the "Treasure State" since it has produced a few big nuggets, too. One weighed 53 ounces and was displayed at the Paris World Expoition of 1889. The largest in Montana was over 170 ounces and was dug at a depth of 12 feet in Snow Shoe Gulch on the Little Blackfoot River. Nevada's largest nugget was taken from the diggings of the Osceola District in 1878. It weighed 24 pounds (but eight pounds of that was quartz). The old Spanish miners found plenty of big gold in New Mexico, including one nugget in the late 1890s that weighed over 65 ounces.
North Carolina's claim to fame is the Reed Gold Mine located in Cabarrus County. It was the site of the first documented discovery of gold in 1799. For years, that 17 pound nugget was used as a doorstop because no one recognized what it was! At the time, it was worth roughly $4,000 (when the price of gold was $20.67 for an ounce). The Reed Mine actually produced a lot of big gold, including some weighing 28 pounds, 17 pounds, 16 pounds, and 13 pounds. Two different nuggets came from this area that weighed eight pounds each and another two nuggets were nine pounds each. Several more nuggets have been unearthed that weighed five pounds and less. These examples of where large nuggets have been found are by no means exhaustive. A Google search will provide lots of fun stories about past and present finds across the United States. But no matter who has found what, the big question remains: Where do you hunt for big gold these days? Generally, big nuggets occur in places where rich gold-bearing fluids flow through the same pathways for a long period of time, allowing continued deposition of gol The simple answer to where to hunt for big nuggets is to hunt where they have been found in the past. Past finds of big gold indicates these locations have the right geology for their formation. Big nuggets in a stream environment will work their way to bedrock very fast and stay put. They will often be lodged in deep crevices. Keep in mind that big nuggets are also worth more than their actual metal value. The fact they are so rare adds to their value. If you haven't found your big gold yet, keep looking! And if you can't wait to own your own shiny stuff, buy gold nuggets here. Nugget of News Blog Friday, December 29 2017
Given a choice, most miners prefer using water to wash and run material, but in some dry, remote areas that Clay is generally known as a great gold robber, making clay-bound gravels the biggest difficulty to overcome. In most of the placers directly derived from weathering lode deposits, the placers are in ravines, gullies and hillsides with sometimes very little gravels and mostly decomposed fragment of rock and fine silt from the decomposing host rock. Host rock containing a lot of feldspars are most problematic. As feldspar breaks down, it creates some difficult clays and silts that bind fine gold to small rocks and sand with the clay and silt particles forming larger clods. Loamy or sandy conditions are much easier to process with a drywasher than clay-bound material due to the absence of clods and clumps. But if dirt clods are giving you grief, break them down with a large hammer on a canvas tarp, or use a mortar and pestle (dolly pot). Once you are set up to run material, process in short runs before cleaning out the riffle tray (perhaps after every three 5-gallon buckets). Frequent clean ups minimize the amount of fine gold that may creep or walk down the riffle tray with the tailings. This method uses your dry washer as a form of a classifier to screen off larger material while getting rid of much of the fine silt and lighter weight material. Re-running tailings can aid in the recovery of lost gold— especially small gold dust and flakes. The second pass through is usually much quicker than the first time because the material has already been classified. With some placers, especially flat, fine gold, rerunning material can be very lucrative. In places where gold is more coarse and angular, very little gold will like be recovered by running the tailings a second time. You may want to experiment with adding a second layer of cloth to a portion of the riffle tray. Doing so reduces airflow by almost half in that section. In addition to the riffle tray, the void under the riffle tray can collect a sizable amount of really fine gold mixed in with fine silt. No doubt there are going to be losses of gold when using a drywasher to recover fine gold (20 minus mesh down into the 200 minus gold), but the end goal should be to limit those losses as much as possible and these tips should help. Good luck! Learn more about Gold Buddy drywashers here. Nugget of News Blog Wednesday, June 14 2017
Fun and exercise are two great reasons to go gold prospecting, but you might as well make some money while you're at it, right? The best way to do that is to increase production rates. Assuming you are mining on a known gold-bearing claim or waterway, volume is the key to your success!
A dredge or highbanker/suction dredge combo is the next step up. A dredge uses a gas motor to generate the suction that will load and transport the material to the sluice, which greatly increases volume, as well as allows you to reach gravel on the river bottom that would otherwise be inaccessible (unless the river is seasonal or there is a prolonged drought). The more material a dredger can push across the riffles, the more gold can be recovered. An additional benefit to dredging is that it also allows you to clean gold out of all the cracks and crevices in the bedrock. A shovel just cannot do that. The size of the dredge intake nozzle is the most important factor in how much material a dredge can process, but it is not a direct one-to-one relationship. For example, a 5 inch dredge will not move twice the material that a 2.5 inch dredge can move. It actually can move much more. The surface of the hose is figured in square Beyond dredges or highbanker/suction dredge combos, you can get into some professional mining set-ups that use trommels and jigs and shaker tables and earth moving equipment. Every deposit is different, varying in size and grade and structure. Environmental conditions and access will dictate mining methods and knowing the rock types and size of the gravel is critical in determining which equipment will work best for increasing your production. Finding a suitable deposit to mine and finding a way to work it economically— to justify your time and expense— is the first step. Then choose the right equipment to increase your recovery rate and speed of recovery and make more money. Good luck! Wednesday, March 08 2017
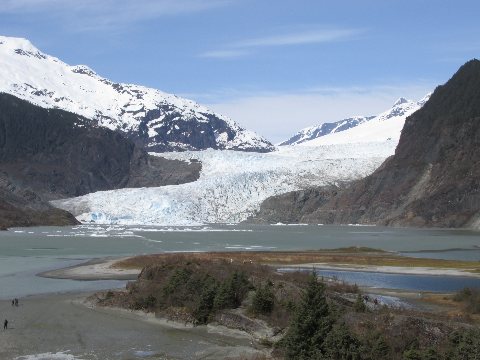
You might think that glaciers are important to gold prospecting only in Alaska and the Yukon, but glaciers have also affected placer deposits in the Midwest and some western states, too. What is a glacier? Glaciers are formed when a huge mass of ice is created by accumulated snow. The body of ice grows over the years when more snow falls during colder months than melts during warmer months. Glaciers shrink when the melting is greater than the snow accumulation. Once the weight of the glacier grows large enough, the weight of the snow and ice presses down an Eventually the body of the glacier reaches a warmer elevation where the ice melts more easily. Here, at the foot of the glacier, are gigantic piles of rocks and boulders and debris that have been bulldozed down by the moving massive glacier. These glacial gravels are known as “moraines.” However, finding gold in this unsorted jumble of glacial moraine material produced by a glacier’s bulldozing effect is like finding a needle in a haystack—not worth the time to process…. until the glacier’s natural melt waters or another water source washes through it, and does a bit of natural sorting. Alluvial gold deposits Normal alluvial placer deposits form by the power of flowing water washing away lighter materials and gravels and leaving behind heavier material such as gold— very similar to what happens in a sluice box when the flow of water washes away the lighter materials and the gold is deposited in the riffles. When flowing streams and glacier melt water process and wash away the glacial moraine gravel, the gold works its way downward. Gold will then be deposited on bedrock or false bedrock (such as clay or other packed material). As the glaciers themselves melt, the huge quantity of water creates an effective sluicing system that can sort the gold out of gravels. These flows can leave behind very profitable pay zones along the channels cut by the ice melt waters on bedrock benches, among packed false bedrock gravels, and on the downstream side of bedrock high spots. Where to look for glacial placer gold deposits in the West In California, glaciers still exist in the southern Sierra Nevada, small parts of the Cascade ranges and the Shasta-Trinity Alps. In the northern Sierra Nevada and higher parts of the Klamath and Trinity ranges, that area’s placer deposits were greatly affected by glaciers that existed thousands of years ago. Glacial derived placer gold is important in a number of other western states, too, including Idaho (Boise Basin and Mount Pisgah), Montana (Pioneer District, upper portions of Gold Creek near Deer Lodge) and in Colorado (Fairplay District, Arkansas River Valley in southern Lake County). Where to look for glacial placer gold deposits in the Midwest What you might be very surprised to know is that glaciers are the source of nearly all the placer gold found across the Midwest. During the past ice ages (which were repeated events, not just a one-time occurrence), great sheets of glacial ice leveled the middle parts of North America, acting like giant bulldozers by pushing enormous amounts of material southward from Canada. When the ice melted, the area was left with extensive glacial moraine (gravel) deposits. Although it’s spotty and sporadic, some of these glacial deposits have gold, depending on where the glacial gravels came from in Canada and if that region was gold-bearing. Glacial gold is found in several of the northeast states such as New York, Vermont, and Pennsylvania. Glacial gold is also found more extensively in Midwest states such as Indiana, Illinois, Ohio, Michigan, Wisconsin, Iowa, Minnesota, Kansas, Nebraska, Missouri and the Dakotas. All things considered, while glaciers can destroy a placer deposit, the moraines they leave behind can produce some very worthwhile deposits of gold, and are worth prospecting if you live in or visit these areas. Tuesday, November 01 2016
Researching and exploring new areas in which to prospect for gold, gems, or whatever you are seeking can be a lot of work, but the process can go much quicker and easier when you know where to start. If the weather where you live is keeping you indoors much of the time this winter, use your downtime wisely by researching and planning for next spring and summer. But don’t rely on just one source of information. Confirm it through several sources. It’s not that you don’t trust Uncle Joe or a “friend of a friend” tip, but facts can be distorted or forgotten over time and that “secret” nugget patch found 30 years ago just might not t The best kind of research brings together different forms of info from a multitude of sources. It is the info gleaned from COMBINED sources that can help you to determine the best possible place to locate precious metal or gems. The more info you can lay your hands on, the better. Consider these resources: Old mining district reports and mining history books. Most western states have some form of mining and geology agency, although they all have different names depending on the state. Find out what information is publicly available at the agencies located in the area you will want to prospect. Old history books can be more help than any state agency because they were written by folks with ties to the area they wrote about. That means they often include valuable information on old mining discoveries or operations that didn’t make it into a government report. Topographic maps. Many old mining areas are shown on topo maps, but usually not on the newer versions, so try and find older topo maps. Many of the newer versions may have old mines removed as a way for the government to “keep the general public safe” by not advertising the whereabouts of the old and “dangerous” mine shafts. Aerial photos. Google Earth is amazing in its quality and detail of photos. Many times you can see individual trees, hiking trails, rock outcrops and even hand-stacked piles of rocks left behind by old-timers. Sometimes larger features and patterns (areas where miners removed a lot of brush, for example) cannot be seen from ground level, but are obvious from far up in the sky. This is also a good way to get an idea of the condition of the roads in the area so you’ll know in advance which look to be commonly traveled. Google Earth ties in with GPS, too. You can review the photos, check them against maps, and get the GPS coordinates of the precise location you want to visit. No more guessing if you have arrived! You will know for sure with GPS that you are in the right spot. Reference libraries. The librarians at state mining divisions and university libraries are generally very friendly and helpful. These libraries are open to the public, so don’t feel shy about requesting help. Any university with a good-sized geology or mining program should have quite a few geologic reference resources including old reports, magazines on the mining industry, thesis reports by graduate students, and even reports by engineers and geologists who were on site at the big operating gold mines in the late 1800s. Many of the old books and reports found in the university libraries will be out of print and cannot be purchased anywhere, so be sure to make photocopies of any documents you need while you are onsite. Many prospectors are discouraged by the amount of work and time that can be involved in researching new areas, but when you find a new spot with good gold, it will be well worth your time and effort! Saturday, July 02 2016
Although there are many variables that go into catching gold in a sluice, perhaps properly “tuning” your sluice is the most critical. A few months ago, Steven “Doc” Vetter, owner of Gold Hog brand mats, wrote an interesting article for Gold Prospector Magazine that focused on a few key factors that all miners should pay attention to. The following ideas from his article are all about achieving the proper tuning exchange, meaning letting the junk flow out, or be worked out by exchange zones, and holding the stuff you do want—gold. A well-tuned sluice will have heavy gold concentrations up top, medium gold in the middle, and trace gold near the end Hydraulic Equivalence: By definition, “hydraulically equivalent” (HE) refers to particles of varying size, shape and density that fall out of a water flow and deposit in the same area. While quartz rock and gold vary greatly in specific density, you can make them collect in the same place by making the quartz rock bigger and rounder. A 2 inch quartz rock and a 1 mm sphere of gold will fall through water and deposit in about the same place— making them hydraulically equivalent (HE). An opposite example is a .25 inch round piece of gold and a .25 inch round piece of quartz. The gold will sink through the water and likely land straight down. The quartz rock, however, will not fall as fast and will be pushed several feet away before it settles. These two items are not HE. The shape of the gold has a big influence on its HE. Flat things move more easily than spheres when either moving water or air is introduced. HE is a huge factor in gold mining and is often the main reason for classifying material to a certain size— the theory being if everything is about the same size, the heaviest material will stay in the sluice. When you slow down a sluice, you start to have a traffic jam. Things that are HE all want to gather in the same deposit zone and you start to gather/open the window for more non-gold particles to pile up and that’s not good. Incremental Processing: A great analogy of how this principle works is to picture a city bus. Imagine a rule where all passengers must enter through the front and must exit through the back. As they enter, passengers must fill the seats in the front of the bus first. Every time the bus makes a stop (you shoveling dirt into the hopper of your highbanker or sluice), the first few rows fill up quickly and remain full for a short period of time. As a new passenger (each new shovel full of material) gets on and finds the front seats taken, he must move further down the bus (sluice). The result is a bunch of folks all competing for the same seats up front and when there are no seats up front, they must take the next available one. If all the seats get full, a passenger (your paydirt) never even gets to sit down and exits the bus (sluice) without ever sitting (collecting in the riffles). As the working zones in your sluice fill up, slurry material will move down to the next zone before it settles there. During times of heavy loading, the first percentage of your sluice will load up heavy and take some time to exchange out. That means gold will keep traveling until it finds an “empty seat.” If you load too heavy or have too short of a sluice, you’ll have gold flowing over holding zones that are busy working and exchanging. It may take an exchange center (vortex) 3 or 5 seconds to fully process down material and exchange out non-gold and heavies. Fine Tuning: Because of the principles of Hydraulic Equivalence and Incremental Processing, you may have realized that slowing down a sluice can really cause problems and loss of gold. How do you know if your sluice is running too fast or too slow? Experiment! Of course doing so is a little scary because the #1 fear of most gold miners is losing gold, and quite honestly, until your sluice is fine tuned, that just might happen. To avoid losing gold, most miners start running their sluice at the “normal” or widely accepted pitch of 1 inch per foot. But this is just a starting point. If you see gold in your tailings, your first thought is probably to slow it down so you aren’t blowing gold out of the sluice. But perhaps that’s not the cause at all. Perhaps it’s because gold doesn’t have a place to sink down into and hide in your sluice. Experiment by running way too fast, say at a 15-degree pitch. Then take it to 13 degrees, then go down to 12.5. Keep adjusting until you find an acceptable capture rate for the size of gold you want to hold. Lose your fear of losing gold through testing and experimentation. Not only will you fine tune your sluice, but you’ll also get a great education. Good luck! Tuesday, December 01 2015
With the weather turning colder, you might think you're done prospecting 'til next summer, but you don't have to be! Even if you're not a regular snowbird heading to a warmer climate for the next few months, Gold mining in the desert is especially enjoyable if you're not into crowds— the desert can be delightfully smog free and people free in the winter. Experts say there is just as much gold waiting to be taken out of the desert as there is commonly found in streams and rivers. Why? Well, throughout history the desert mines just never got the publicity that wet places like California's Mother Lode did, so fewer prospectors went there. Plus, back in the day, mining used to be harder in dry conditions. Luckily that's no longer true if you have the right equipment.
• Metal detecting is another great way to hunt for gold in the desert. Gold detectors are not necessarily higher in cost, but they are built with a higher sensitivity to detecting gold nuggets, and have better ground balancing and • A bonus of prospecting in the desert is the abundance of interesting rocks. You can find many unusual rocks and semi-precious gems such as tourmaline, turquoise, agate, jasper, and more. Lapidary shops can cut and polish the rocks for you, or buy your own rock tumbler and lapidary tools and learn a new hobby. This winter, consider extending your gold-getting season with a prospecting trip to a sunnier, warmer state. Good luck and have fun! Sunday, January 11 2015
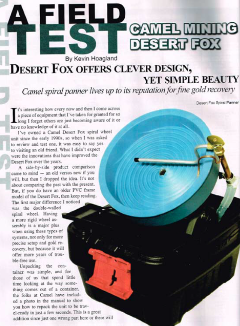
"... The Desert Fox ships in an Action Packer case that is the storage, transport, and water container unit. It provides excellent protection for the Fox while giving you a true compact recirculating unit that can be transported easily. Unpacking the container was simple and for those of us that spend little time looking at the way something comes out of a container, the manufacturer has included a photo in the manual to show you how to repack the unit so it's back to being travel-ready in just a few seconds. In the container you will find:
Setup takes just a few moments. The wheel frame is a single point A-frame that sits perfectly in place in the container and allows you a stable, easy-to-set-up base for the spiral unit. The A-frame construction also allows the unit to be set up directly in a stream. Stand the A-frame in the container, lift the drive unit to a beginning angle, slide the double-wall wheel into the slot on the drive motor, attach the spray bar, fill with water, hook up to a 12-volt power supply (not included), and after a couple of fine tuning adjustments, the Desert Fox is ready to start running your concentrates. Total time from cased to running is about two minutes! The A-frame mounted drive motor allows you to easily make small adjustments to the angle of the wheel. This ease-of-use factor can become critical when running materials that require more precision. Water flow is controlled by a single-point knob on the spray bar assembly, and the speed control is located on the back of the unit. These 3 adjustments are all you need to ensure efficient gold recovery. Before first use, be sure to clean with a good quality dish washing soap to remove all the manufacturing oils (mold-release agents from the plastic parts). Do NOT use a citrus-scented soap because the scent is derived from oils, which is exactly what you are trying to remove. Use hot soapy water and a non-abrasive pad. Spiral panners work in reverse of traditional hand panning. Instead of gravity separating gold from concentrates with the heavies sinking to the bottom of a pan, a spiral machine uses speed, water, and the angle of the spiral wheel to keep lighter material in the bottom of the wheel, while the heavier black sand and gold is brought up the leads. When set correctly, the sands drop off at the last moment and only gold is moved through the center of the unit and recovered in the cup.
Starting with the water first, find the lowest water pressure that will clean the light material from the leads as it climbs up the pan, adjust the angle and speed as needed so the heavy sands drop off at the right spot and you're ready to start processing your concentrates. After completing the basic setup, I adjusted the speed to keep the unit tuned in to variations in the types of material I ran. There are two models of the Desert Fox— a constant speed ($339) and a variable speed ($359). Since the difference in price is just $20, I highly recommend the variable speed model. The Desert Fox is a straight-forward and simple spiral wheel system that recovers gold efficiently, and has been manufactured by Camel Mining since 1969. It is compact, weighs about 10 pounds, and is ideal for carrying into the field. Gold recovery is exceptional and the learning curve is short..." Click here to learn more about the Desert Fox Spiral Panner on this website. Click image to download .pdf of field test review. Tuesday, April 01 2014
Typical winter storms that regularly occur in gold country usually do not create enough havoc to force substantial amounts of "new" gold into movement. However, when major flooding like what happened in Colorado in September of 2013 is followed by a “bad” winter, a great deal of gold can be set free. When tons of rock, cobble, and boulders are swept downstream along bedrock during a huge storm, quite a bit of destruction occurs. Plants, weeds, and trees that normally grow along the river and gravel bars are washed away. And when a major storm or flood tears up large portions of a streambed, a fair amount of this newly-released gold, because of its weight, will be deposited along the riverbed and settle into cracks and crevices. Saturday, March 01 2014
Natural Factors to Consider Before Digging for Gold:
Thursday, October 24 2013
There is probably no more appropriate place for a mineral museum than in Butte, Montana, better known as the Richest Hill on Earth. The state itself is nicknamed The Treasure State, so with monikers like those, you know you’re going to see a lot of prized specimens! Situated on the Montana Tech Campus, the Mi One of the highlights in the Mineral Museum is the “Highland Centennial Gold Nugget” weighing 27.5 troy ounces. The nugget got its name because it was found in the Highland Mountains south of Butte in 1989. The nugget is believed to be the 7th largest gold nugget found in Montana. A 400-pound smoky quartz crystal, referred to as “Big Daddy,” was unearthed just east of Butte. Because of Montana’s long tradition of mining, you’ll see impressive examples of colorful bornite, garnet, azurite, agate, sapphires, and more. If you want to take a sample home, you’ll find small pieces for sale in the gift shop. There’s also a good selection of books relating to minerals. Don’t miss the museum’s display of fluorescent minerals. Cases are in a separate room and are illuminated in both long and short wavelength ultraviolet light. It’s amazing how ordinary-looking minerals radiate extraordinary vibrant shades of pink, orange, and blue when exposed to ultraviolet light. You won’t believe how halite (also known as salt) changes from white to red. Kids especially think it’s just plain fun being in the Fluorescent Room surrounded by a crazy glowing rainbow of rocks! The Montana Bureau of Mines and Geology Earthquake Studies office is also located in the Mineral Museum. Watch the seismic activity from Montana and around the world as it is recorded and printed on the seismographs. IF YOU GO Montana Tech Campus 1300 West Park St. • Butte, MT 59701 • (406) 496-4414
Wednesday, April 03 2013
Weighing gold and gemstones can be a bit confusing. Miners use pennyweight and jewelers use grams. Gemstones are weighed in carats. The word "carat" comes from ancient India where carob seeds were used as small consistent weights. The word "pennyweight" comes from the old Gold Rush days when a miner would compare the weight of his gold dust against the weight of a penny. Keep in mind that a penny in 1849 was somewhat larger than it is today.
Pennyweight Conversions 1 pennyweight (dwt) = 7.776 carats 1 pennyweight (dwt) = 1.55 grams 31.1 grams = 1 troy ounce 1 pennyweight (dwt) = 24 grains 480 grains = 1 troy ounce 1 pennyweight (dwt) = 0.05 troy ounce 20 pennyweight (dwt) = 1 troy ounce 12 troy ounces = 1 troy pound Carat Conversions 1 carat = 0.20 grams 1 carat = 0.1287 pennyweight 1 carat = 0.0064 troy ounce 1 gram = 5 carats 1 pennyweight 7.776 carats 1 troy ounce = 155.5 carats |
 of high inflation, market volatility and geopolitical uncertainty. Gold is a finite resource, and therefore increases in value over time. Knowing this, many investors turn to the precious metal in an effort to protect their money. And those holding it in their portfolios were rewarded in December 2023 when the price of gold hit an all-time high of $2,135 per ounce! Analysts say that record price was driven largely by a weak U.S. dollar and expectations the Fed will begin lowering rates.
 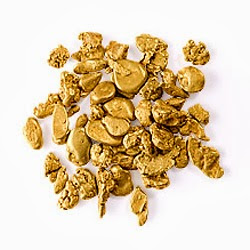 nuggets out of a crack in the bedrock.
 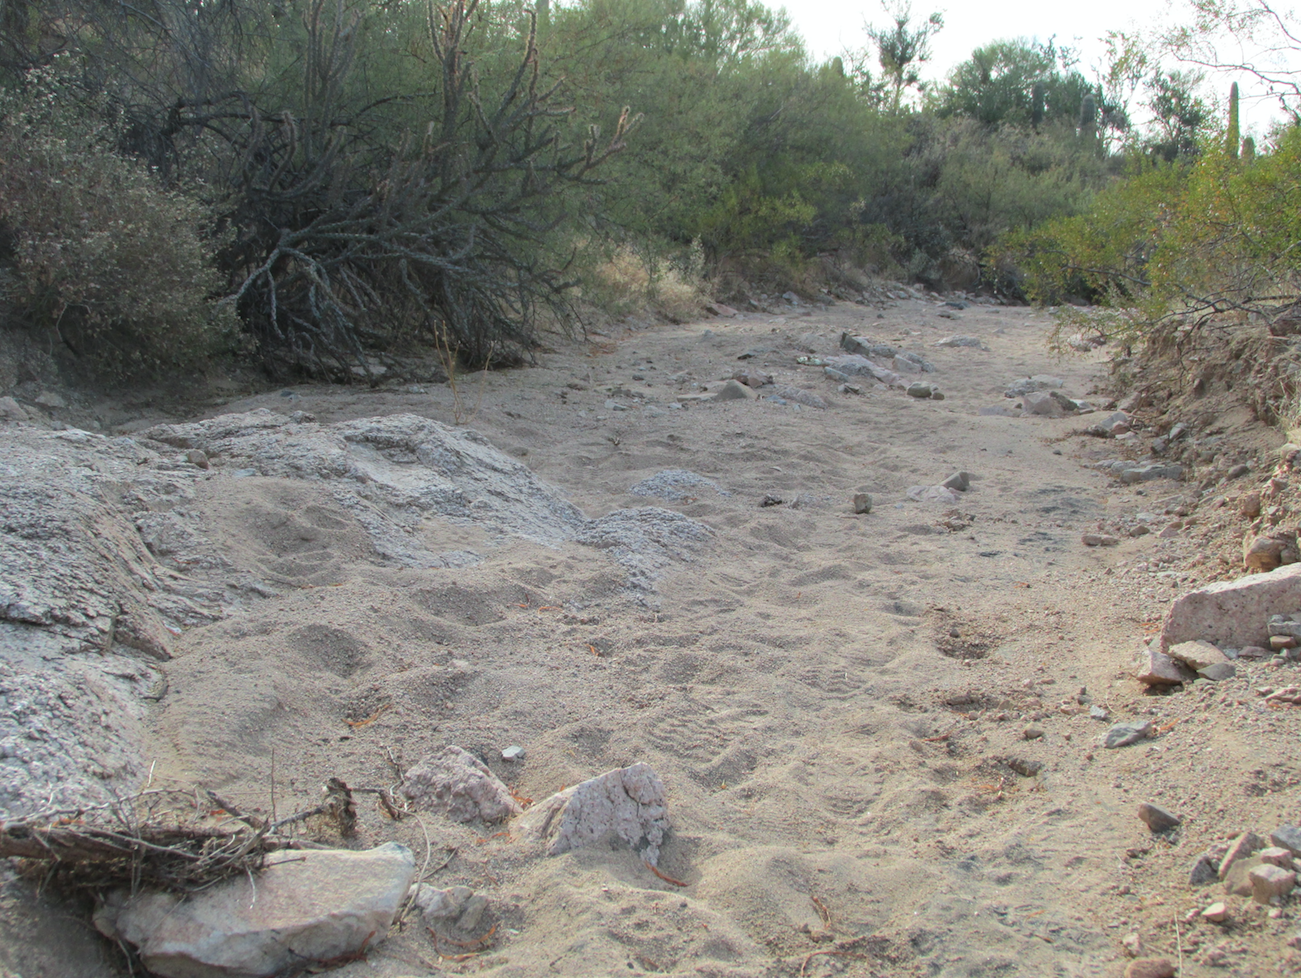 as a massive sluice box. Many of the principles you’re used to when prospecting and mining in waterways, will translate into desert mining. The most important thing to remember is that water is crucial to gold movement. Unlike a running river or creek with highs and lows, desert placers are much different in that gold is moved quickly during a flash flood, leaving gold stranded as opposed to being moved further by continual water flow in a creek.
 nown as paystreaks. No matter if you are panning, sluicing, dry washing, or metal detecting, in many ways your success at gold prospecting comes down to locating these elusive natural pay streak concentrations. Keep in mind that most gold paystreak formations occur during times of flooding and that many factors affect how gold gets deposited. Perhaps the biggest factor is that gold is dense and is more than 19 times heavier than water. The denser an object, the more easily it will resist the flow of moving water. That means it takes a very strong and fast moving water flow to move along a nugget the size of a pea.
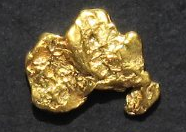
 Unlike many Western states, the largest nugget in Alaska was found rather recently. In 1998, the Alaska Centennial Nugget, weighing 294 ounces, was mined along Swift Creek near the town of Ruby. This area is well known for its past production of large nuggets. A big nugget was also found in Anvil Creek near Nome which weighed 182 ounces.
 urn out to be quite so secret any more.
 Some say that "gold is where you find it" and while that may be true, once you arrive at a known gold-bearing location, how do you decide where to dig first? Successful prospectors follow different methods, so there is no single "right" way, but no matter if you are sluicing, dry washing, or metal detecting, if you first consider the "lay of the land" you can better pinpoint a place to start.
 Man-Made Factors to Consider Before Digging for Gold:
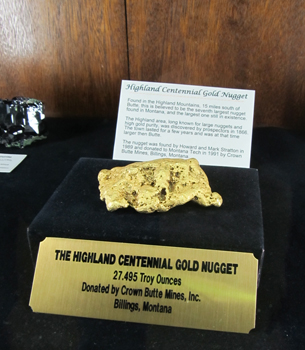
|
Nugget of News Blog |