The most basic piece of prospecting equipment is the gold pan. Size, color, and shape are really a matter of personal preference. Plastic pans generally come in green, black, and blue. The color doesn't effect performance, but green is the most common. Plastic is light weight, so when you add water, dirt, and gravel to your pan, your arms won't get as tired compared to using a steel pan. It's good to have a couple different sizes of gold pans on hand (10 inch, 12 inch, and 14 inch are the most popular). 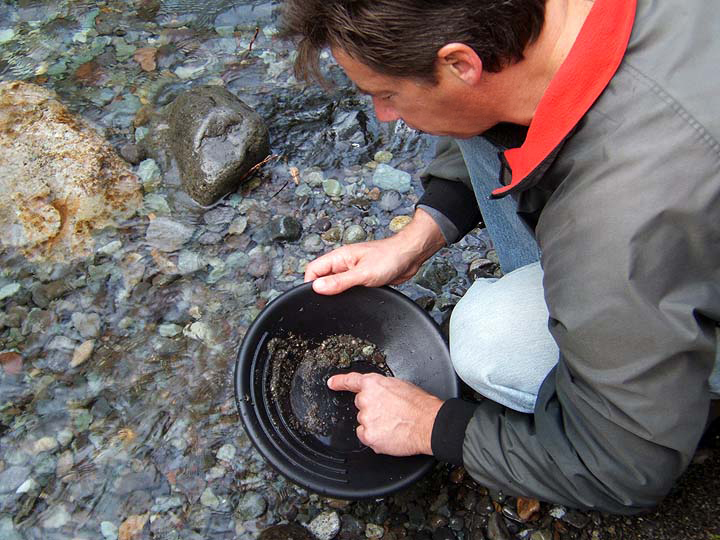
Before you add a new pan to your collection, be sure to “condition” or “season” it for best results. The goal is to remove some of the oils that were used in the plastic mold when the pan was produced. These oils will make your pan too slick, and without some friction you may wash out the gold with the waste material. You’ll want to rough up the bottom and sides of the pan a little to get that all-important friction.
To season a new gold pan in three easy steps, you will need some dish soap that cuts through grease (i.e., Dawn), a scrubby pad, sand, and some water.
1. Add a squirt of dish soap and water to the new pan. Scrub the pan with the scrubbing pad— get all the ridges and every inch of the bottom and sides.
2. Dump a scoop of sand into the pan. You just need enough to scratch up the pan a bit. Again, scrub the sand over the ridges and entire bottom and sides of the pan back in forth in different directions.
3. Rinse your pan, dry it, and have a look. If you see any shiny or glossy areas, repeat the steps from above.
Now you’re ready to use your new pan! If you’re just getting started, try these gold panning techniques:
1. Fill pan about half full of gravel, small rocks, and sand collected from the stream bed
2. Put the pan under the water's surface, break up large lumps of clay or dirt, and remove stones
3. Continue to hold the pan level under the water with your hands on opposite sides, and tilt the pan forward, away from your body, and down slightly. Rotate and shake it side to side to let gravel and sand dribble out the front. Pick out the rocks.
4. Repeat step 3 several times until most of the material is removed, leaving less than a cup of fine-grained dark material overlain with a thin layer of light material at the bottom of your pan.
5. Rotate the pan in a circular motion. Notice how the water separates lighter material from heavier.
6. Stop rotating and hopefully you'll see a flash in the dark material remaining in the bottom of your pan! Use tweezers to retrieve the gold and place in a vial for safe-keeping.
Practice makes perfect, and hopefully before long you’ll be yelling EUREKA when you spot the shiny stuff in your new pan! Gold pans and gold panning kits found here.


