


Friday, December 29 2017
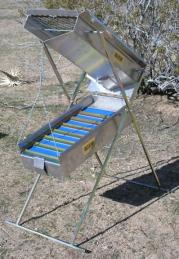
Given a choice, most miners prefer using water to wash and run material, but in some dry, remote areas that Clay is generally known as a great gold robber, making clay-bound gravels the biggest difficulty to overcome. In most of the placers directly derived from weathering lode deposits, the placers are in ravines, gullies and hillsides with sometimes very little gravels and mostly decomposed fragment of rock and fine silt from the decomposing host rock. Host rock containing a lot of feldspars are most problematic. As feldspar breaks down, it creates some difficult clays and silts that bind fine gold to small rocks and sand with the clay and silt particles forming larger clods. Loamy or sandy conditions are much easier to process with a drywasher than clay-bound material due to the absence of clods and clumps. But if dirt clods are giving you grief, break them down with a large hammer on a canvas tarp, or use a mortar and pestle (dolly pot). Once you are set up to run material, process in short runs before cleaning out the riffle tray (perhaps after every three 5-gallon buckets). Frequent clean ups minimize the amount of fine gold that may creep or walk down the riffle tray with the tailings. This method uses your dry washer as a form of a classifier to screen off larger material while getting rid of much of the fine silt and lighter weight material. Re-running tailings can aid in the recovery of lost gold— especially small gold dust and flakes. The second pass through is usually much quicker than the first time because the material has already been classified. With some placers, especially flat, fine gold, rerunning material can be very lucrative. In places where gold is more coarse and angular, very little gold will like be recovered by running the tailings a second time. You may want to experiment with adding a second layer of cloth to a portion of the riffle tray. Doing so reduces airflow by almost half in that section. In addition to the riffle tray, the void under the riffle tray can collect a sizable amount of really fine gold mixed in with fine silt. No doubt there are going to be losses of gold when using a drywasher to recover fine gold (20 minus mesh down into the 200 minus gold), but the end goal should be to limit those losses as much as possible and these tips should help. Good luck! Learn more about Gold Buddy drywashers here. Nugget of News Blog Saturday, December 02 2017
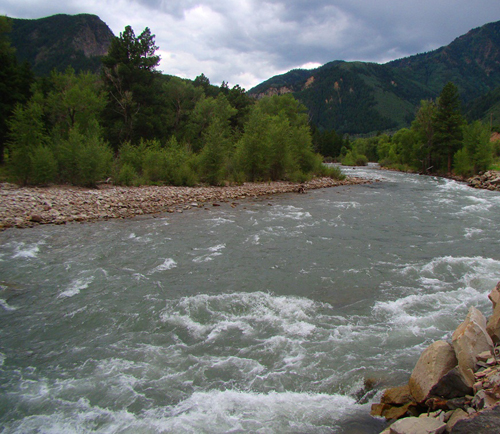
You might have heard the term “flood plain gold” and are wondering what it really means. A very simple definition is “fine-sized gold flakes carried or redistributed by flood waters and deposited on gravel bars as the flood waters recede.” When this “redistribution” occurs, it is usually after heavy winter storms that churned up rivers enough to turn part of the bedload over and move the river bar gravels from one place to another. Within these gravels is fine gold that was previously deposited there. When waterways flow way up and above their normal banks, they generally drop the heavier gold in the front of the bar, and as pressure decreases, the finer gold starts dropping into the mixed gravel. Over time, some of this finer gold will work its way down to bedrock, but generally it stays on the move.
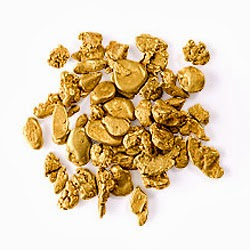
How did the gold get there in the first place? There are many classifications of placer deposits, and their definitions can provide the answer. Among the most well-known is stream placers. Streams carry gold from eroded veins and concentrate them in various ways. Modern streams refer to present-day gold-bearing waterways that are the most common sources of gold for today’s prospectors. Tertiary and intervolcanic channels are rivers buried from mud and volcanic flows that existed prior to our modern-day waterways. High benches were created as rivers cut their way deeper into the bedrock and could be located hundreds of feet above today’s modern rivers. Desert placers are generally the result of torrential flash flooding and not a constant water flow. Glacial stream deposits are created by melting glaciers that can concentrate gold if the water flow is sufficient. Marine or beach deposits can come from wave action against cliffs, from off-shore currents bringing in gold-bearing material from under the ocean, or even from gold-bearing streams that flowed into the beach area eons ago. Since there is a strong possibility that gold can get moved around during storms, it’s now important to know WHERE to find this “dropped out” gold. The secret is to find that drop point and to capitalize on its accumulation. Fine gold looks fantastic in a pan or box, but its weight can be deceivingly light. It takes a lot of fine gold to be equal to a larger piece and to have enough weight to make the recovery effort worthwhile. Some of the best areas to look for flood plain gold are where the stream or river widens out, or levels out, or changes direction. The inside of a bend is good. Rocks and weeds and small shrubs are also potentially good collection spots. When checking out collection spots, be extra careful. Calm water on the surface can hide swift currents underneath. Keep in mind that the effects of heavy winter rains and snow will not be the same on all waterways. Redistribution might occur to a larger degree on larger rivers. Or it could be the opposite where you live and prospect. No one hopes for an especially “bad winter,” but if Mother Nature makes it so, this information could be the silver lining— a way to turn lemons into lemonade come spring when you can get out and take advantage of any gold redistribution that occurs. Good luck and be safe! Nugget of News Blog Thursday, November 16 2017
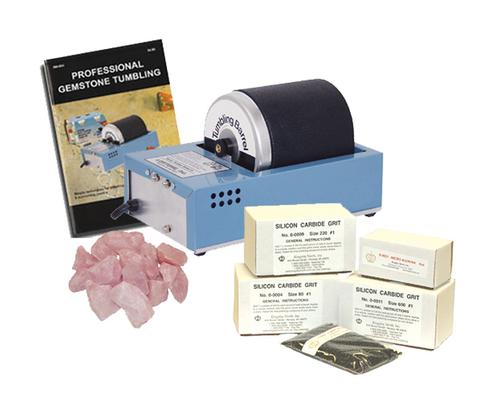
It takes years and years for nature and its elements— dirt, rock, water, and sand— to smooth a rock's surface. But a rock tumbler can get you those same results in considerably less time. Although you should always refer to the owner's manual for the particular rock tumbler you own, if you're just getting interested in the hobby of lapidary and are wondering how a tumbler works, below are general tumbling instructions from Lorton, Inc., a leading manufacturer for the last 50 years. STEP 1: (coarse grit) Fill the tumbler barrel 2/3 to 3/4 full with properly graded and sized stones. If the barrel is not full enough, you won`t get the proper tumbling action in the later steps. Add t
Whether you're just getting started in the hobby of lapidary, or you've been polishing rocks for decades, you'll find the rock tumbling equipment and accessories you need here. Nugget of News Blog Thursday, September 28 2017
For those of us with a strong dose of gold fever, the price of gold doesn't make much difference. Most You might recall when gold peaked in August 2011 at $1890 per ounce. That was a very exciting time in the news— media hype always follows whenever gold takes a strong rise or dips. Over the last few years, the price has come down and is averaging around $1200 per ounce. But you might be wondering where the price is going from here. If you take a look at the chart of gold prices, it can be an indicator of what's to come. The key to the chart is recognizing resistance levels and support levels (high and low points). When a price bottoms out, it establishes a new floor. When it breaks below that floor it is considered "bearish" and likely to drop further since it broke a supporting base price. When it breaks above a resistance level, it indicates there is strong demand which could push the price to higher levels. Between 1978-1980, gold prices went from $172 to $830 per troy ounce. In 1982, gold prices dropped back to $328 an ounce. It was not until 1999 that the price hit the low of $253 after the peak in 1980. Never having broken that price floor, it entered a recovery where it eventually broke above the high set in 1980, pushing to $944 an ounce by February 2008. Later that same year, in October, the price hit just under $830 before skyrocketing to that crazy high of $1890 per ounce! Since then, the price has dropped from its high just as it did in the early 1980s. Gold dropped to a new floor of $1066 at the end of 2015, before bouncing back to its current levels. Since the new floor was established, it has not been broken. Instead, the price climbed to $1340 per oz. by August 2016, dropped but stayed $100 above the prior low to $1163 and has since bounced back to around $1200. If the price continues to set new highs, even if it drops thereafter and continues to set higher lows on its way up, it is considered "bullish" or positive. Why is the price of gold so important? Maybe it's not to the average prospector, but the price of gold has a direct impact on the level of involvement in prospecting. The next sharp rise in price might bring with it additional involvement from more people. The treasure seeker in all of us might just kick in, bringing more families out to the gold fields. Good luck! Sunday, August 20 2017
September 1st of every year is a very important date if you own a mining claim, mill site or tunnel site. That's Maintenance Fee Payment Waiver Certification (Small Miner’s Waiver) The maintenance fee and small miner’s waiver must be paid or filed in the Bureau of Land Management (BLM) state office (in Alaska, the Fairbanks District Office also accepts fee payment) of the state where the claim or site is located. If a claimant owns claims or sites in multiple states, a fee or waiver must be paid or filed in each state where each claim or site is located. Failure to timely pay the fee or file the waiver in the proper BLM office will subject your claims or sites to forfeiture by operation of law. Annual Assessment Work Assessment work is not a requirement for owners of mill or tunnel sites; however, a notice of intent to hold (NOIH) the site must be filed on or before December 30. The BLM requires a $10 processing fee per site for filing a NOIH.
Claimants (except those in Alaska) may pay their annual maintenance fee online through the Mining Claim Maintenance Fee Payment Portal. This site is available 24 hours a day. The BLM payment portal provides the ability to query eligible mining claims and sites for payment through an interface with the Legacy Rehost 2000 (LR2000) public reporting database; select claims and sites to be paid; and then transfer to Pay.gov for payment of the maintenance fees for the selected claims and sites. At this time, only credit card payments are accepted and treasury limits apply. Claimants who file on paper must include a document listing the claim/site name(s) and the BLM serial number(s) assigned to each claim for which the fees are being paid. Form 3830-5 (lode claims) and Form 3830-5(a) (placer claims) may be used to list claims and sites when making payments by check or credit card directly to the BLM state office for the state where the claims or sites are located. Sunday, July 02 2017
Every prospector has his or her own opinion as to the best material to have under the riffles of your sluice box—
Wednesday, June 14 2017
Fun and exercise are two great reasons to go gold prospecting, but you might as well make some money while you're at it, right? The best way to do that is to increase production rates. Assuming you are mining on a known gold-bearing claim or waterway, volume is the key to your success!
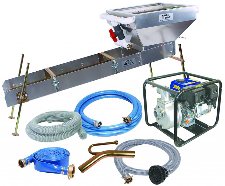
A dredge or highbanker/suction dredge combo is the next step up. A dredge uses a gas motor to generate the suction that will load and transport the material to the sluice, which greatly increases volume, as well as allows you to reach gravel on the river bottom that would otherwise be inaccessible (unless the river is seasonal or there is a prolonged drought). The more material a dredger can push across the riffles, the more gold can be recovered. An additional benefit to dredging is that it also allows you to clean gold out of all the cracks and crevices in the bedrock. A shovel just cannot do that. The size of the dredge intake nozzle is the most important factor in how much material a dredge can process, but it is not a direct one-to-one relationship. For example, a 5 inch dredge will not move twice the material that a 2.5 inch dredge can move. It actually can move much more. The surface of the hose is figured in square Beyond dredges or highbanker/suction dredge combos, you can get into some professional mining set-ups that use trommels and jigs and shaker tables and earth moving equipment. Every deposit is different, varying in size and grade and structure. Environmental conditions and access will dictate mining methods and knowing the rock types and size of the gravel is critical in determining which equipment will work best for increasing your production. Finding a suitable deposit to mine and finding a way to work it economically— to justify your time and expense— is the first step. Then choose the right equipment to increase your recovery rate and speed of recovery and make more money. Good luck! Saturday, April 29 2017
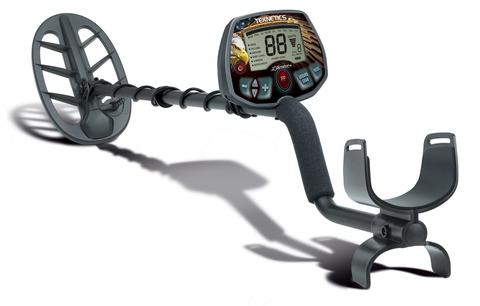
The NEW Ameritek metal detectors have arrived! The Minuteman, Liberator, and Patriot, are three new
• Turn-on-and-go, well balanced and lightweight Click here to get it for $199 AND FREE SHIPPING AND FREE ACCESSORY KIT with coupon code A1486
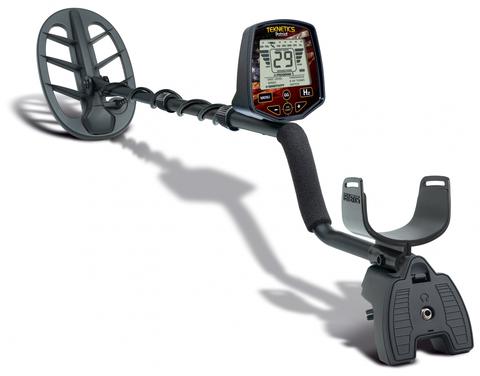
Liberator • V-Break, variable tone breakpoint Click here to get it for $299 AND FREE SHIPPING AND FREE ACCESSORY KIT with coupon code A1486
Patriot • Detects coins to 12 inches Click here to get it for $399 AND FREE SHIPPING AND FREE ACCESSORY KIT with coupon code A1486 Guidelines for All Metal Detectorists Realize that each time you go detecting you will be representing EVERYONE in this sport; all will be judged by your actions. Detectorists are a very visible group and the public knows what you are doing. That is why you must conduct yourself accordingly, learn proper recovery techniques and abide by a code of ethics. Scars from improper or sloppy recovery methods can remain for years and further damage the image of this activity. This can only lead to tougher laws and regulations. Even in remote areas it is very important to always leave no sign you were there. Learn about your local laws regarding metal detecting, especially on Federal, State or County lands, because they can vary significantly from state to state. Make the effort to search the local public records to verify the laws regarding metal detecting in your area BEFORE you go detecting. Do the same with State and Federal agencies that govern lands AND waters in your area. If you will be hunting on private property you MUST obtain permission ahead of time and be absolutely certain you know the exact boundaries of the property or yard. Check with your County land records office (usually County Seat) to obtain information on how to research or obtain land ownership plats. In some places this information is available online or you may be able to purchase a plat book for your County (some libraries also have copies you can view). These plat books are useful tools, showing owner’s name and boundaries, as well as Federal-, State-, and County-owned lands. However, it is your responsibility to still check with the land owner to verify the plat map is correct. Penalties and fines can be very costly. Ignorance of the law is not an excuse. Once you have a name, try to locate the owner’s address and pay him a visit. Introduce yourself, express your interest and ask if he would allow you to metal detect on his property. Explain your practices and how you will proceed. Always be polite, even if he turns down your request. If given permission, find out if there are any limitations he might have; certain times of the day, where to park your vehicle, certain areas that might be off limits, etc. Above all else, you must carefully cultivate the relationship between yourself and the land owner to ensure that you always have his/her best interest in mind. Often there may be others, such as hunters, using their property as well. Crop lands might be leased to a farmer; buildings may be rented or leased to other families. If your activities offend any other users, they will also offend the owner and that will reflect negatively on the sport. You may even get kicked off the property. When you are on private property, your actions and activities must always be beyond reproach. You must always put the owner’s concerns above all else. And this is just as true if you are in a City park or on school grounds. There are numerous cities across the country that have banned metal detecting on city property, and in nearly every case it is because of a careless detectorist that left holes and trash. Always respect the land owner! Your detector comes with the responsibility to detect and recover targets ethically. Your actions WILL affect the sport so be sure you portray yourself in the best possible way. Look for a local dealer or club in your area. They can offer up-to-date information on local conditions and laws, and teach you proper recovery techniques. Joining a club is a great way to give a stronger voice to the activity. You will find that club members have a strong stake in keeping the sport healthy by watching for violators or those not using proper recovery techniques. The goal of most clubs is to educate and teach those in this activity. With your ethical participation, you will help ensure we can all enjoy this activity for years and years. Please be responsible! Saturday, April 01 2017
Typical winter storms that regularly occur in gold-bearing areas usually do not create enough havoc to force substantial amounts of "new" gold into movement. However, when Mother Nature really goes to work over a “bad” winter, a great deal of gold can be set free, creating a bonanza for gold hunters in spring and summer. Gold veins that have been hidden for decades suddenly can be exposed. Floods can also sweep gold out of abandoned mines and wash it downriver. Known gold digs can be washed out, trees uprooted, and the landscape eroded— all pluses for prospectors! When tons of rock, cobble, and boulders are swept downstream along bedrock during a huge storm, quite a bit of destruction occurs. Plants, weeds, and trees that normally grow along the river and gravel bars are washed away. And when a major storm or flood tears up large portions of a streambed, a fair amount of this newly-released gold, because of its weight, will be deposited along the riverbed and settle into cracks and crevices (hand dredges are an ideal tool in this situation). Flooding on this scale occurred in Colorado in 2013. After the heavy rains in the west this winter (in California, Oregon, and Washington to name just a few affected states), this summer promises to be one of the best seasons for small scale miners in many areas. Even farmers in Thailand are looking for gold now to try and make up for the economic loss of ruined pineapple crops caused by floods. Stream bed layers caused by several floods over time are referred to as “flood layers.” Flood layers are usually a different color, consistency and hardness from the other layers of material within the streambed, making them easy to recognize. Larger, heavier pieces of gold will work their way down toward the bottom of a flood layer as they are washed downstream. The smallest and lightest flakes of gold might not work their way down through a flooding layer at all, but might remain dispersed within the material. Of course not all flood layers contain gold in large quantities, but it’s a good place to start. In early spring, rivers are still high in most places, but in the next few months, stream beds could be exposed for better gold hunting. Some of the best areas to look for flood gold are where the stream or river widens out, or levels out, or changes direction. These areas can allow concentrations of gold to collect either on bedrock or in the contact zones between layers. Another place that tends to collect gold are gravel bars, especially the ones located towards the inside of bends in a waterway. No one ever hopes that Mother Nature releases the type of fury that causes loss of life and property, but when a catastrophic weather event occurs in a gold-bearing area, take advantage of it. Get out there and get your share of the shiny stuff! With so much more runoff than normal shaking gold from them thar hills, the best prospecting will come in the summer months when the water has receded. Good luck and be safe! Wednesday, March 08 2017
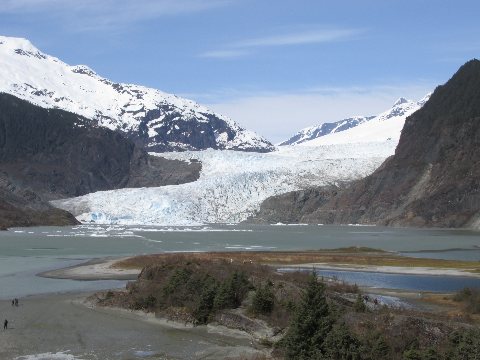
You might think that glaciers are important to gold prospecting only in Alaska and the Yukon, but glaciers have also affected placer deposits in the Midwest and some western states, too. What is a glacier? Glaciers are formed when a huge mass of ice is created by accumulated snow. The body of ice grows over the years when more snow falls during colder months than melts during warmer months. Glaciers shrink when the melting is greater than the snow accumulation. Once the weight of the glacier grows large enough, the weight of the snow and ice presses down an Eventually the body of the glacier reaches a warmer elevation where the ice melts more easily. Here, at the foot of the glacier, are gigantic piles of rocks and boulders and debris that have been bulldozed down by the moving massive glacier. These glacial gravels are known as “moraines.” However, finding gold in this unsorted jumble of glacial moraine material produced by a glacier’s bulldozing effect is like finding a needle in a haystack—not worth the time to process…. until the glacier’s natural melt waters or another water source washes through it, and does a bit of natural sorting. Alluvial gold deposits Normal alluvial placer deposits form by the power of flowing water washing away lighter materials and gravels and leaving behind heavier material such as gold— very similar to what happens in a sluice box when the flow of water washes away the lighter materials and the gold is deposited in the riffles. When flowing streams and glacier melt water process and wash away the glacial moraine gravel, the gold works its way downward. Gold will then be deposited on bedrock or false bedrock (such as clay or other packed material). As the glaciers themselves melt, the huge quantity of water creates an effective sluicing system that can sort the gold out of gravels. These flows can leave behind very profitable pay zones along the channels cut by the ice melt waters on bedrock benches, among packed false bedrock gravels, and on the downstream side of bedrock high spots. Where to look for glacial placer gold deposits in the West In California, glaciers still exist in the southern Sierra Nevada, small parts of the Cascade ranges and the Shasta-Trinity Alps. In the northern Sierra Nevada and higher parts of the Klamath and Trinity ranges, that area’s placer deposits were greatly affected by glaciers that existed thousands of years ago. Glacial derived placer gold is important in a number of other western states, too, including Idaho (Boise Basin and Mount Pisgah), Montana (Pioneer District, upper portions of Gold Creek near Deer Lodge) and in Colorado (Fairplay District, Arkansas River Valley in southern Lake County). Where to look for glacial placer gold deposits in the Midwest What you might be very surprised to know is that glaciers are the source of nearly all the placer gold found across the Midwest. During the past ice ages (which were repeated events, not just a one-time occurrence), great sheets of glacial ice leveled the middle parts of North America, acting like giant bulldozers by pushing enormous amounts of material southward from Canada. When the ice melted, the area was left with extensive glacial moraine (gravel) deposits. Although it’s spotty and sporadic, some of these glacial deposits have gold, depending on where the glacial gravels came from in Canada and if that region was gold-bearing. Glacial gold is found in several of the northeast states such as New York, Vermont, and Pennsylvania. Glacial gold is also found more extensively in Midwest states such as Indiana, Illinois, Ohio, Michigan, Wisconsin, Iowa, Minnesota, Kansas, Nebraska, Missouri and the Dakotas. All things considered, while glaciers can destroy a placer deposit, the moraines they leave behind can produce some very worthwhile deposits of gold, and are worth prospecting if you live in or visit these areas. |


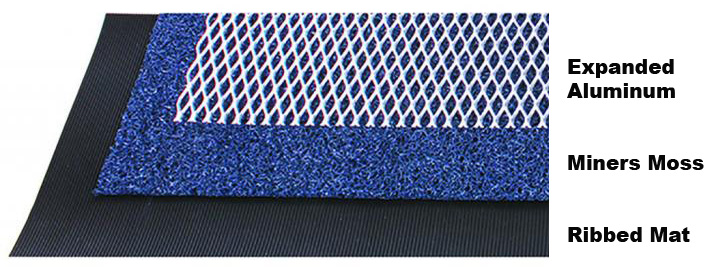 Deep V Matting, Carpet, or Miners Moss. There is no single right answer just like there is no single right answer for which brand or size of
 treasure finding machines from Teknetics with true blue American graphics on their faceplates. Proudly made in the USA by Fisher Labs, these units are making award-winning metal detectors affordable again! Whether you're looking for the ease of a turn-on-and-go coin shooter or want more features for gold prospecting, you will find it in the affordable Ameritek line. All three detectors feature waterproof searchcoils, large two-digit numeric displays, and are perfectly balanced and light-weight so you can swing all day. Click the links below to check out the features of each new machine and

|
Nugget of News Blog |